How to add a contract
BackStep-by-step guide on how to add a contract
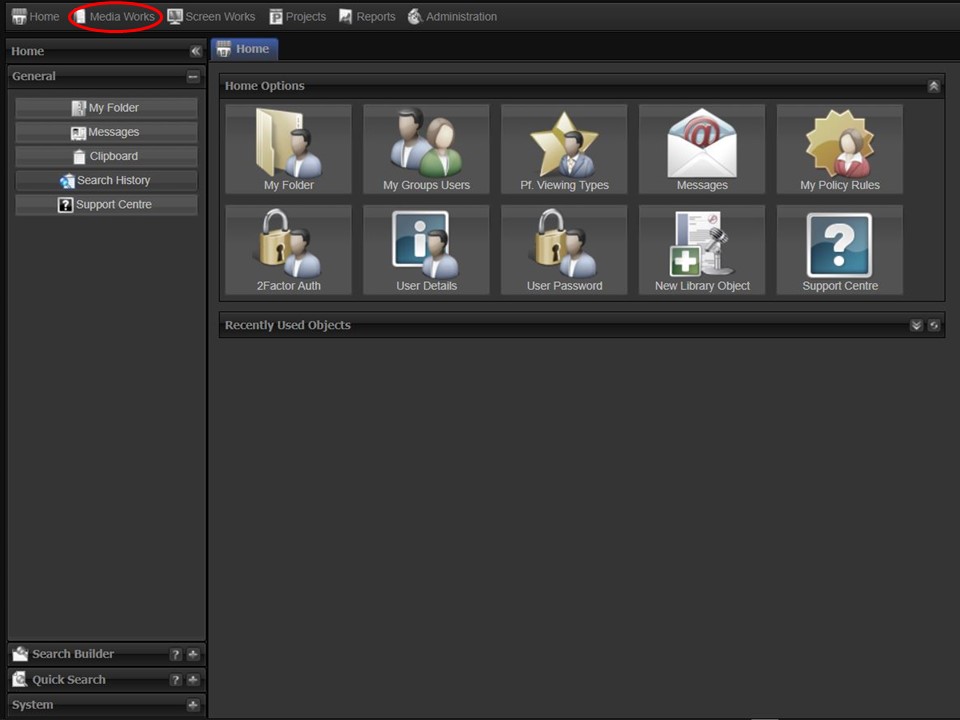
1. Click on the Media Works tab at the top of the screen.
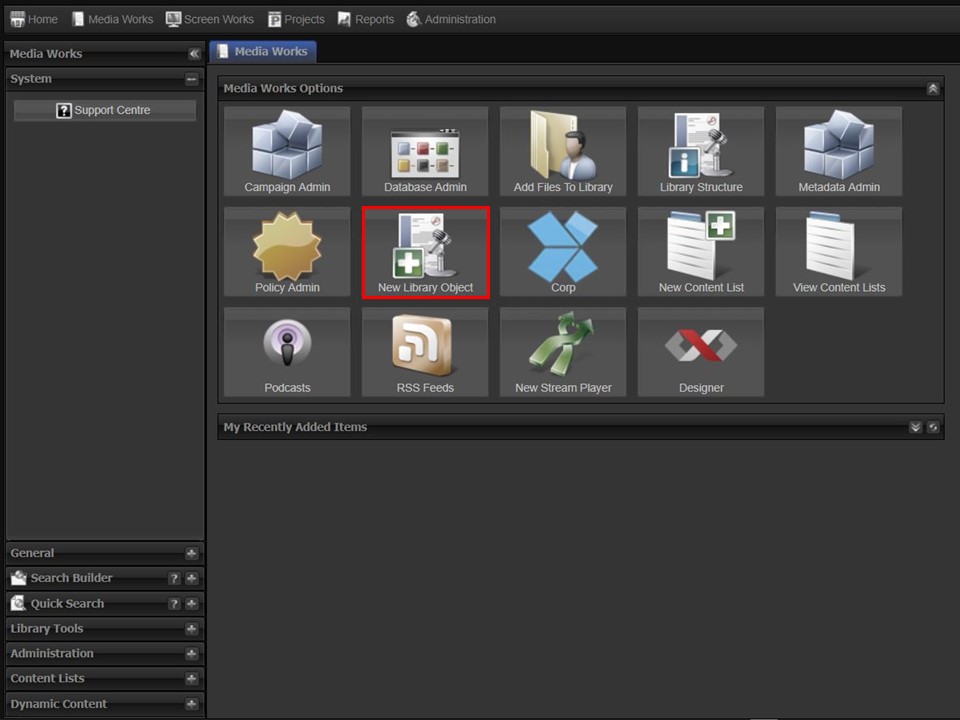
2. Click on the New Library Object icon. A window will appear.
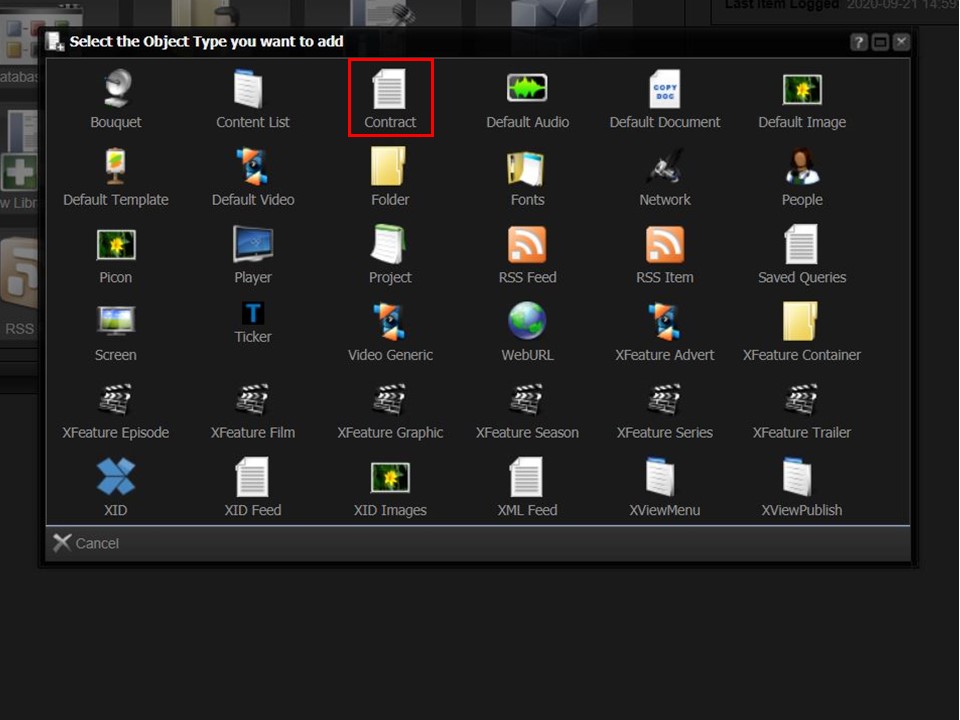
3. Click on the Contract icon. A metadata form will appear.
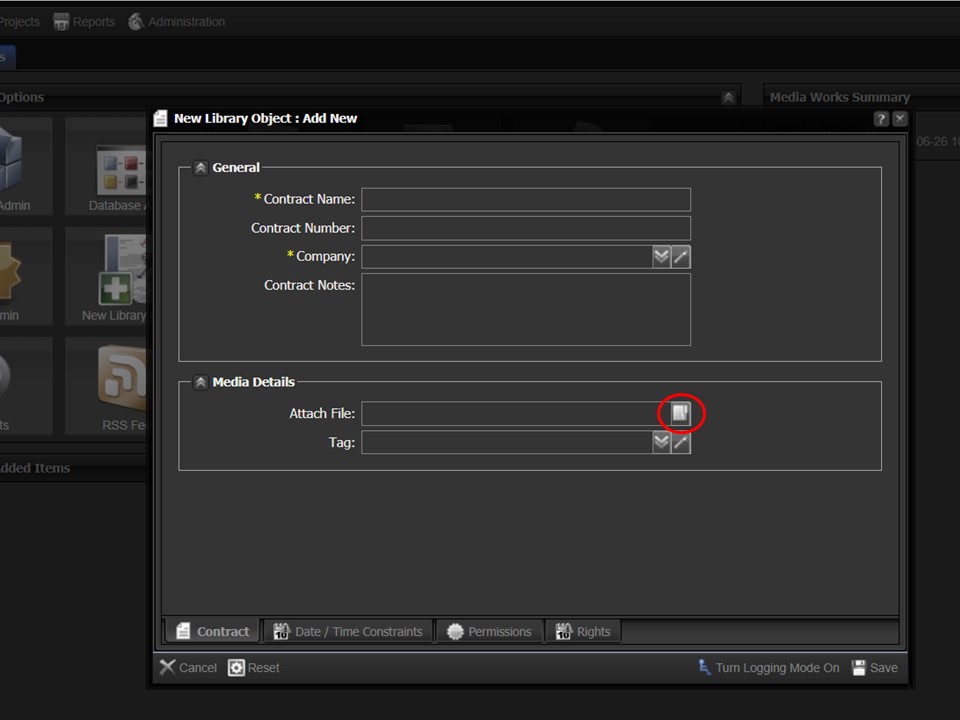
4. Click on the file icon in the Attach File field. It will take you to the file browser.
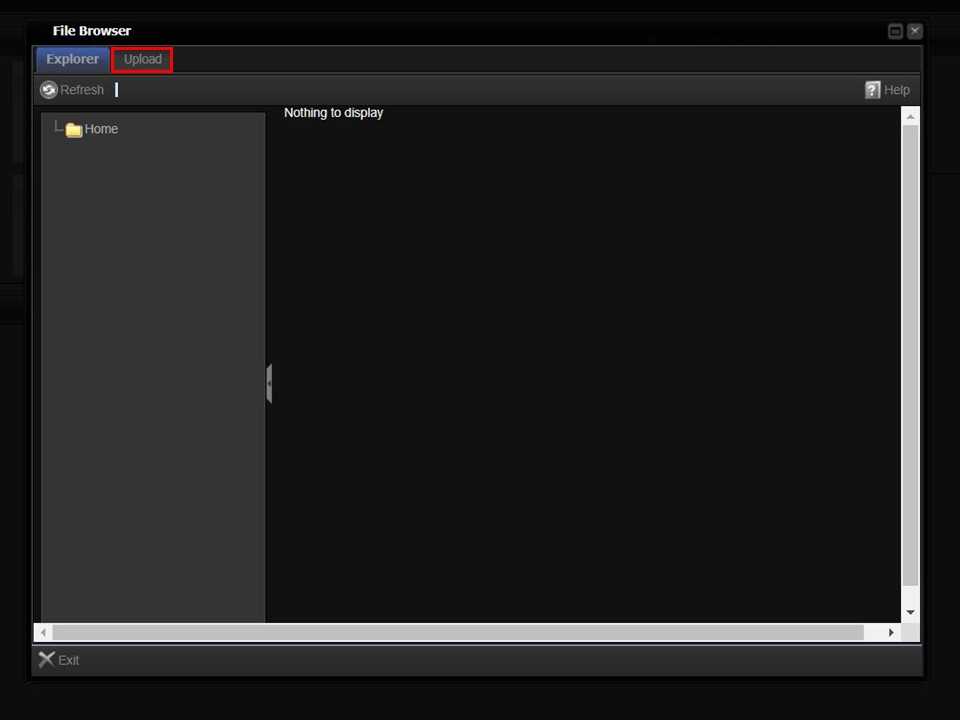
5. Click on the Upload button. The upload bar will appear.
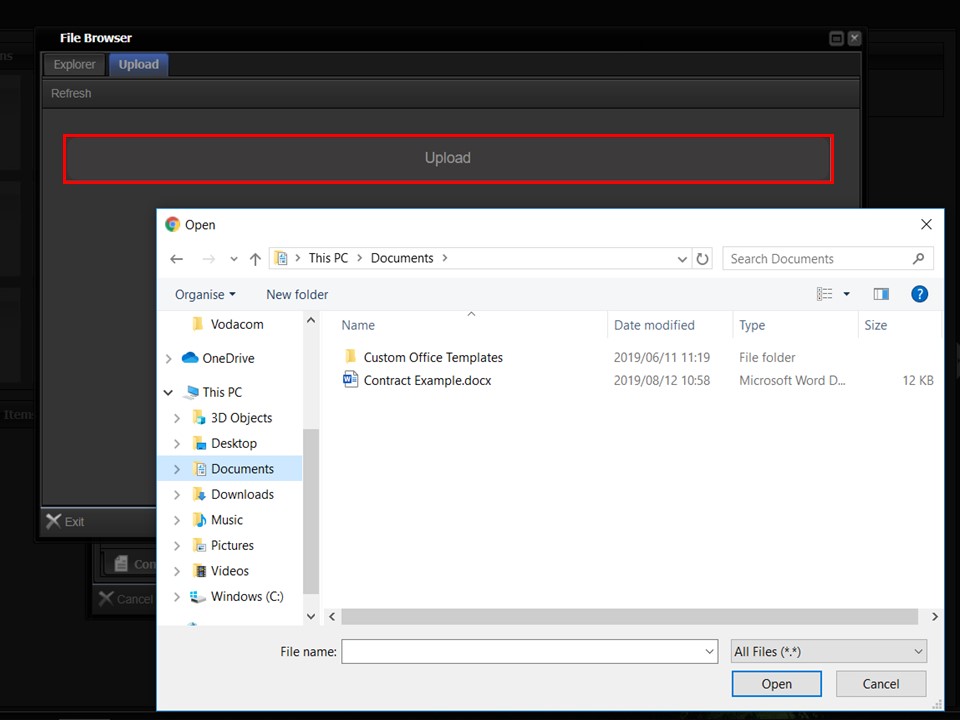
6. Click on the bar to browse for the contract that you want to load. Double-click on the contract.
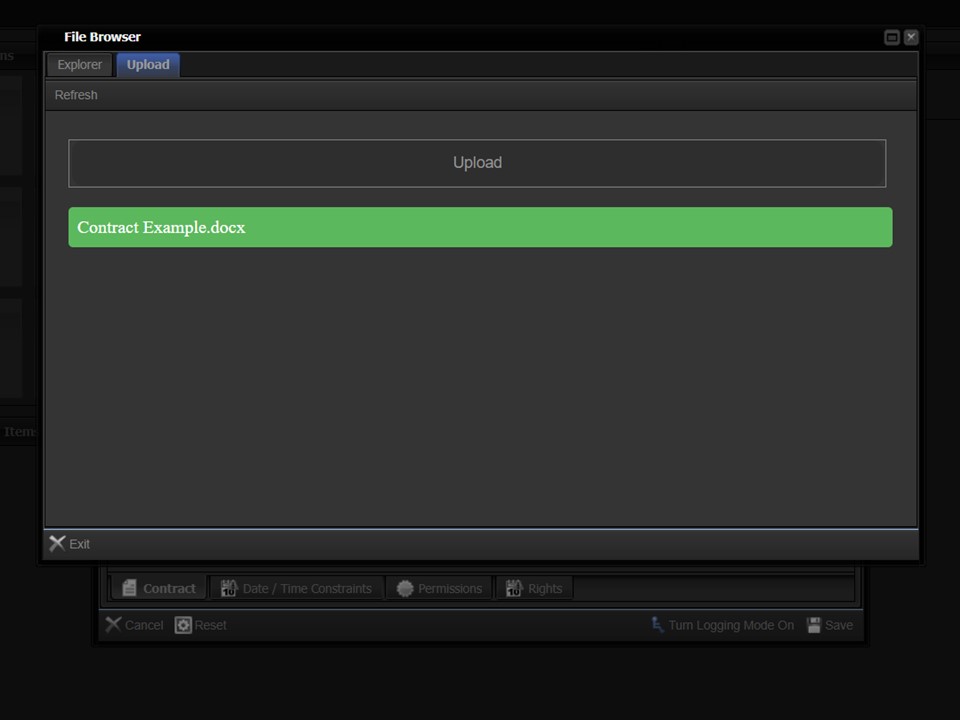
7. A loading progress bar will appear and show the progress of your upload by turning green.
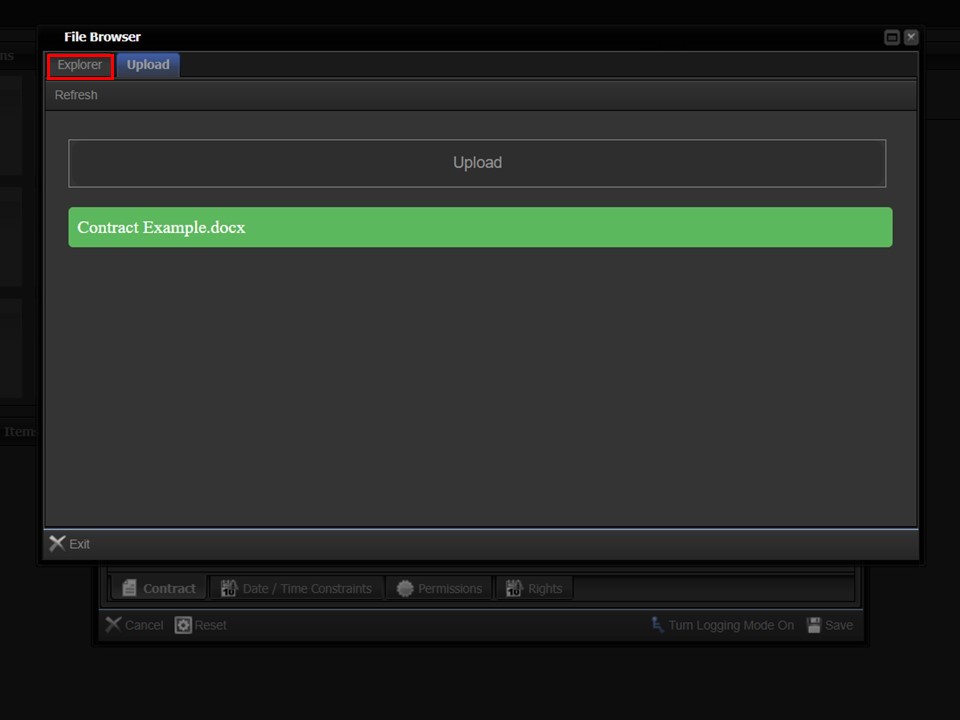
8. Click on the Explorer tab, once the progress bar is completely green. The contract that you loaded will appear in your folder.
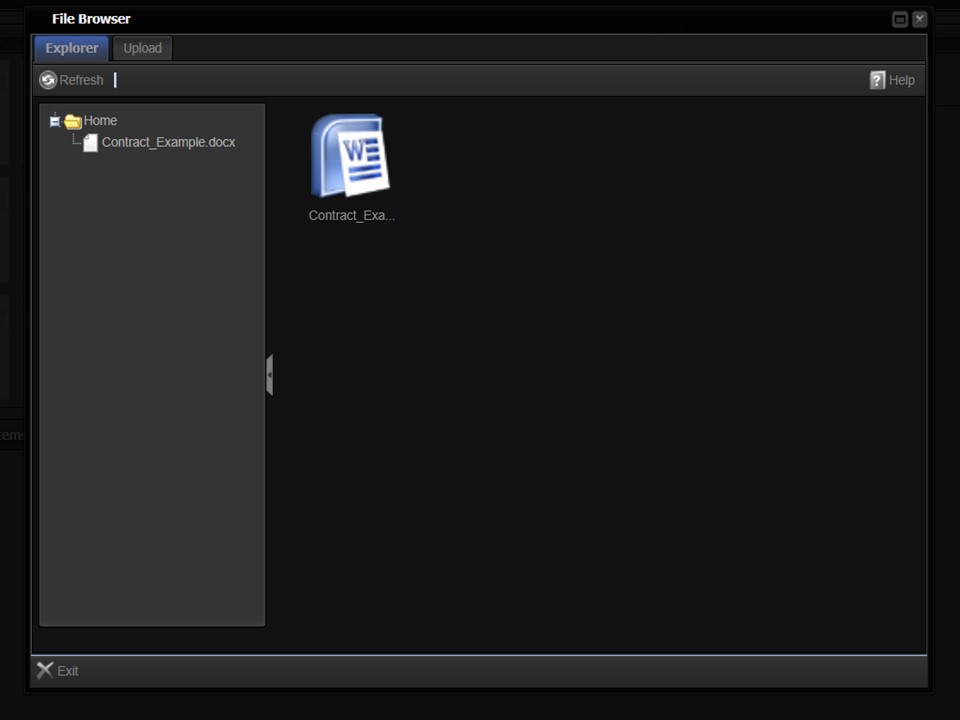
9. Double-click the contract that you have loaded. A metadata form will appear.
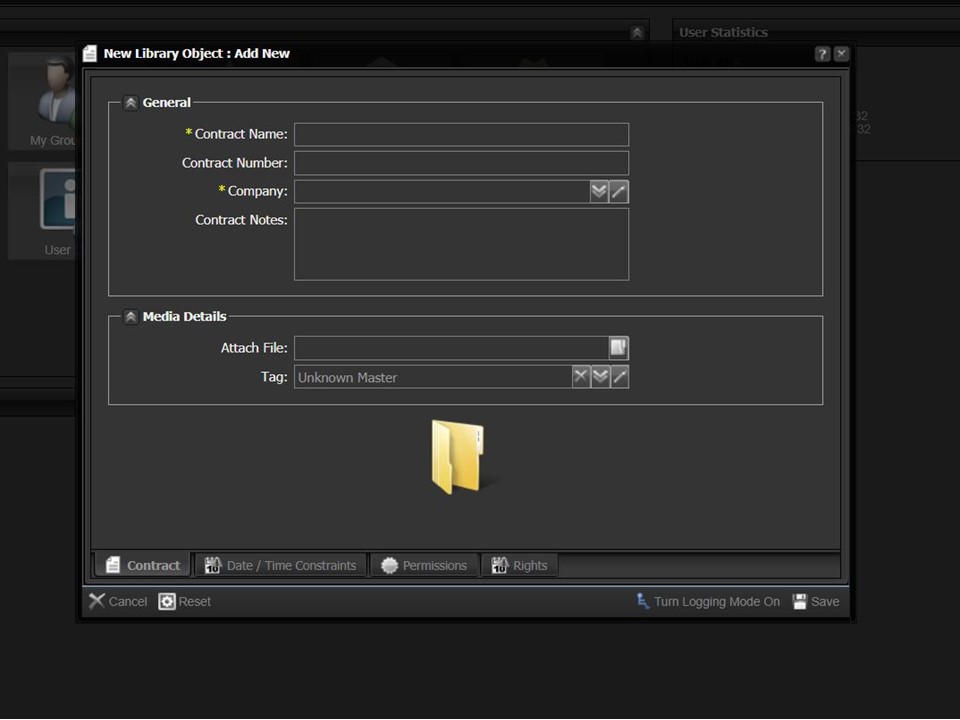
10. Copy the name of your contract into the Contract Name field. Complete the remaining metadata fields.
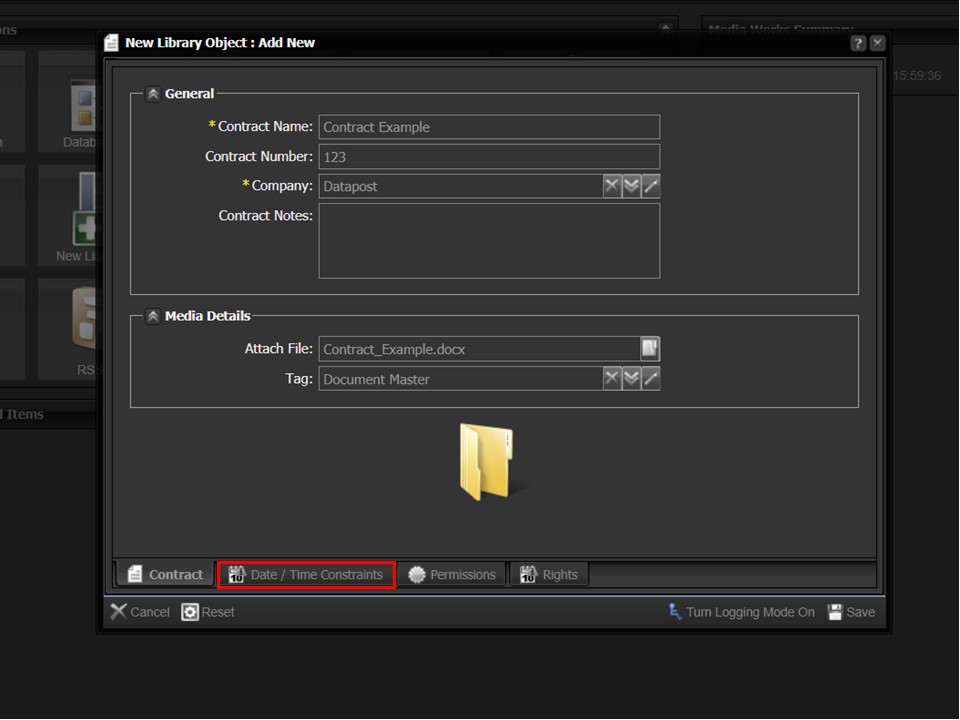
11. Click on the Date/Time Constraints tab.
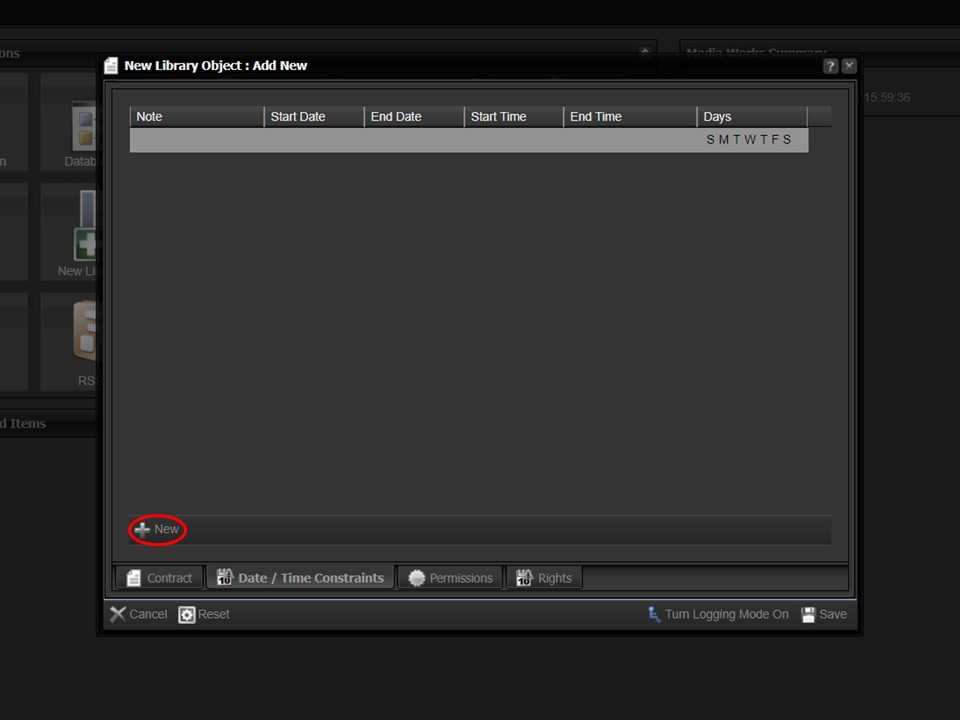
12. Click on the +New button, a grey bar will appear. Constrain your contract by completing the start and end dates.
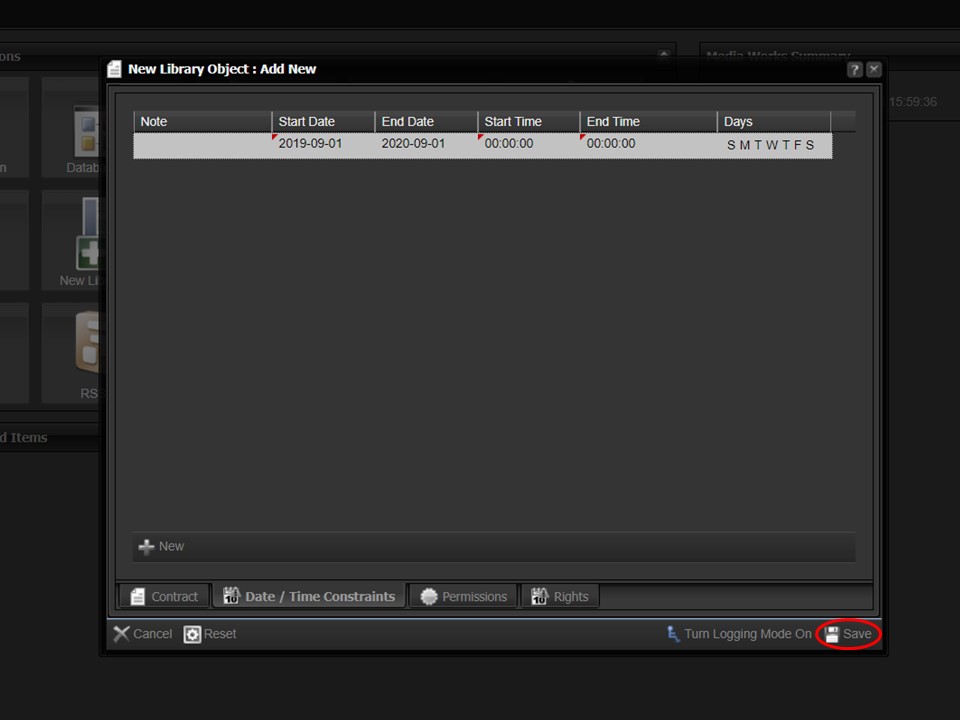
13. Remember to save by clicking on the Save button in the bottom right corner of the form.
Step-by-step guide on how to attach a contract
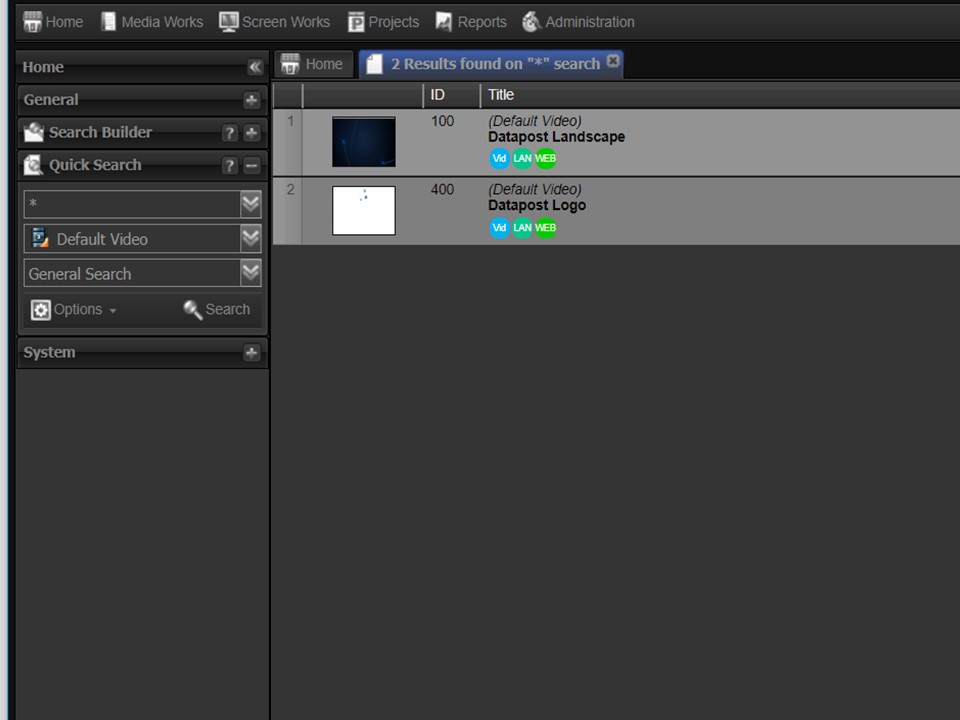
1. Search the media that you want to attach the contract to. Right-click on it. A menu will appear.
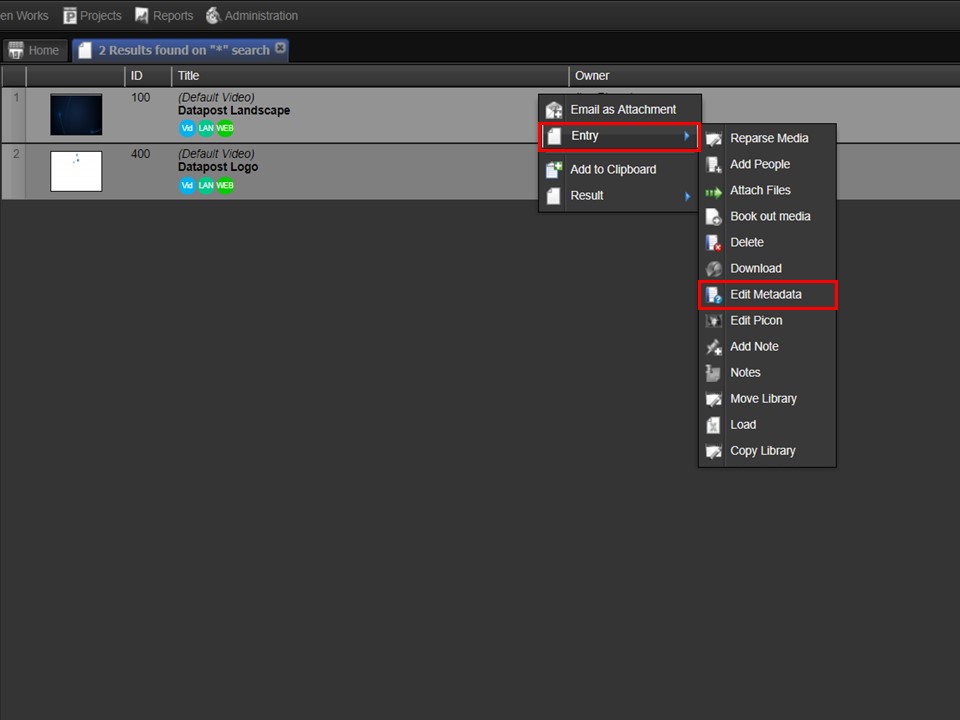
2. Hover over Entry, move to the right and click on Edit Metadata.
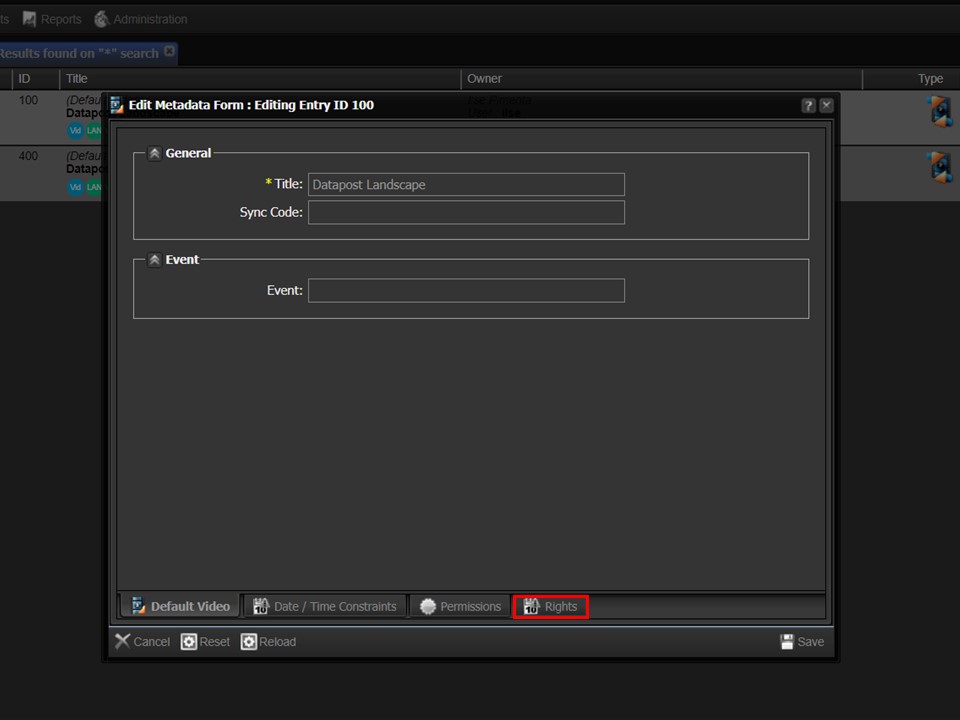
3. Click on the Rights tab in the bottom right corner of the window.
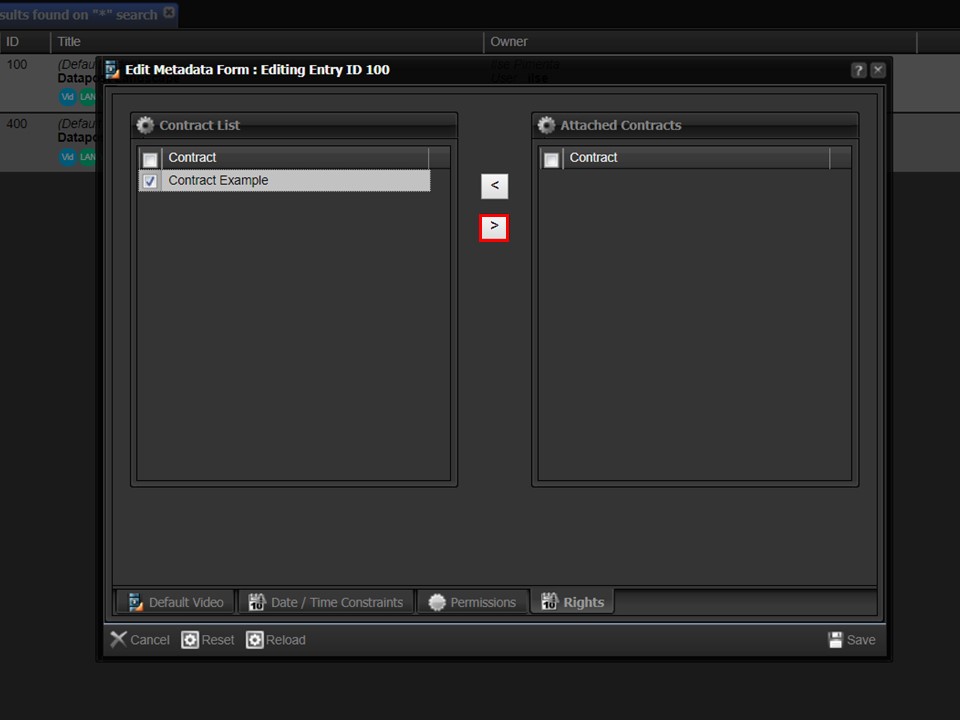
4. Select the contract that you want to attach, from the Contract List on the left, by ticking the relevant box. Click on the greater than arrow to move the selected contract to the Attached Contracts block on the right.
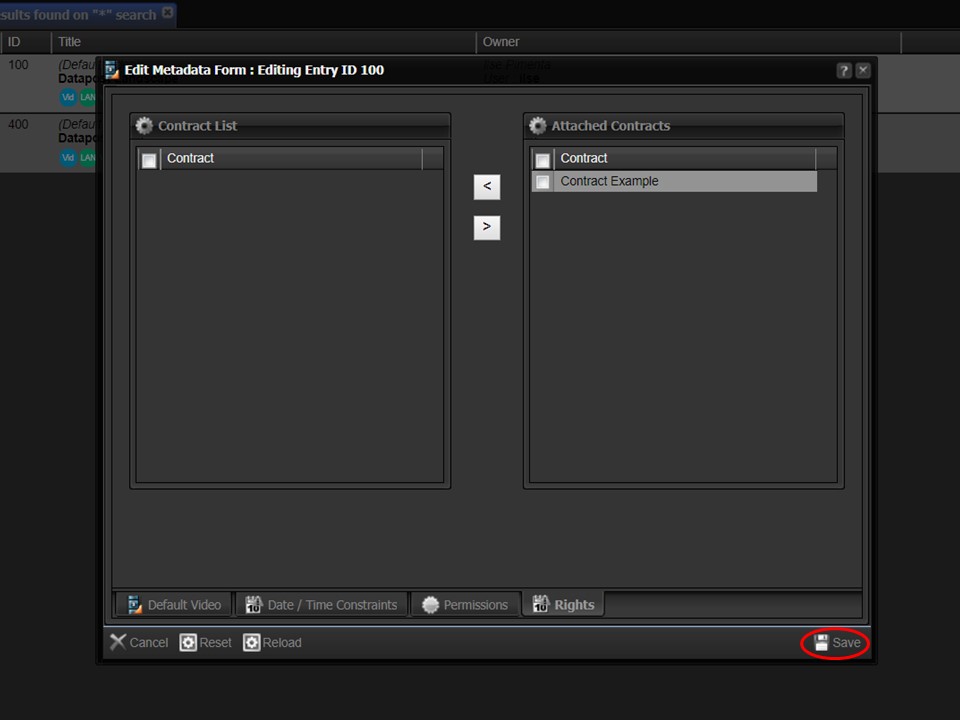
5. Remember to save by clicking on the Save button in the bottom right corner of the window.
