What is a network structure?
By creating a network structure you are subdividing your network into regions. I.e. countries, provinces, states or territories, cities, towns, suburbs and branches/stores. The attached media players inherit all the attributes of the network structure. Your network structure enables you to schedule content and target specific geographical locations and screens. This could be at location or branch/store level using the media characteristics, which are added to your media while ingesting and logging the content. The media players match the media characteristics (the qualities assigned to a piece of media through completing a metadata form) to the media player attributes (qualities assigned to a media player by creating a network structure).
Important Note: Network structures are also used when creating location based XID projects that are used in conjunction with the nfinity Xmobi app.
Step-by-step guide on how to create a network
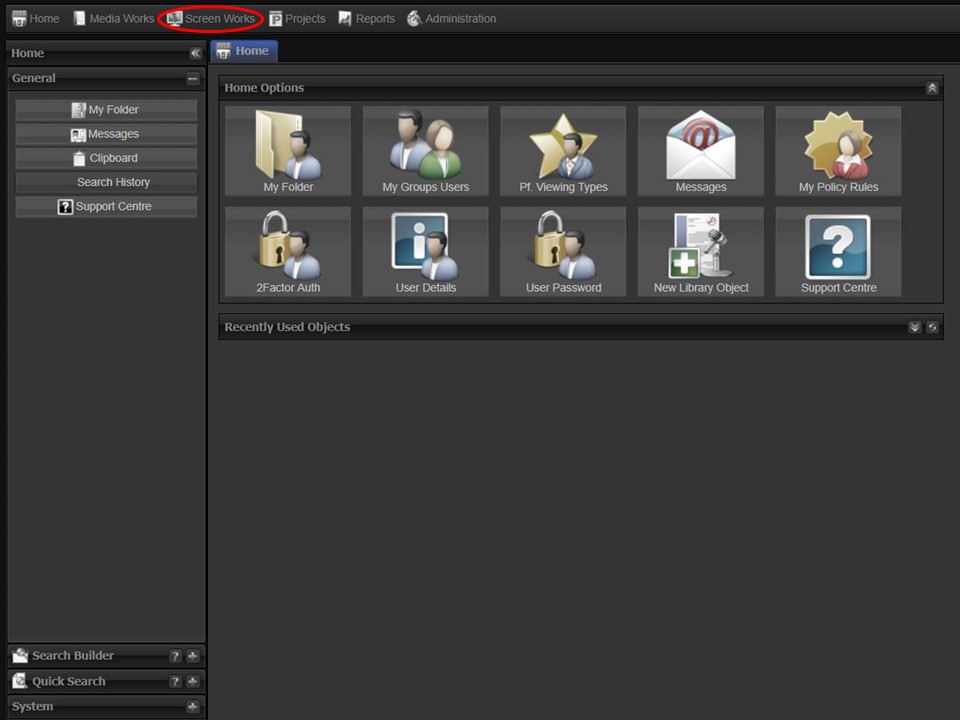
1. Click on the Screen Works tab at the top of the screen.
2. Click on the New Network icon. A window will appear.
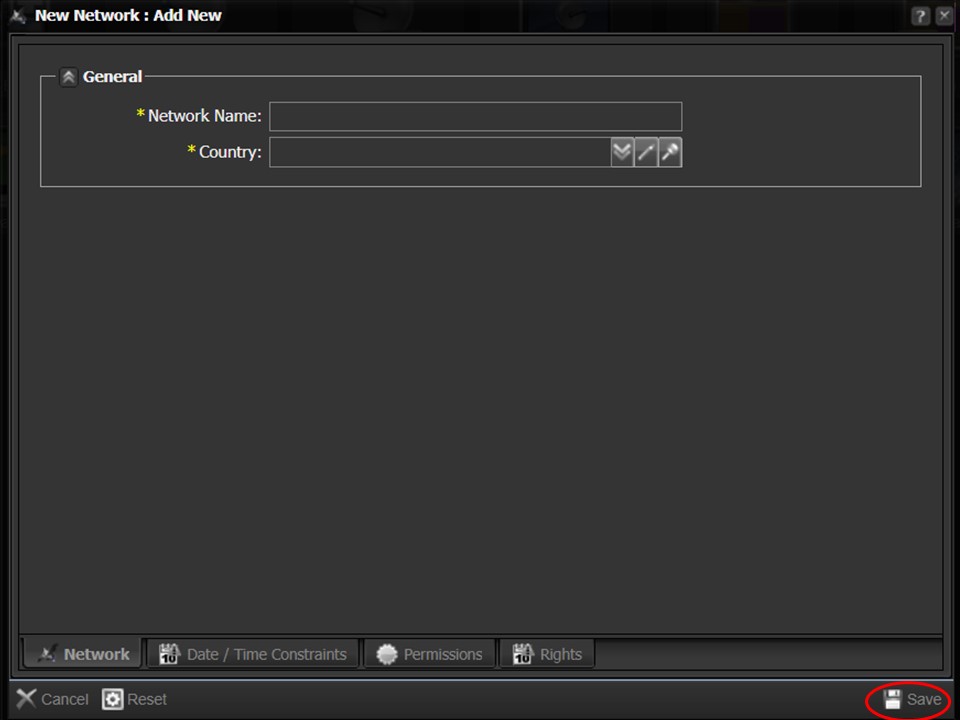
3. Name your network, select a country from the drop-down and click on the Save button in the bottom right corner of the window.
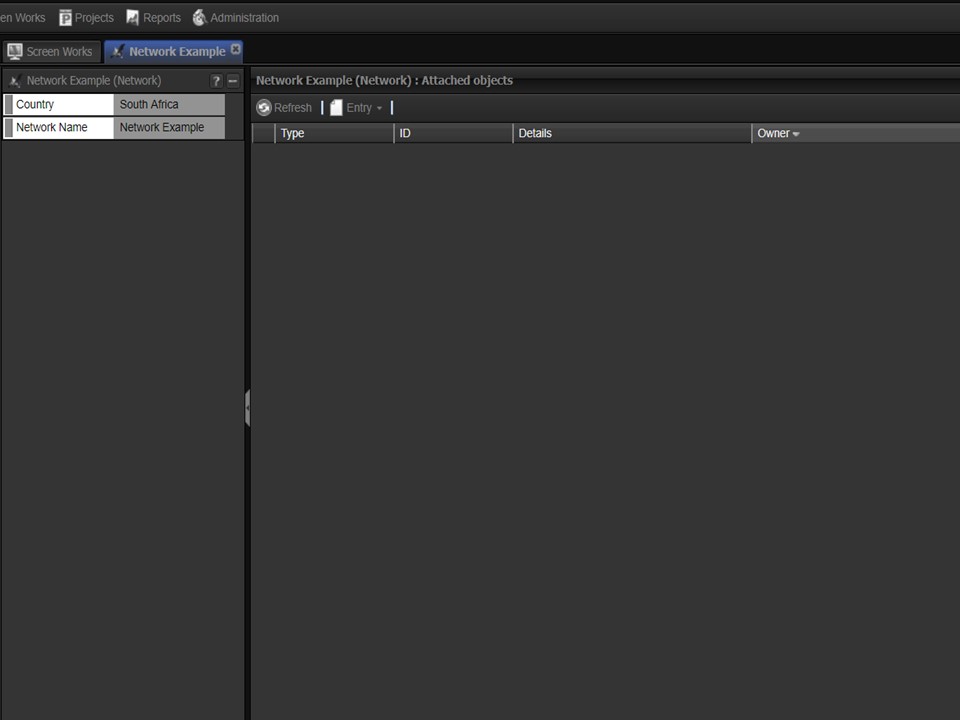
4. The network will open in the middle panel & appear in your clipboard.
Step-by-step guide on how to append a Province to your network
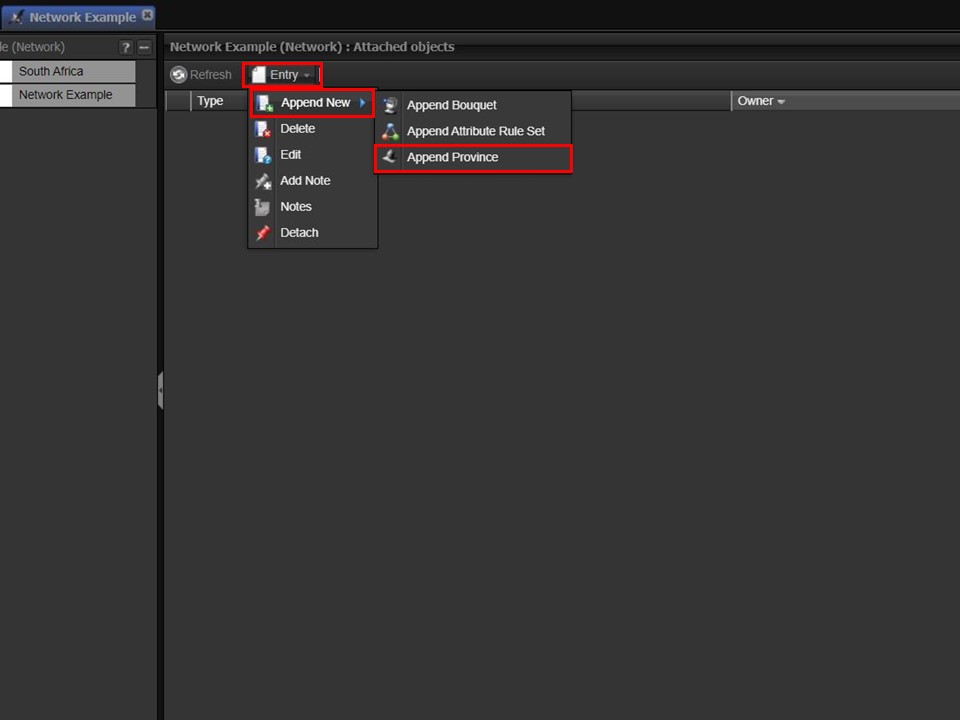
1. Once you have created your network, click on the Entry drop-down. A menu will appear. Hover over Append New, move to the right and click on Append Province. A window will open.
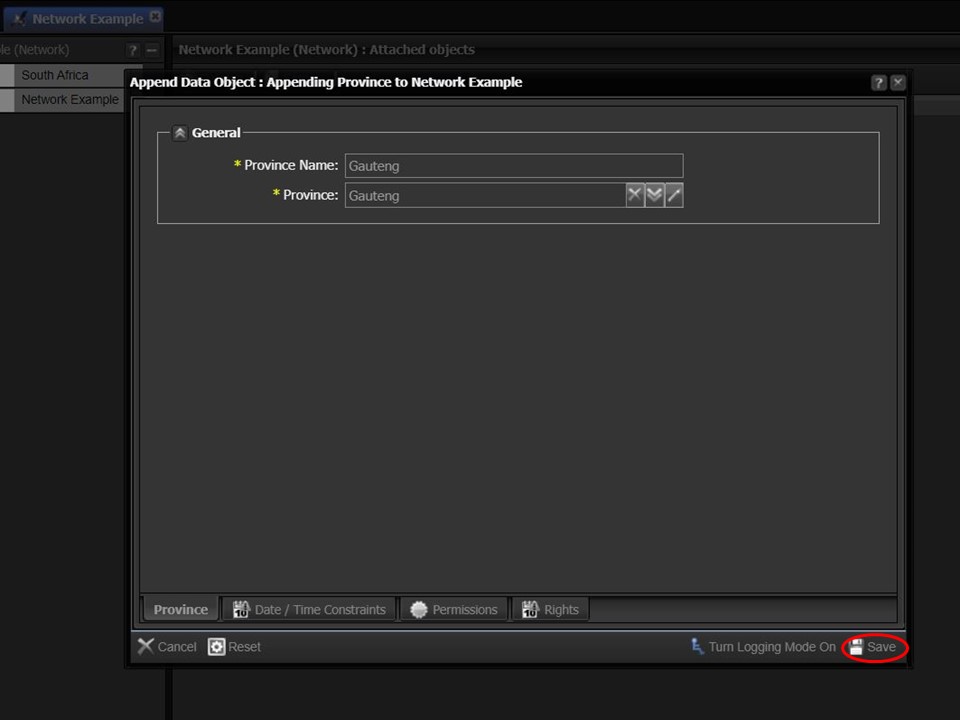
2. Complete the Province Name field, select the relevant province from the drop-down and click on save.
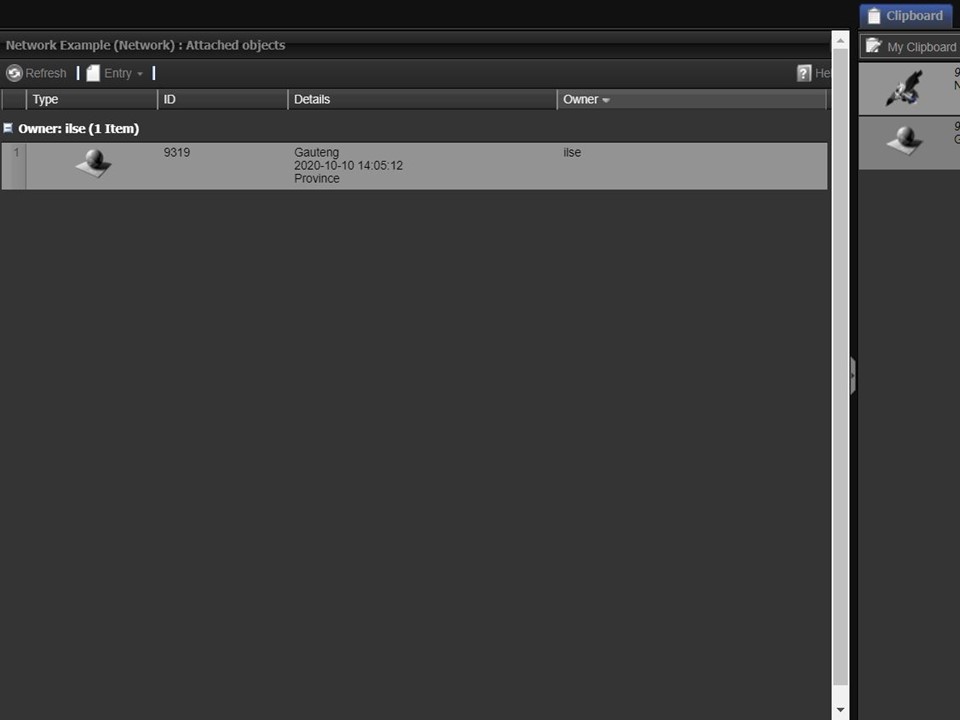
Step-by-step guide on how to append a Region to a Province
3. The province will appear in the middle panel and your clipboard.
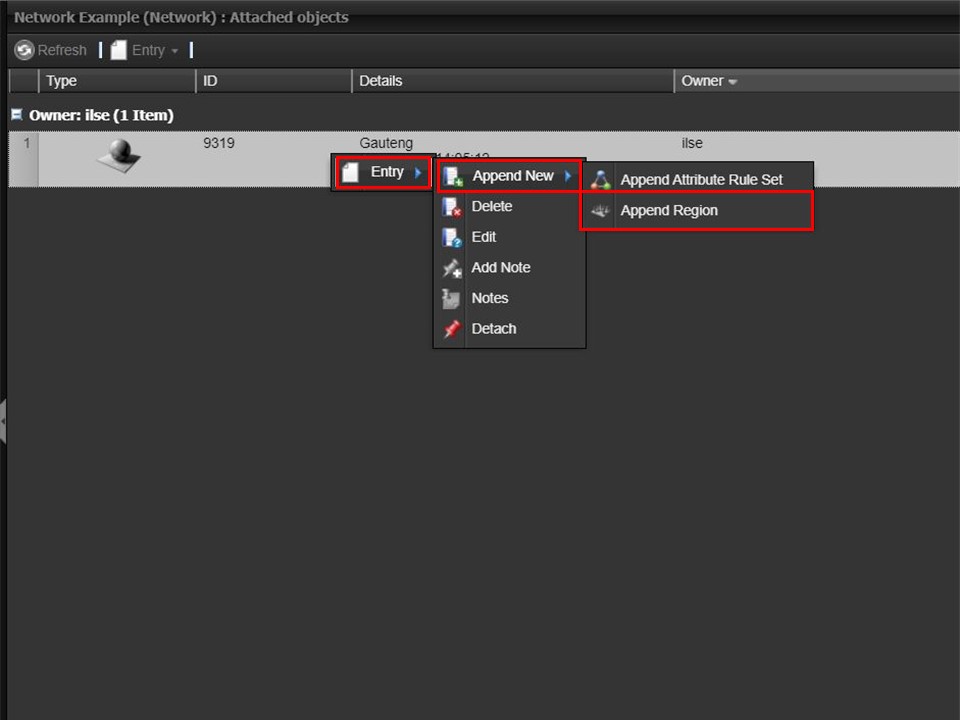
1. Right-click on the Province you have appended. A menu will appear. Hover over Entry, move across to the right to Append New and across to Append Region.
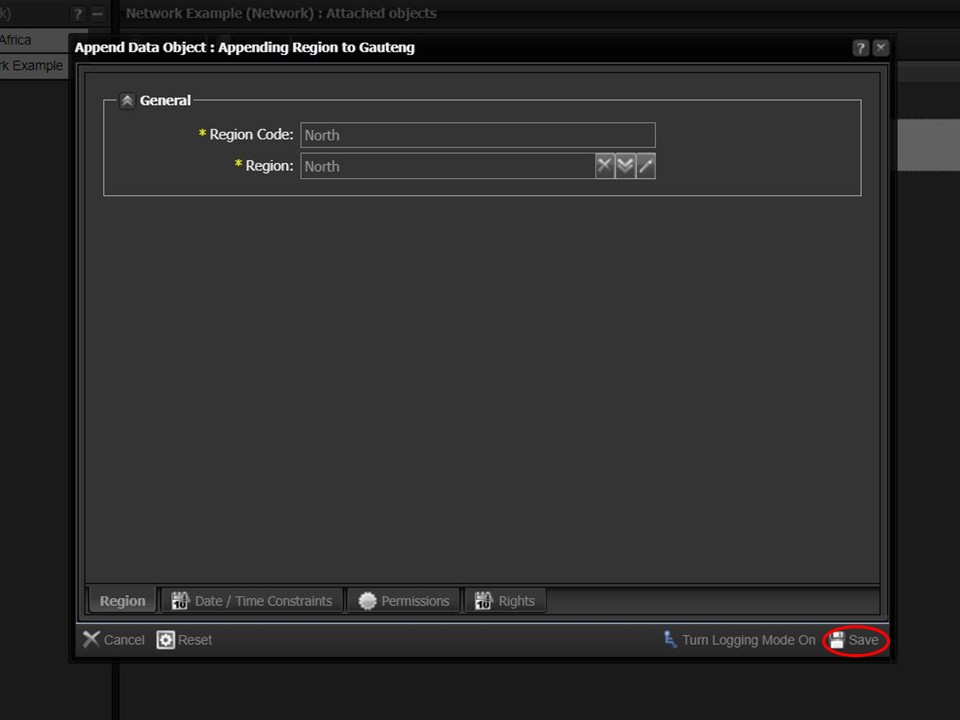
2. Complete the Region Code field, select the relevant region from the drop-down & save.
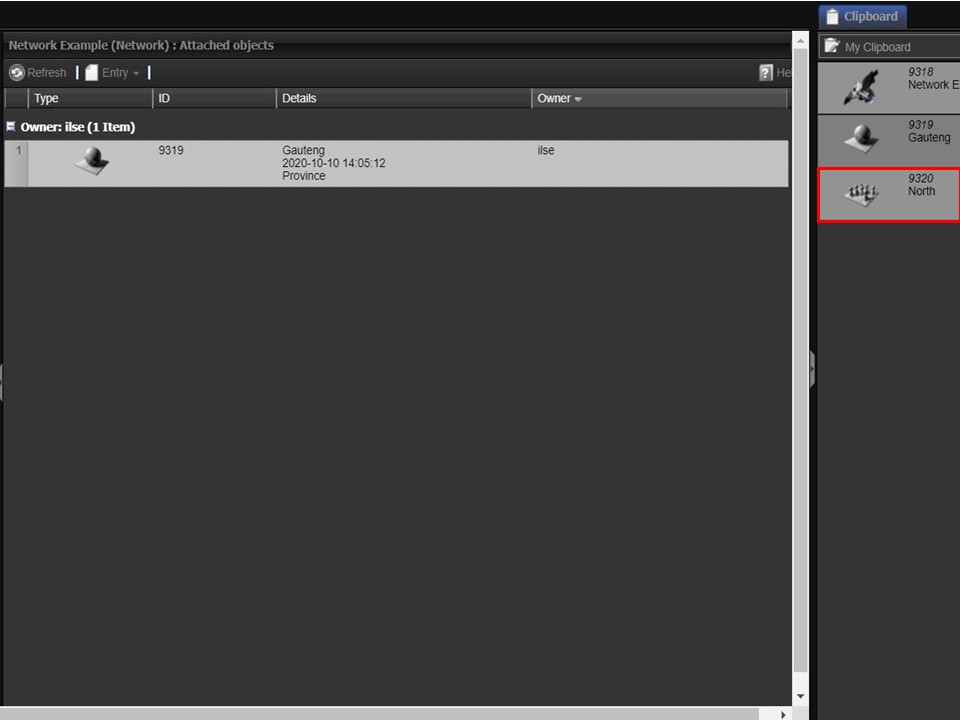
3. The region will appear in your clipboard.
Step-by-step guide on how to append a Town to a Region
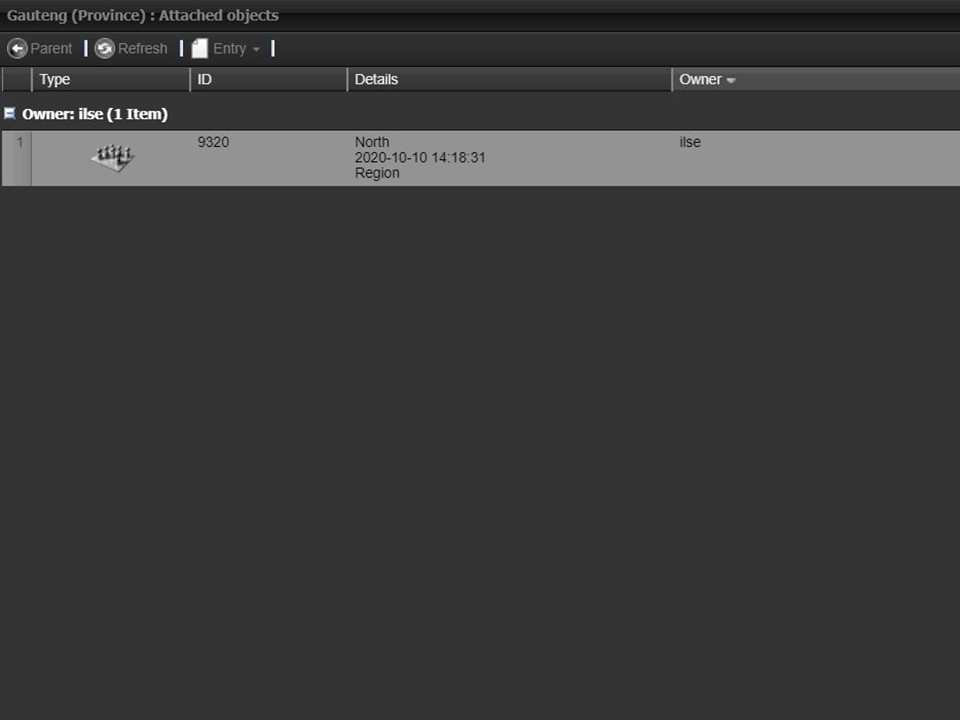
4. If you double-click on the province, it will open the region in the middle panel.
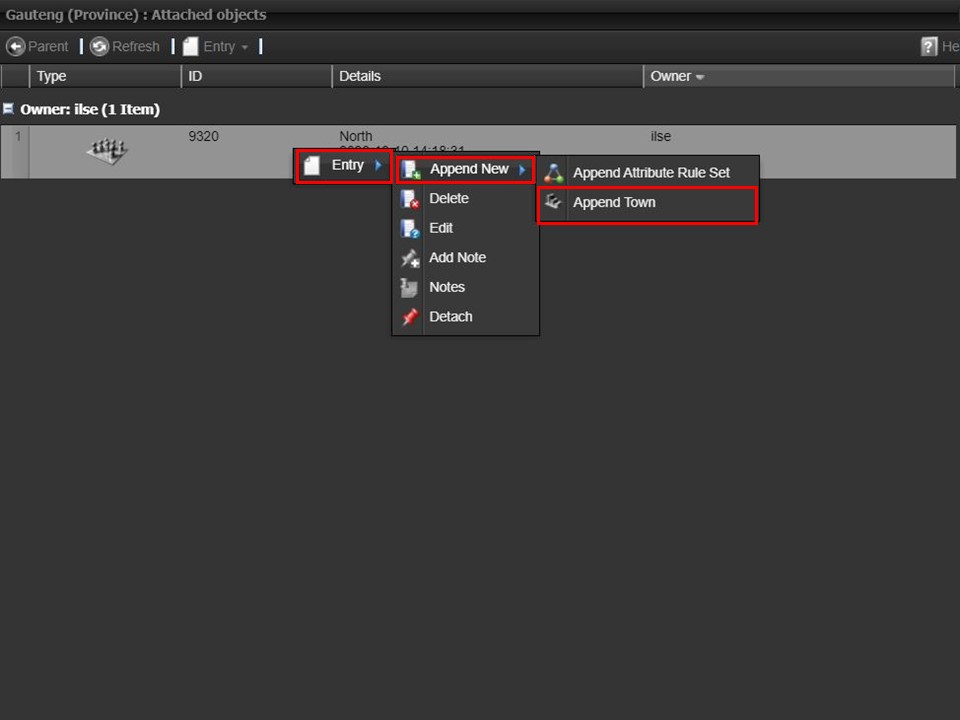
1. Right-click on the region you have appended. A menu will appear. Hover over Entry, move across to the right to Append New and across to Append Town.
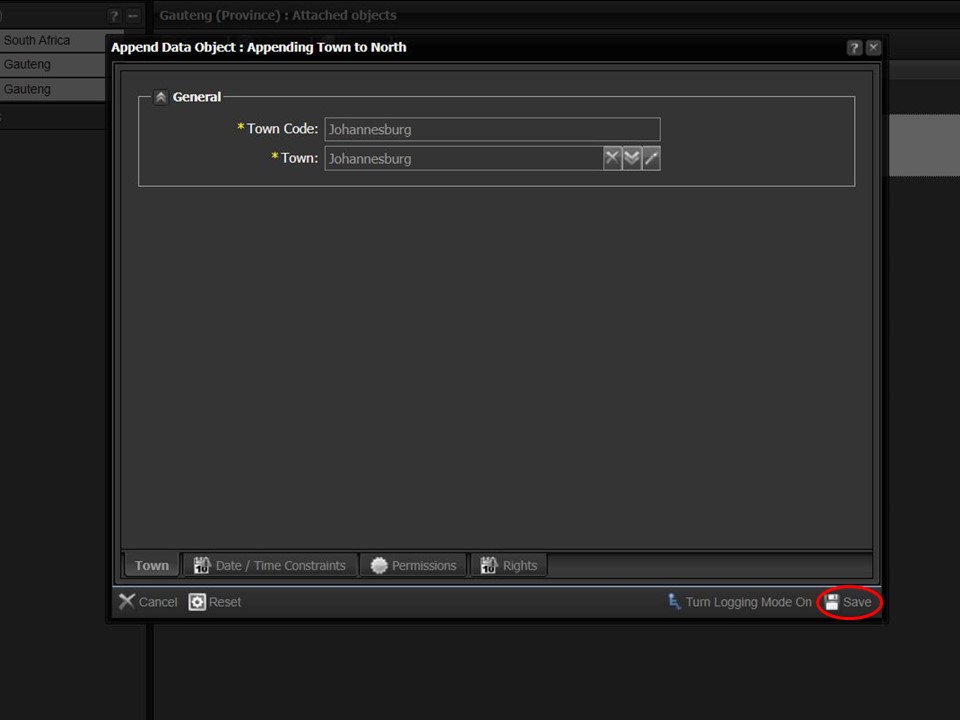
2. Complete the Town Code field, select the relevant town from the drop-down & save.
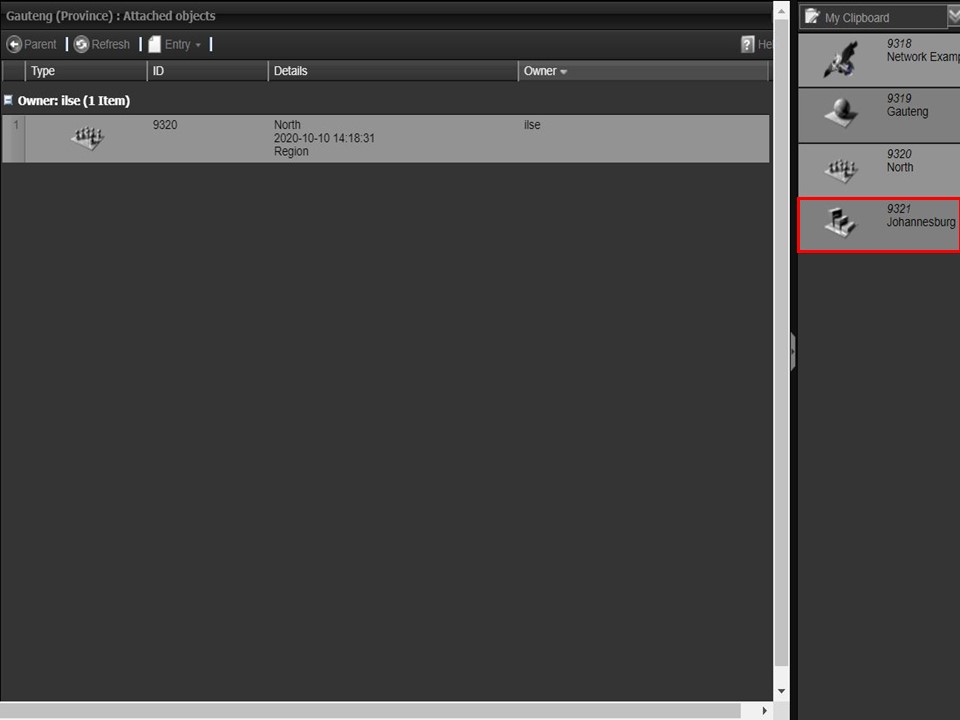
3. The town will appear in your clipboard.
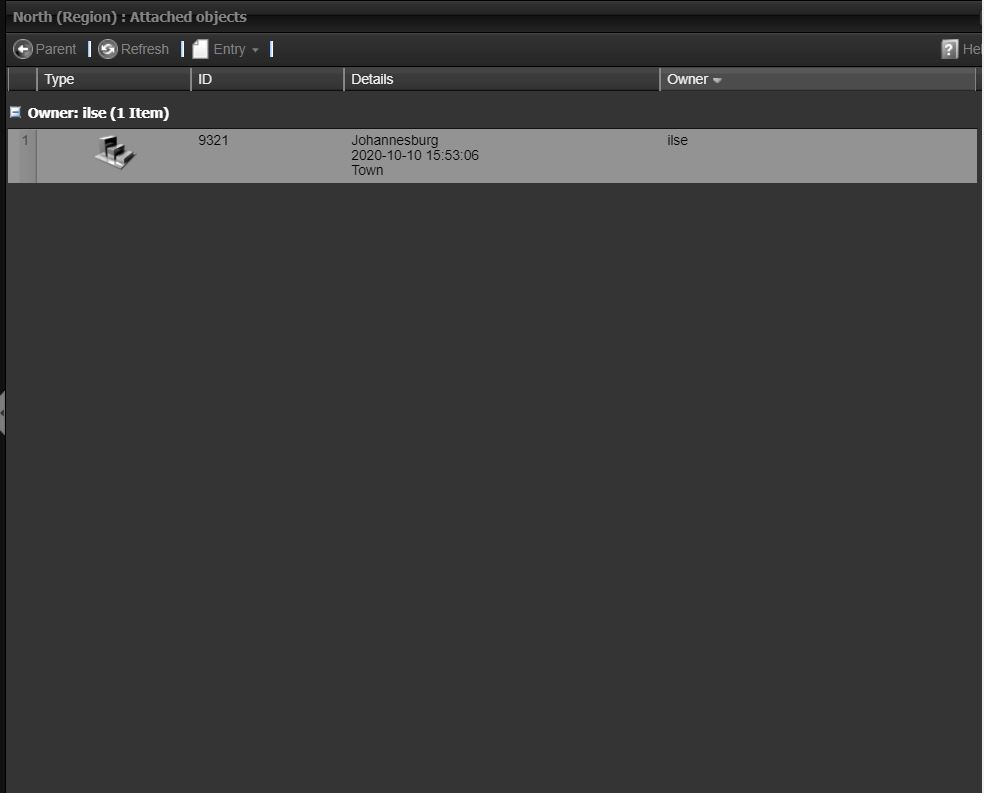
Step-by-step guide on how to append a Suburb to a Town
4. If you double-click on the region, it will open the town in the middle panel.
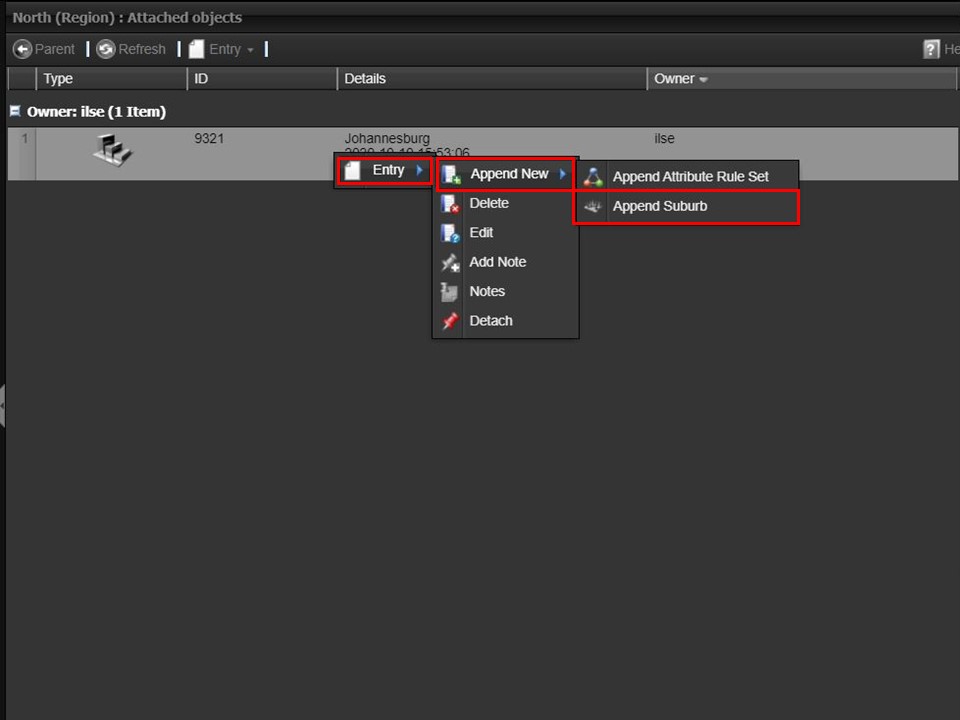
1. Right-click on the town you have appended. A menu will appear. Hover over Entry, move across to the right to Append New and across to Append Suburb.
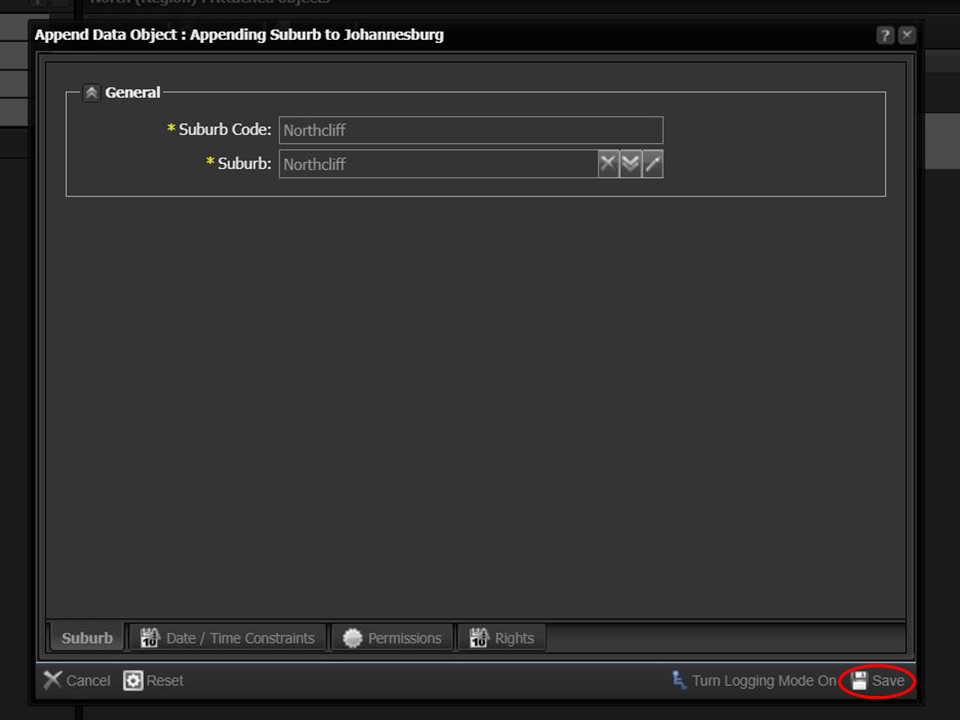
2. Complete the Suburb field, select the relevant suburb from the drop-down & save.
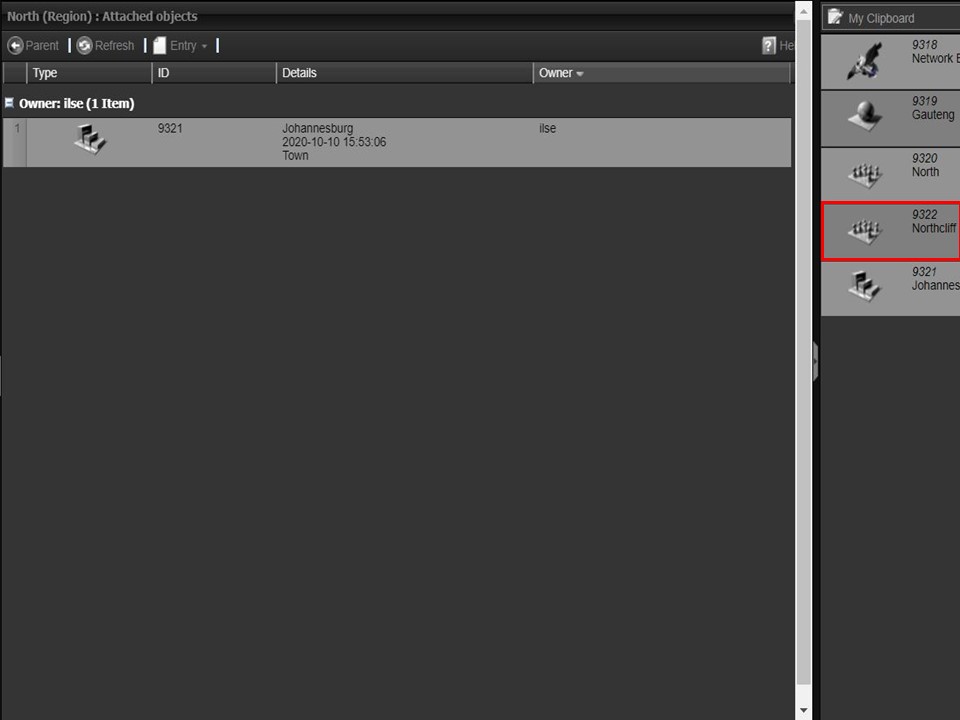
3. The suburb will appear in your clipboard.
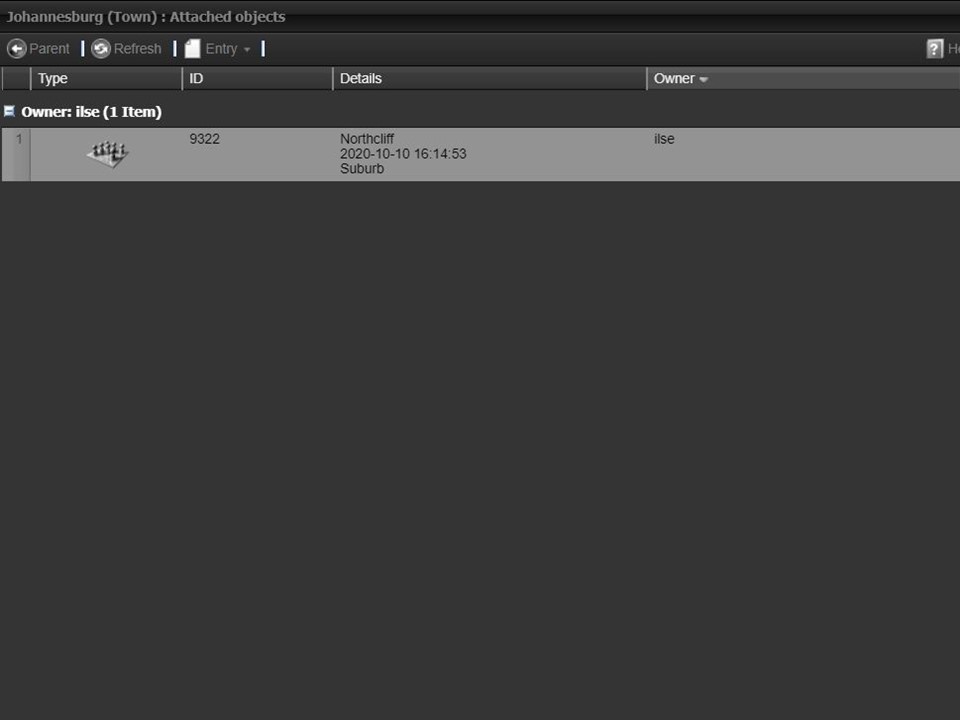
Step-by-step guide on how to append a Branch to a Suburb
4. If you double-click on the town, it will open the suburb in the middle panel.
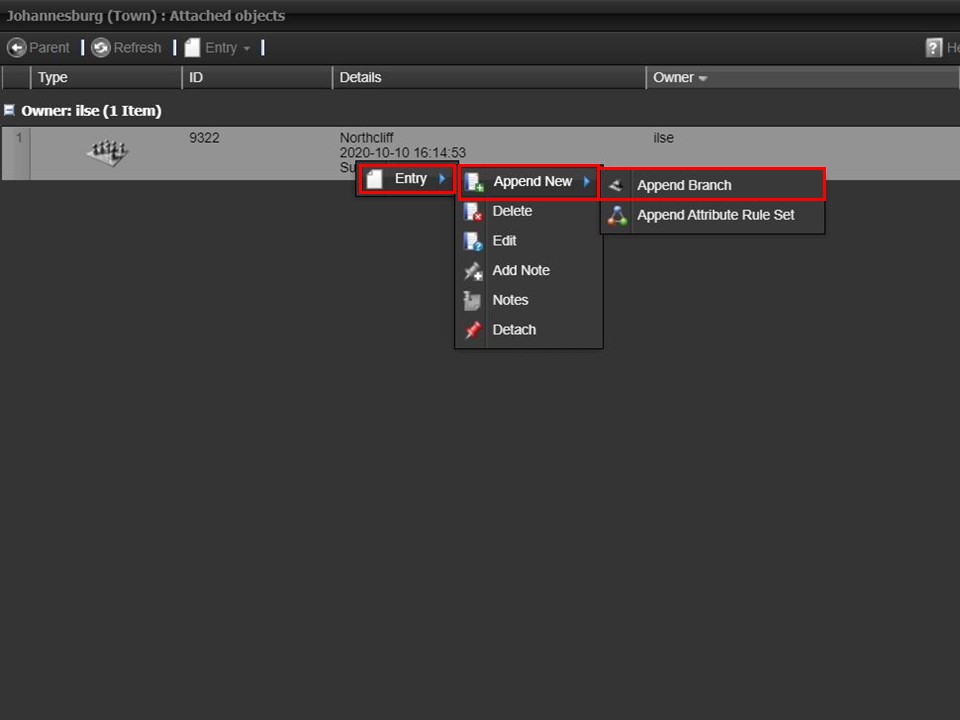
1. Right-click on the suburb you have appended. A menu will appear. Hover over Entry, move across to the right to Append New and across to Append Branch.
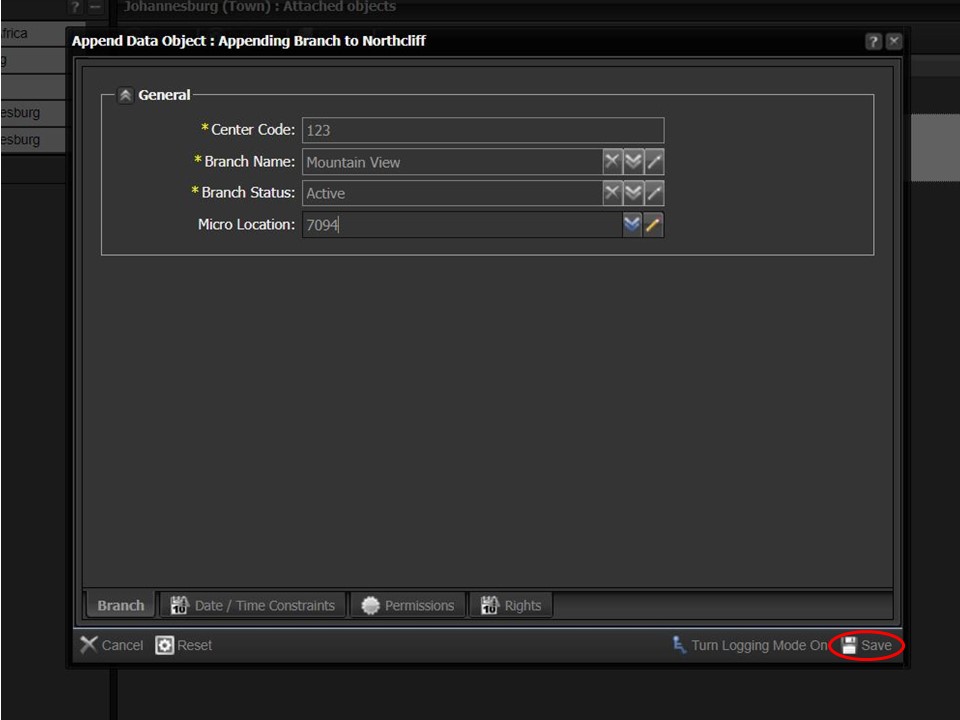
2. Complete the Center Code and Branch Name fields. Branch Status has Active selected as its default. Select a Micro Location from the drop-down & remember to save.
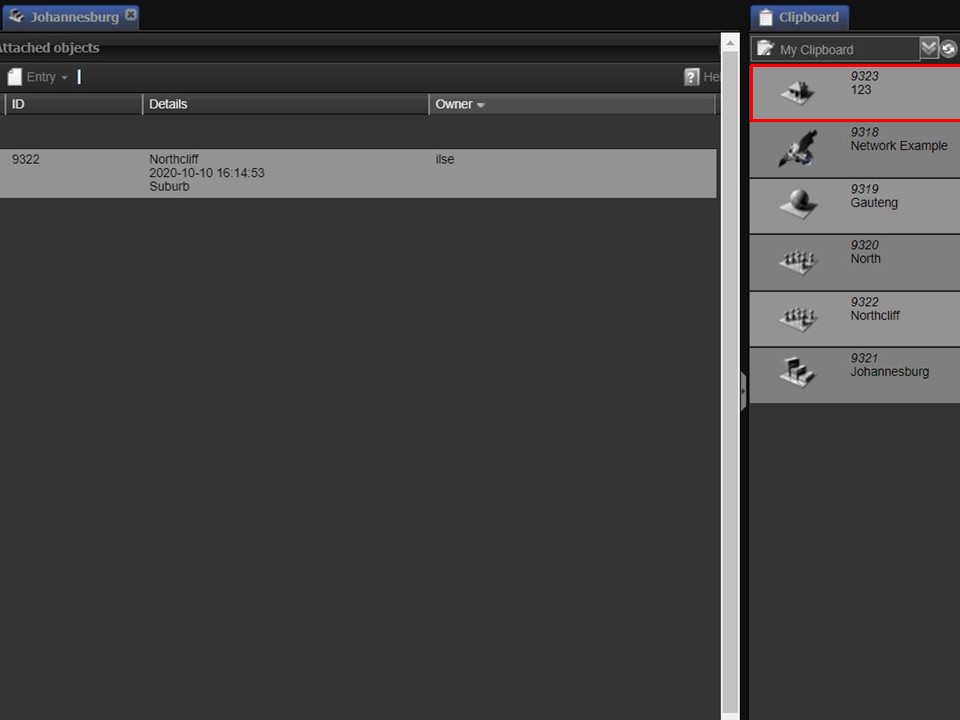
Step-by-Step guide on how to add a bouquet(s) to a network structure
3. The branch will appear in your clipboard.
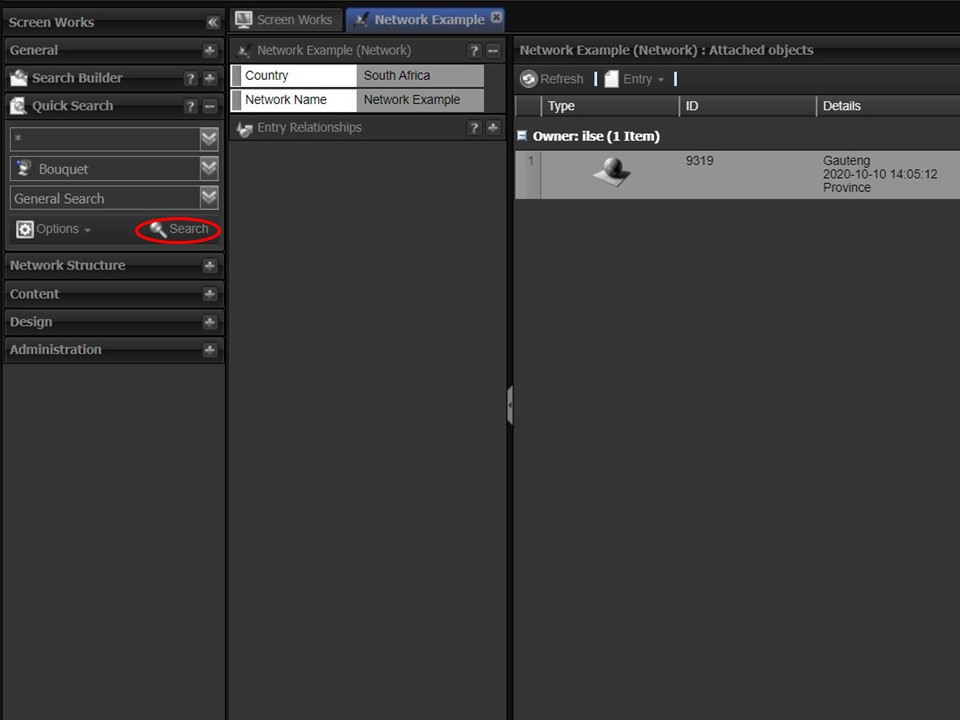
1. Quick Search the bouquet that you want to add the network structure to.
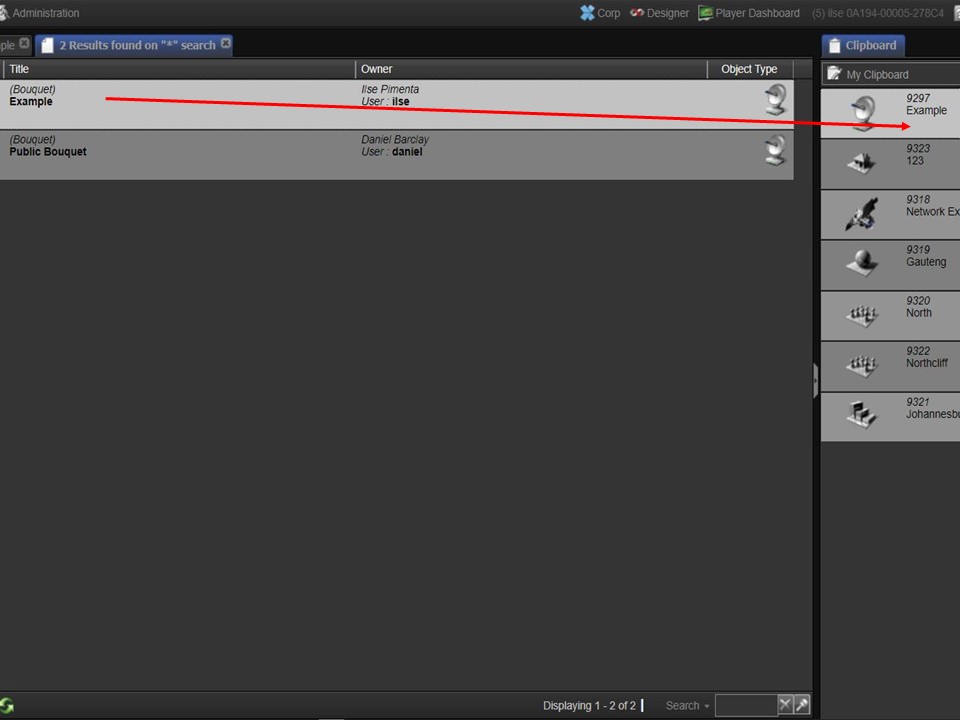
2. Drag the bouquet to your clipboard & close the results tab.
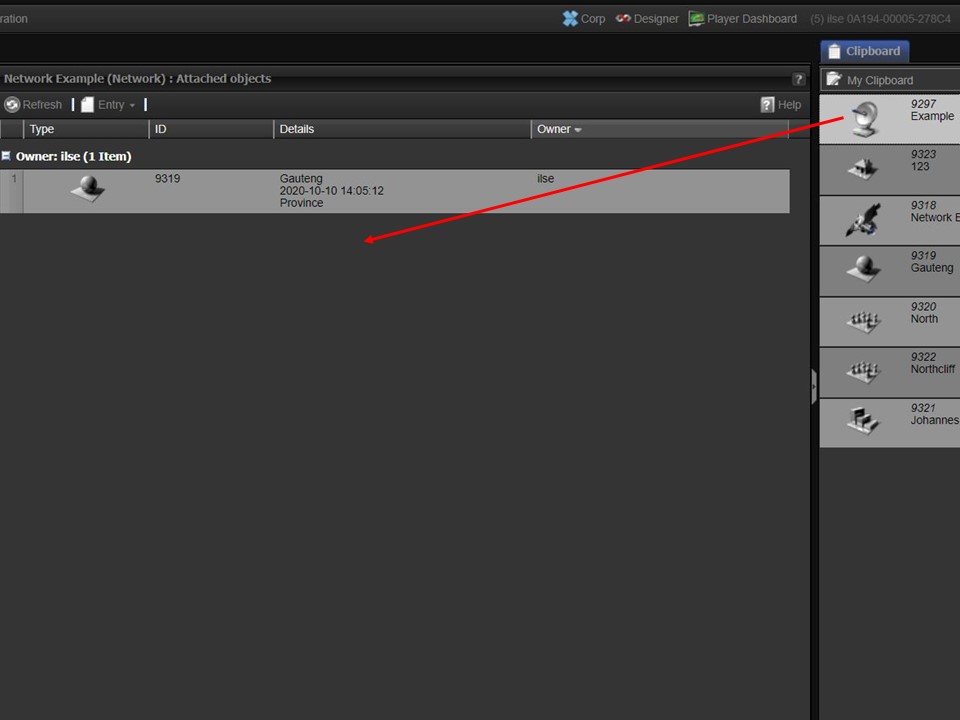
3. Drag the bouquet onto the network that you want to append it to. A dialogue box will open.
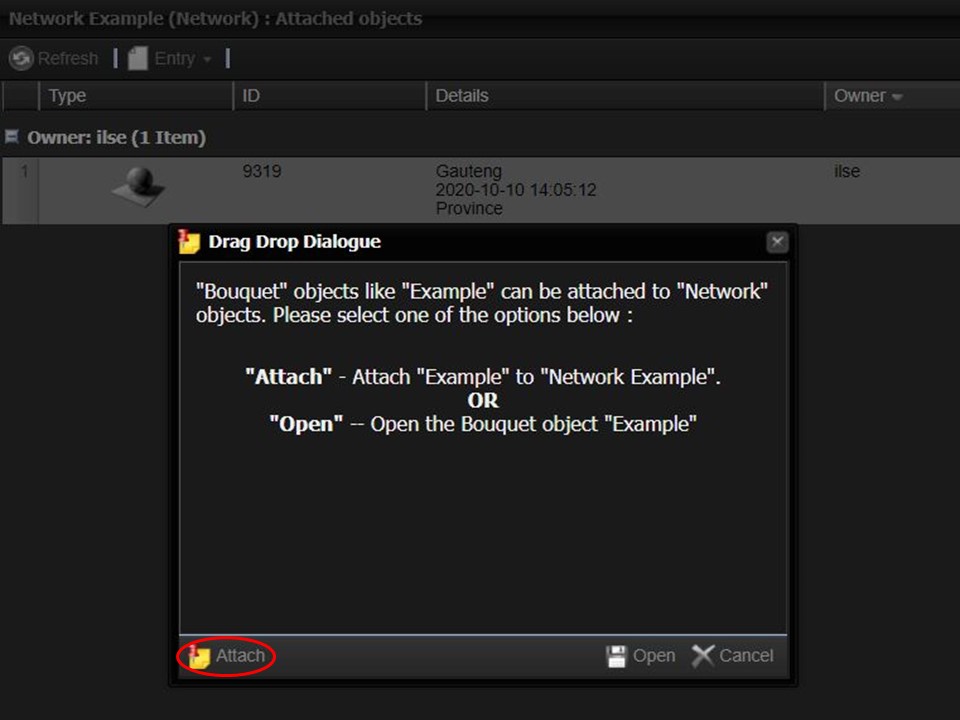
4. Click on Attach.
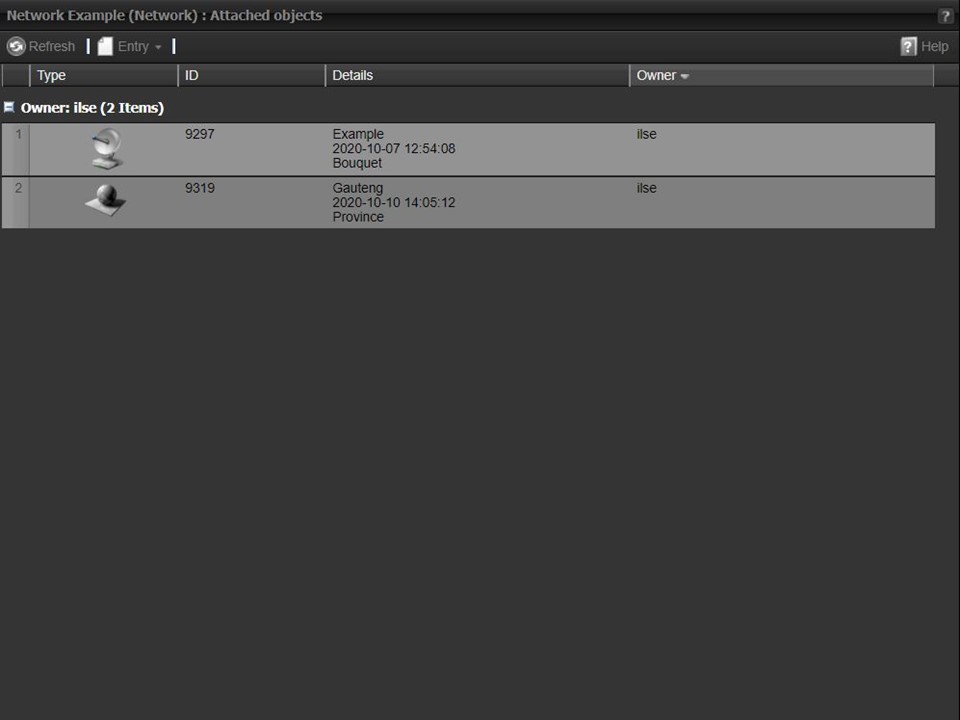
Step-by-step guide on how to add a player to a network structure
5. The attached bouquet will update in the middle panel.
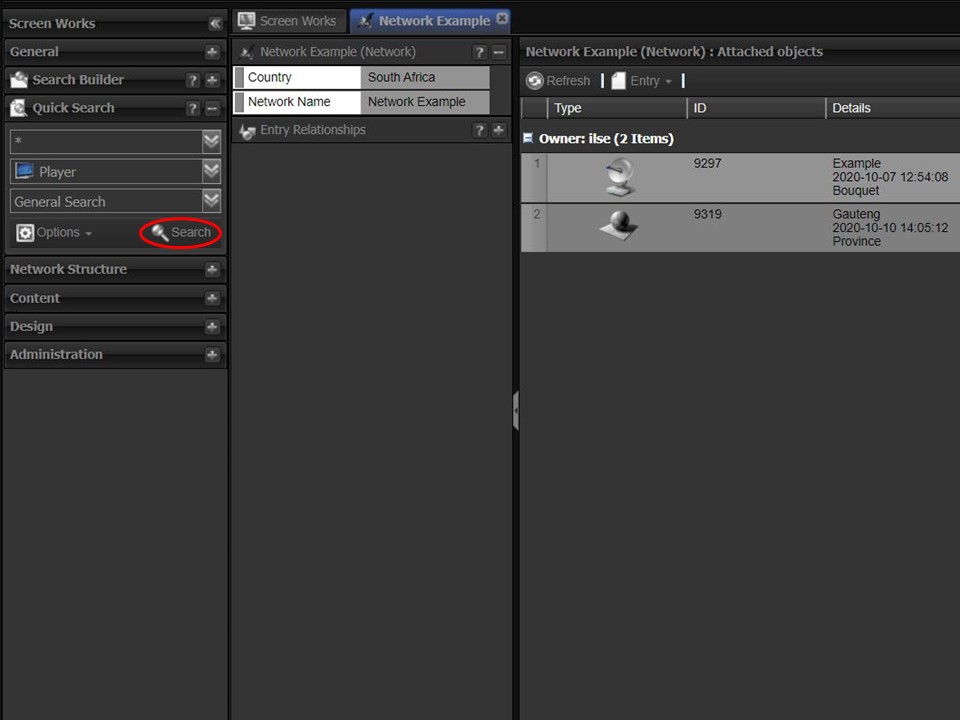
1. Quick Search the player you want to add to the network structure. A results tab will open.
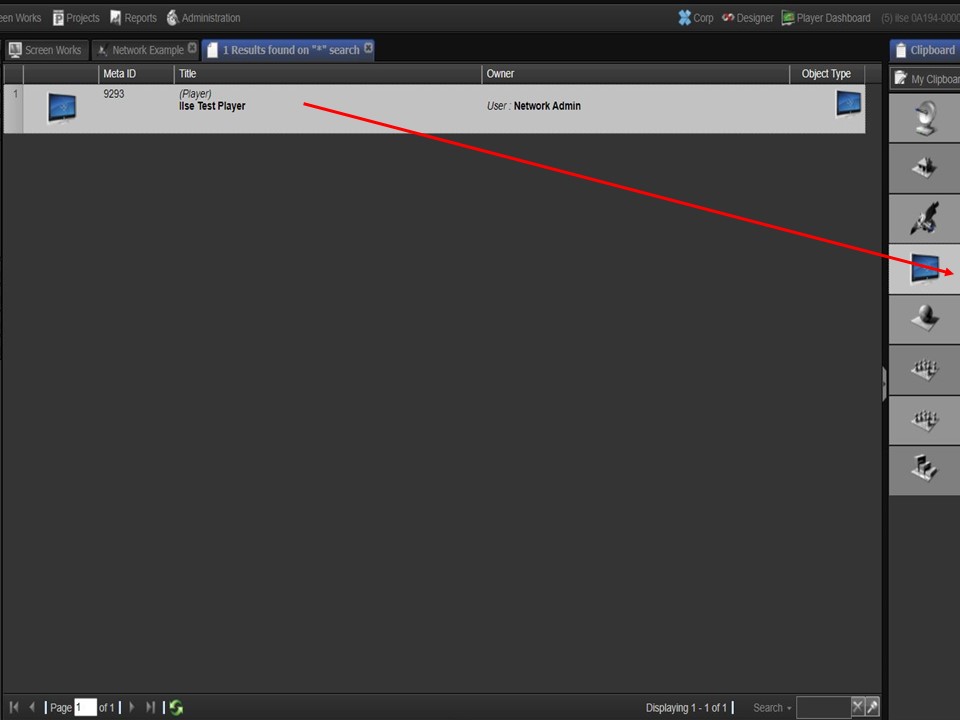
2. Drag the player into your clipboard.
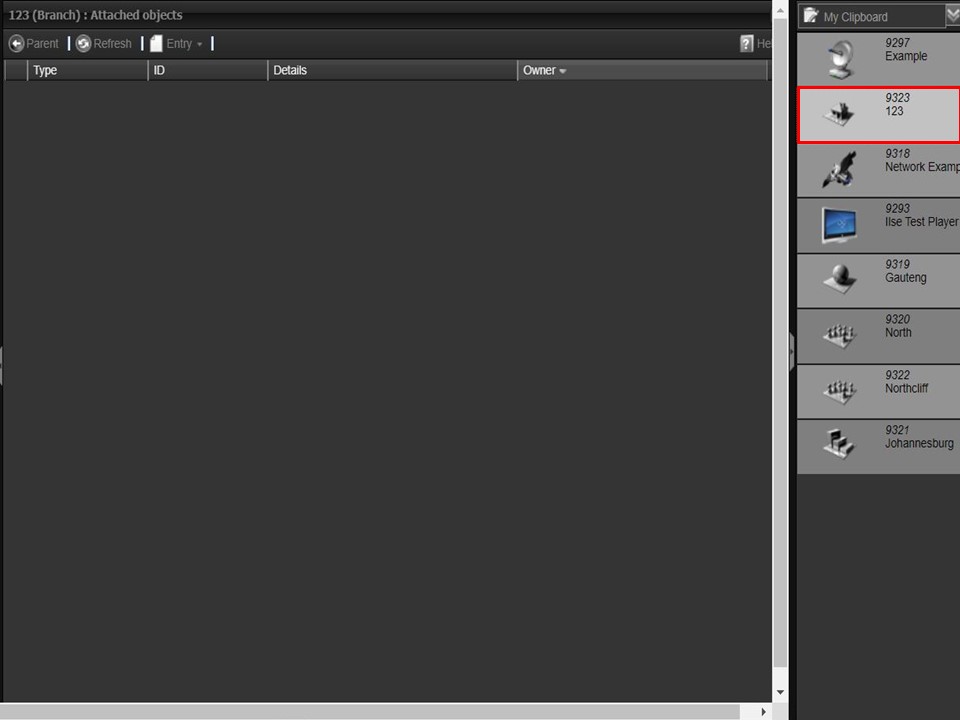
3. Double-click on the Branch in your clipboard. It will open in the middle panel.
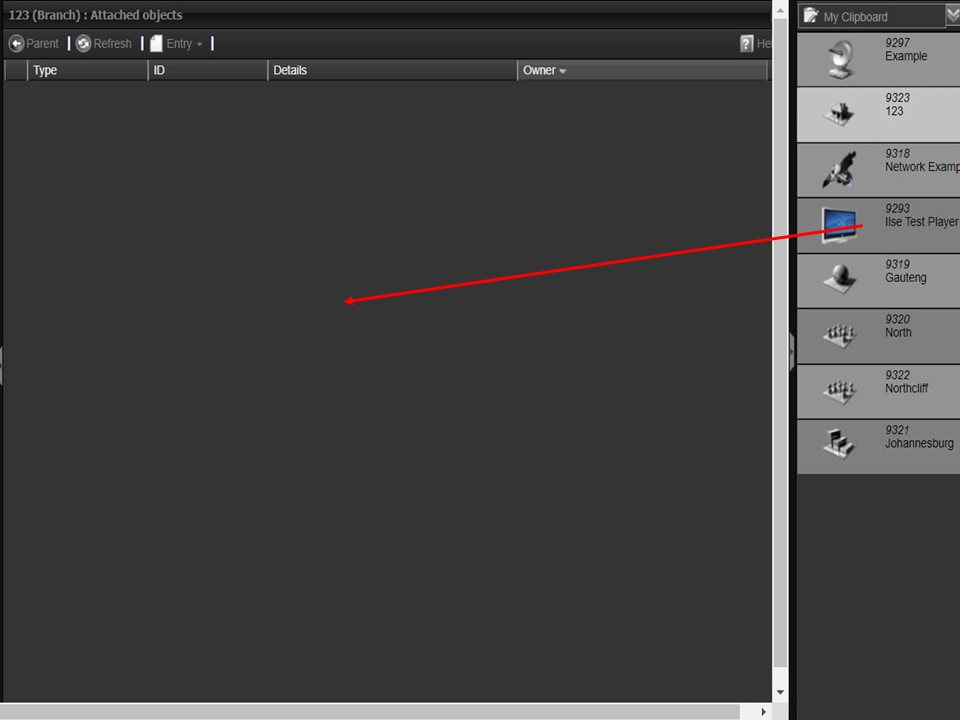
4. Drag the player from your clipboard onto the branch. A dialogue box will appear.
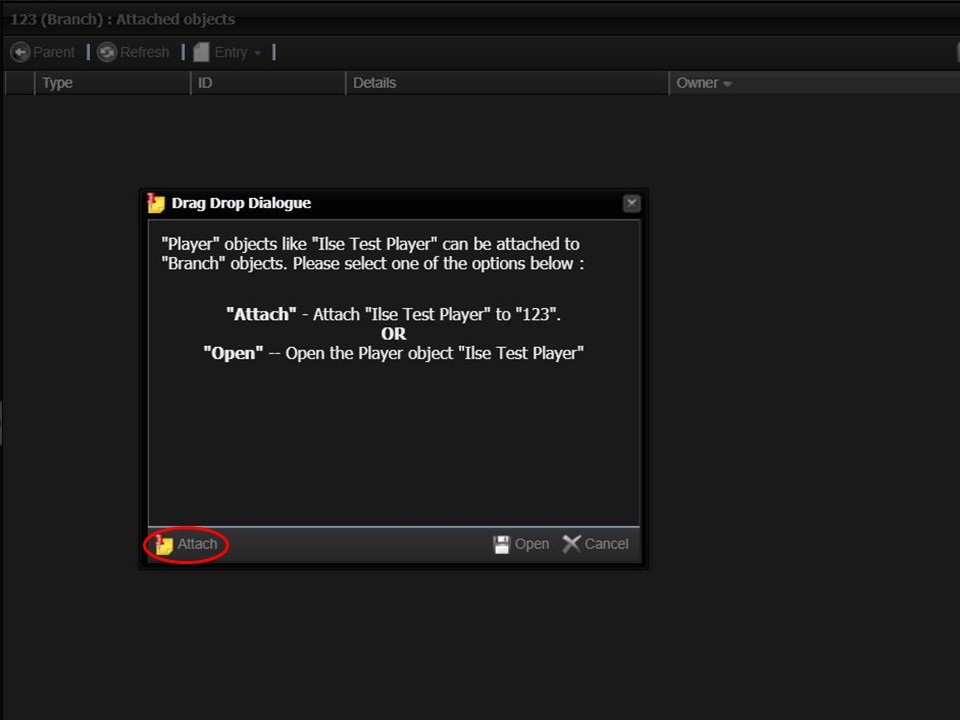
5. Click on Attach.
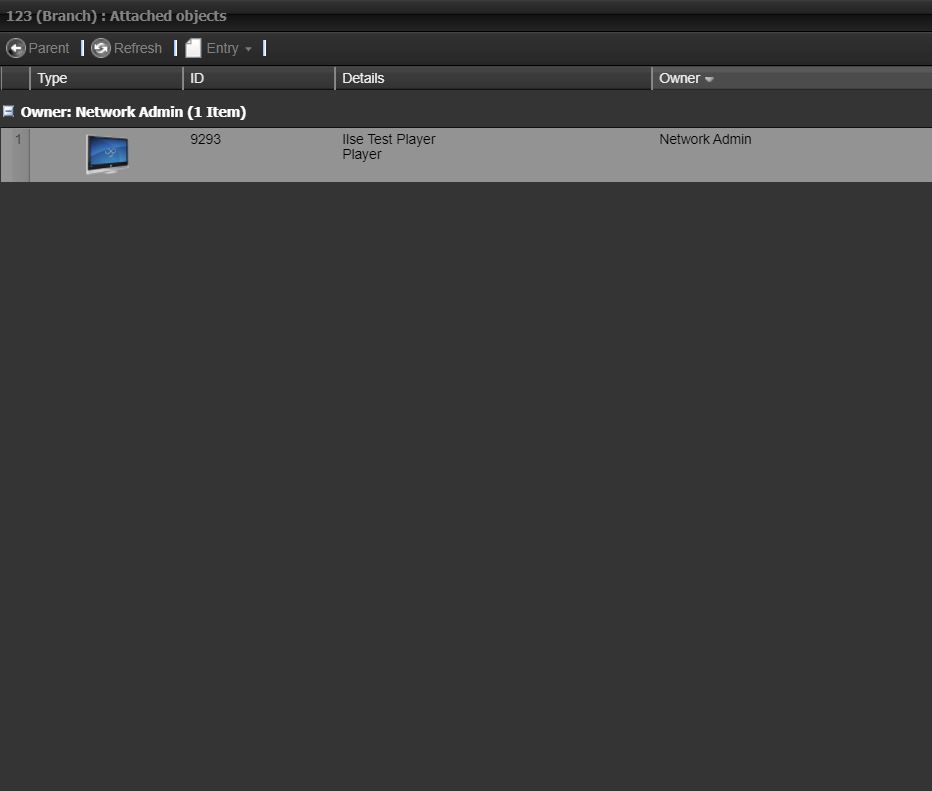
6. The attached player will update in the middle panel.
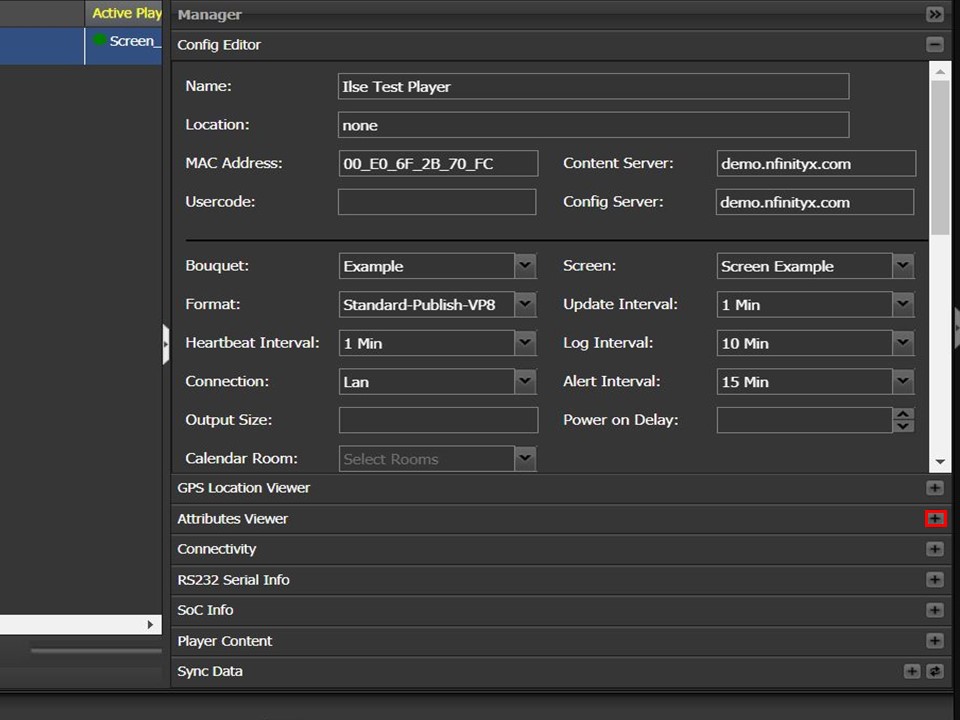
7. Go to the Player Dashboard that you will find in the Screen Works module. Expand the Attributes Viewer in the Manager panel by clicking on the plus sign.
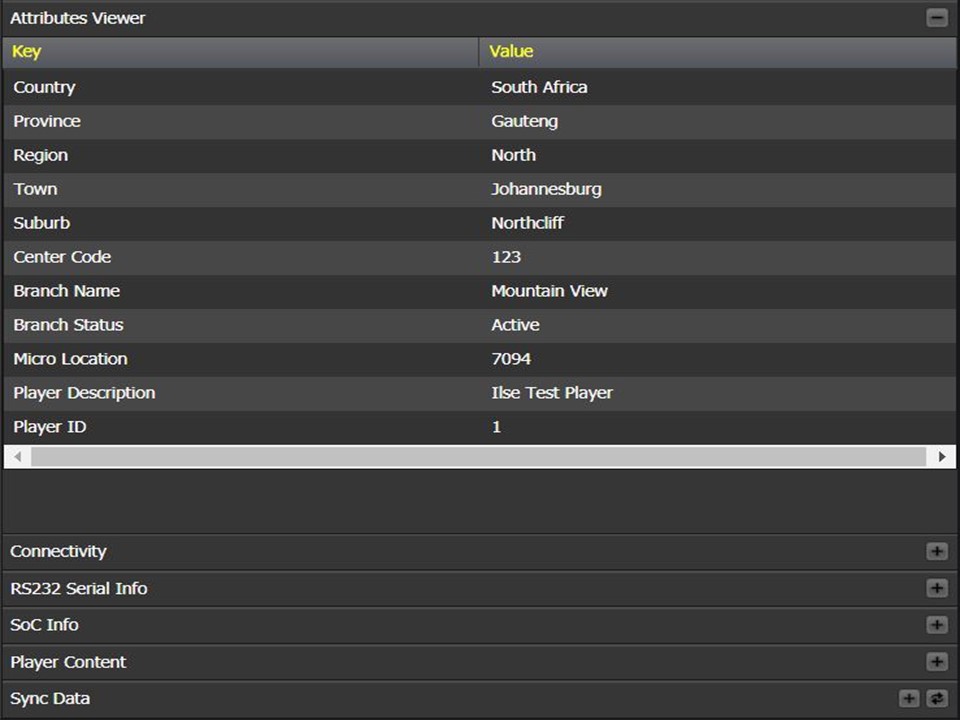
8. The Attibutes Viewer is where you will see the player attributes that you have given the player by adding it to the network structure.
Scheduling content using a network structure
The content must be uploaded & logged using the library object created by an admin user, intended for this purpose, so that the relevant metadata fields are available to complete when logging.
Important Note: The below 3 steps will not be followed when setting up XID projects for location based dynamic pricing updates.
1. Upload & log content as the correct library object
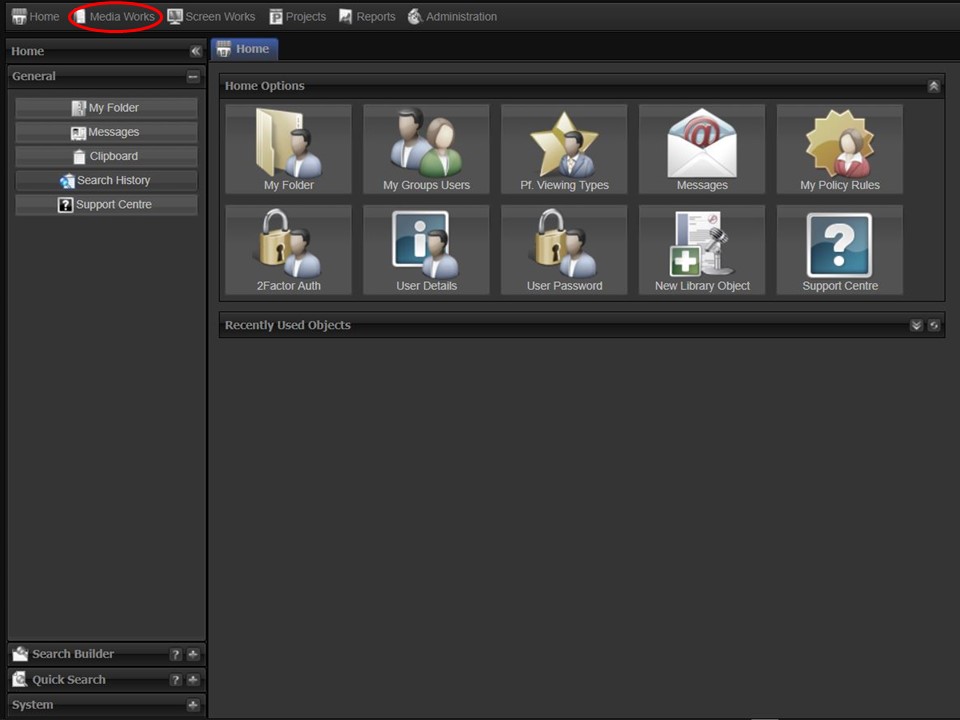
1. Click on the Media Works tab in the top left corner of the screen.
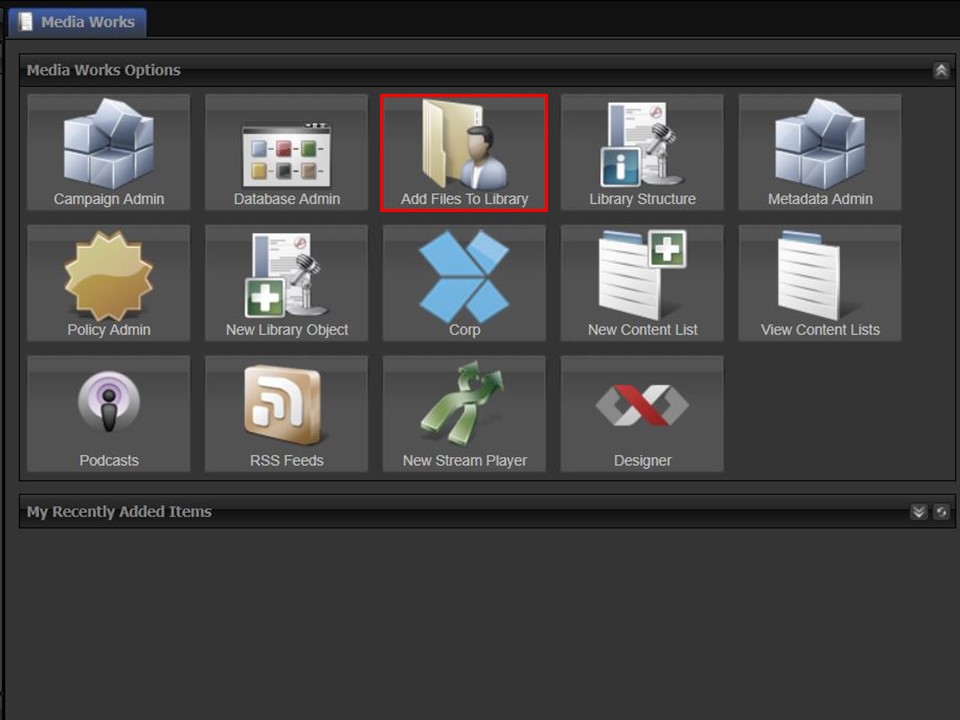
2. Click on the Add Files To Library icon. The Users Folder will open.
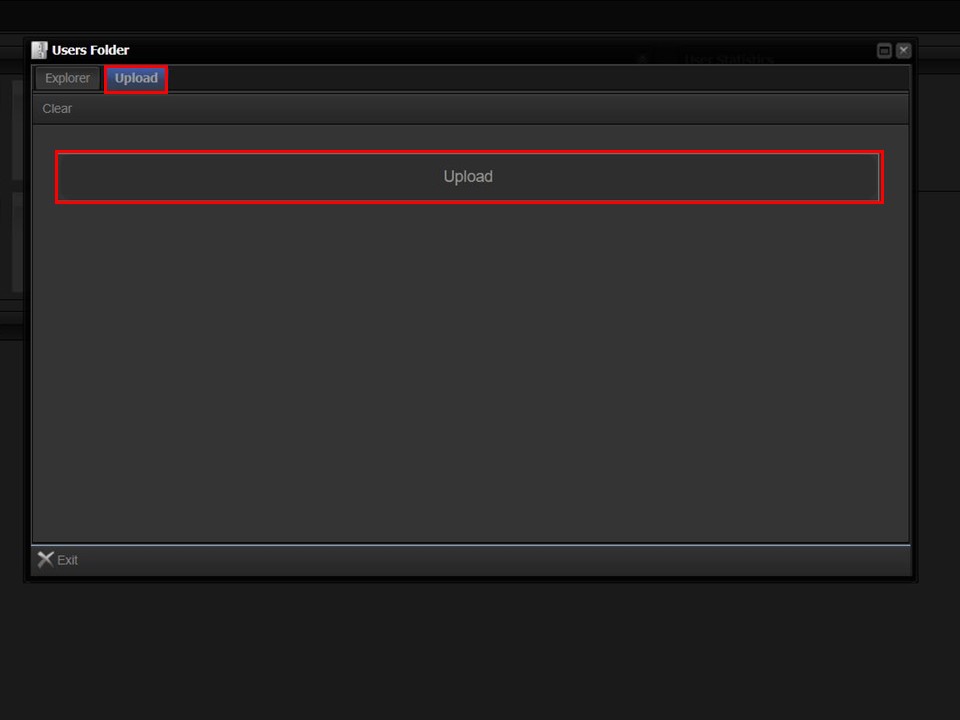
3. Click on the Upload button in the top left corner of the screen. The Upload bar will appear.
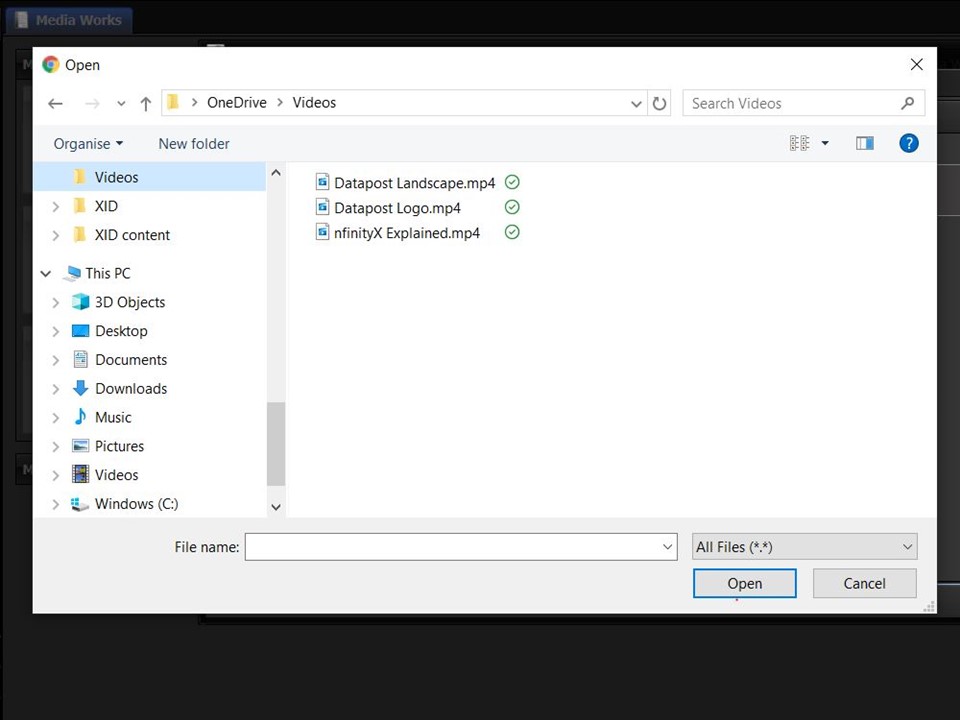
4. Click on the Upload bar to browse for the video that you want to upload.
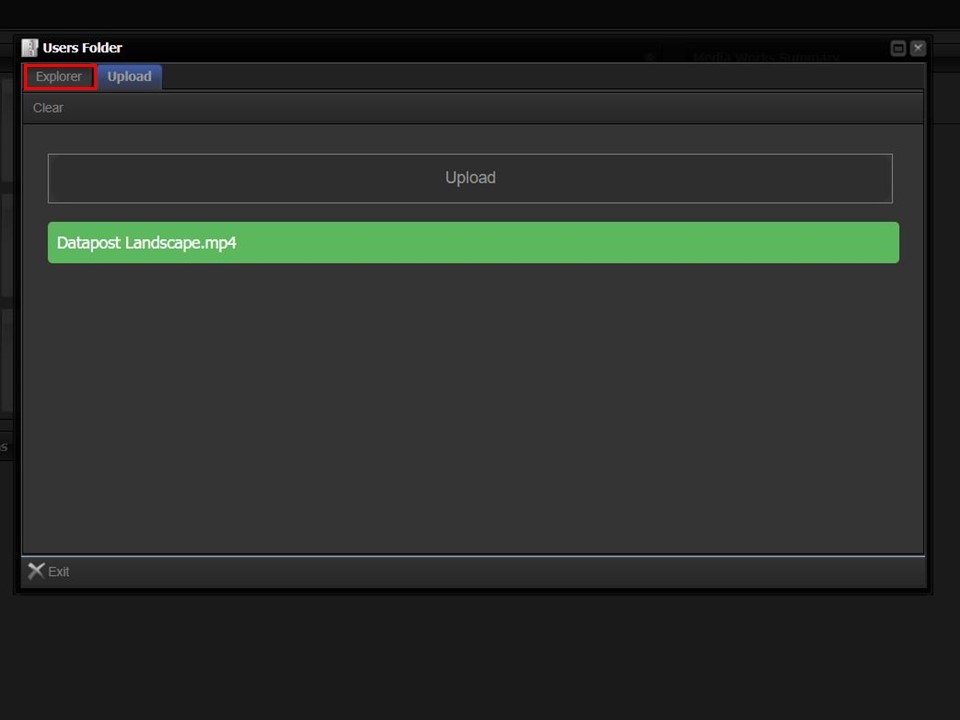
5. Click on the Explorer button in the top left corner of the window, once the video has uploaded.
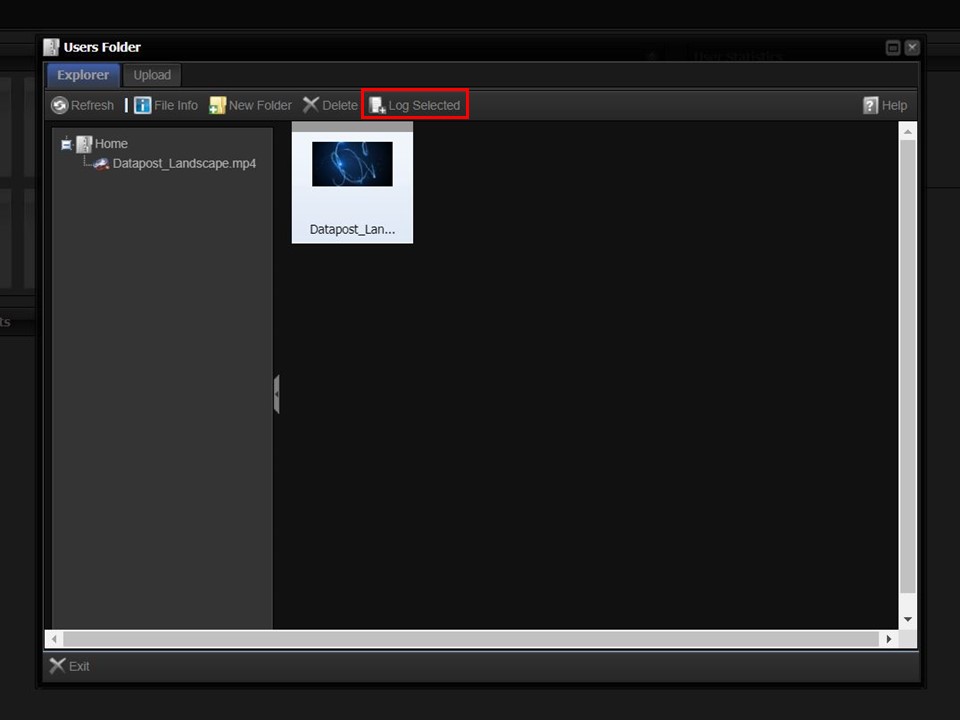
6. Click on the video in the Users Folder to highlight it, followed by the Log Selected button. A window will open.
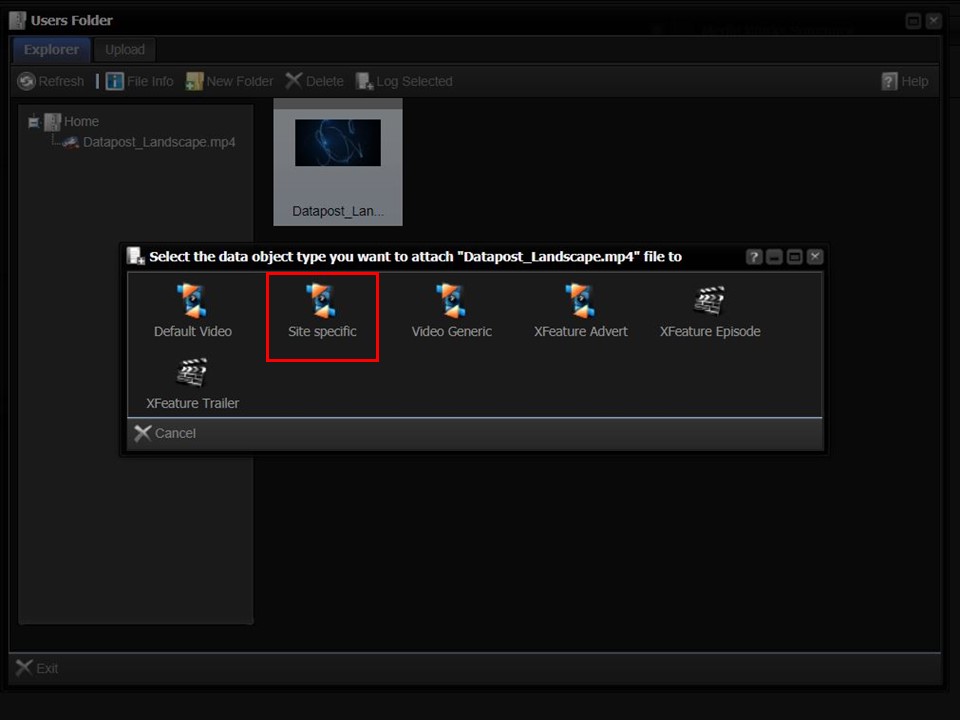
7. Select the object type created to be used when strict matching media characteristics to player attributes. A metadata form will open.
The Site specific object type has been created as an example.
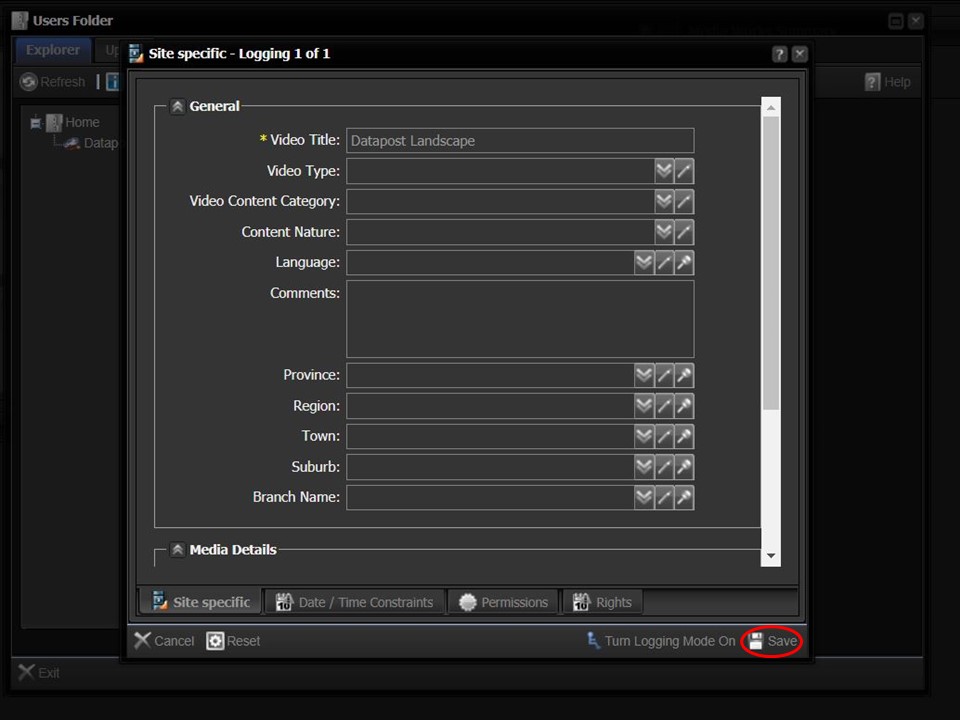
8. Complete the fields in the metadata form. The Province, Region, Town, Suburb & Branch Name items will be available on the respective drop-downs as per the way in which the network structure has been set up. Click on the Save button in the bottom right corner of the window.
2. Use a container or saved query
The content must be scheduled in a container or saved query. The strict container mode gives the instruction to the system to match the media characteristics to the player attributes. Without the instruction, the content will not be differentiated.
What is a container?
A container is a content list that you create as an item to drop into another content list. I.e. a playlist within a playlist.
What is a saved query?
A saved query, is a collection of search criteria/results, saved with a unique name that can be used across multiple content lists. A container mode will have to be added to the saved query to control the behaviour of the content in the saved query.
Step-by-step guide on how to create a container

1. Click on the Media Works tab in the top left corner of the screen.
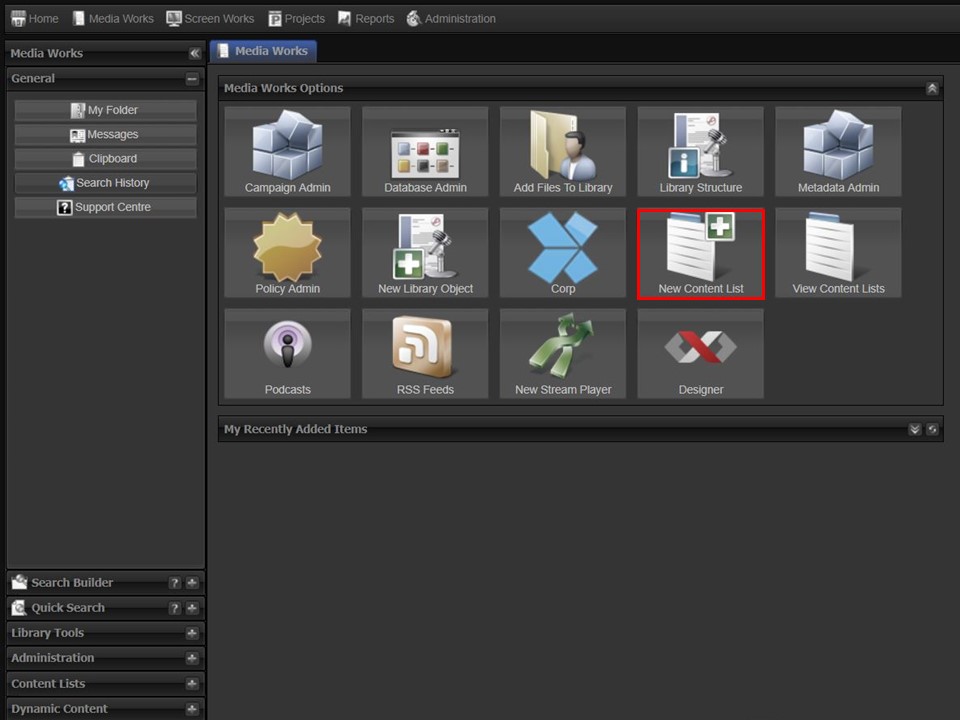
2. Click on the New Content List icon, a window will open.
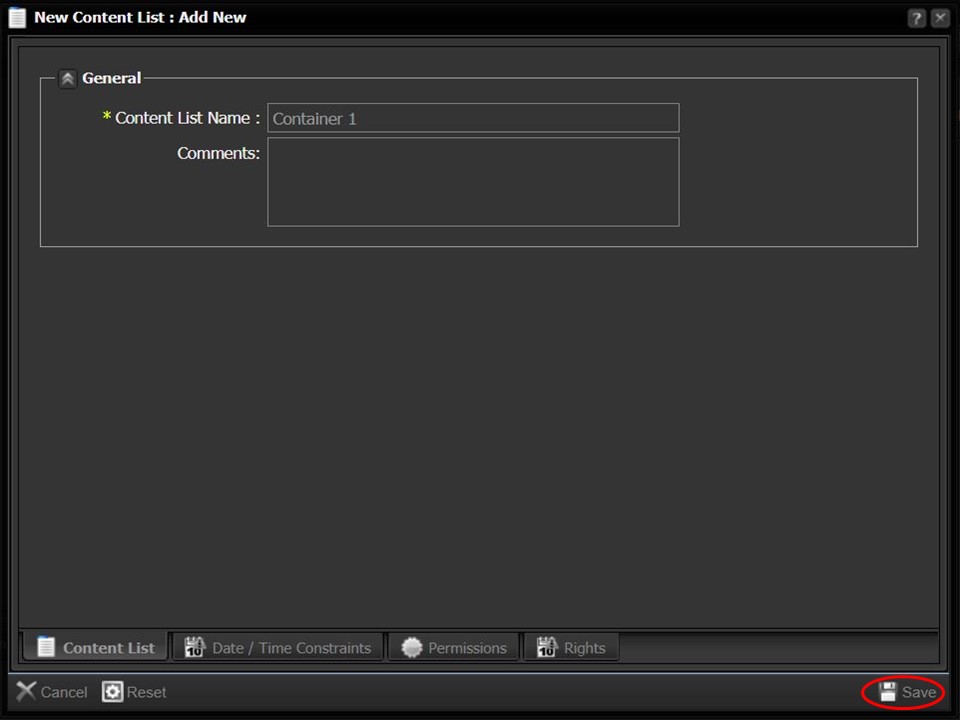
3. Name your content list/container & save it by clicking on the Save button in the bottom right corner of the window. The Content List/Container will appear in your clipboard automatically.
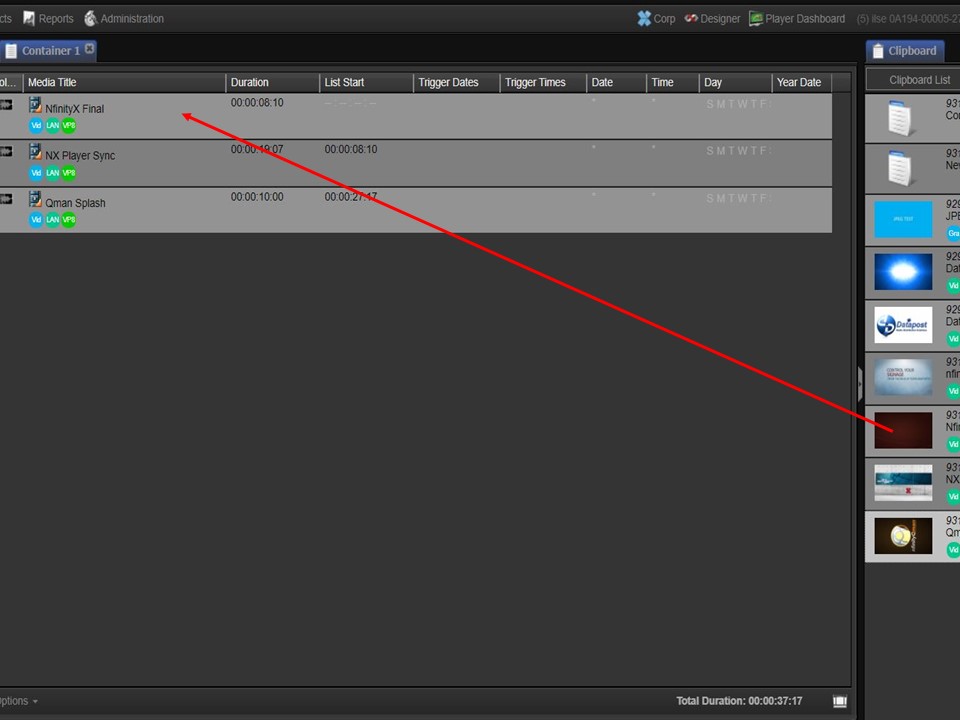
4. Drag and drop the content that you want to include in your container from your clipboard into the content list that you have just created.
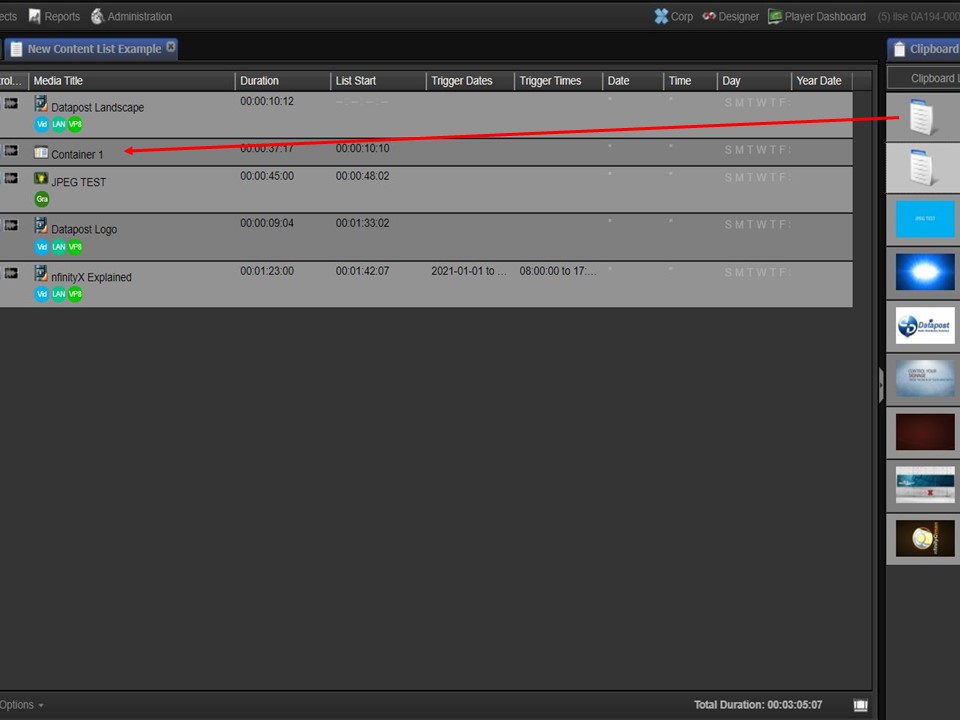
5. Open the content list, that you want to add the container to, by double-clicking on it. Drag the container from your clipboard into the relevant content list.
3. Use a strict container mode
The container or saved query must be set to a strict container mode for the content to play as intended.
Container modes explained
What is a Container Mode?
A Container Mode is an instruction the system gives the content in a container, to behave in a certain way, when the content list plays.
Types of Container Modes used when strict matching content
Consecutive – Best fit on Attributes
This container mode is used when scheduling within a network structure. The system will play the first piece of media in the container, with the best fit in terms of its media characteristics matching the player attributes. It will continue to select the next in sequence, with the best fit, to play every time it reaches the container.
Consecutive – Strict Match on Attributes
This container mode is used when scheduling within a network structure. The system will play the first piece of media in the container that strict matches its media characteristics to the player attributes and will move down the list and continue doing so every time it reaches the container.
Random – Best fit on Attributes
This container mode is used when scheduling within a network structure. The system will randomly pick a piece of media from the container, with the best fit in terms of its media characteristics matching the player attributes, and continue doing so every time it reaches the container.
Random – Strict Match on Attributes
This container mode is used when scheduling within a network structure. The system will randomly pick a piece of media from the container that strict matches its media characteristics to the player attributes, to play every time it reaches the container.
Step-by-step guide on how to add a container mode
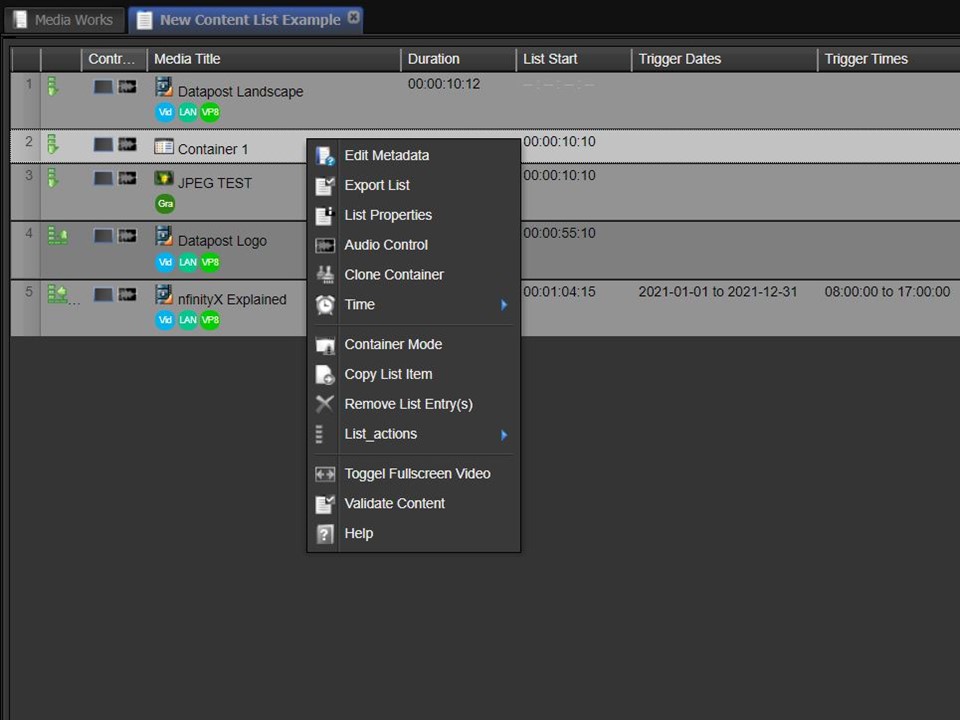
1. Right-click on the container that you want to add the container mode to. A menu will appear.
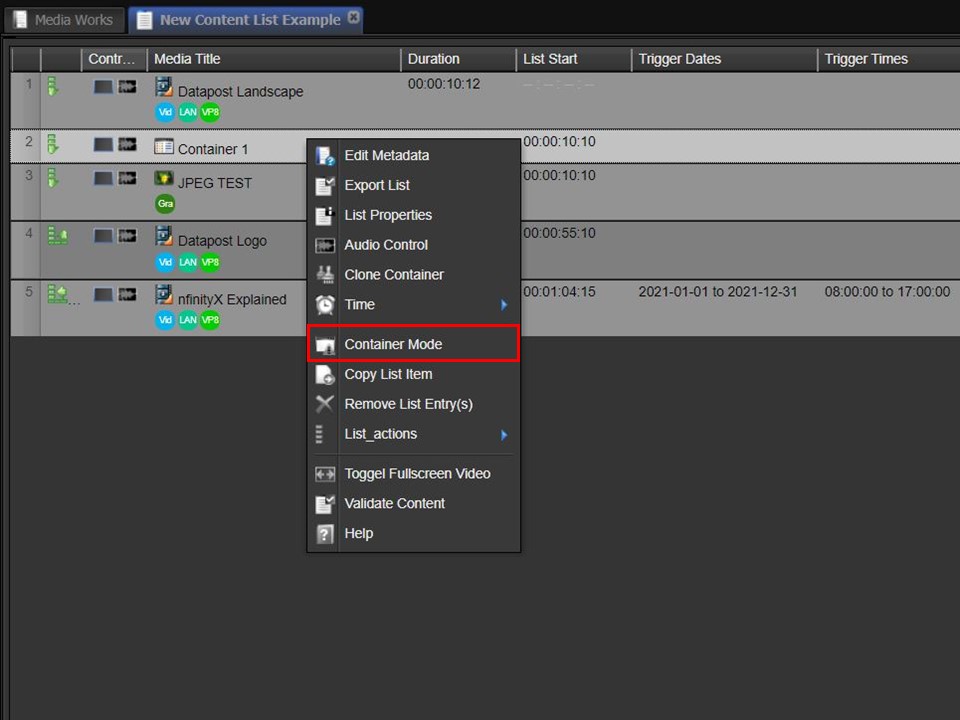
2. Select Container Mode. The Container Method window will open.
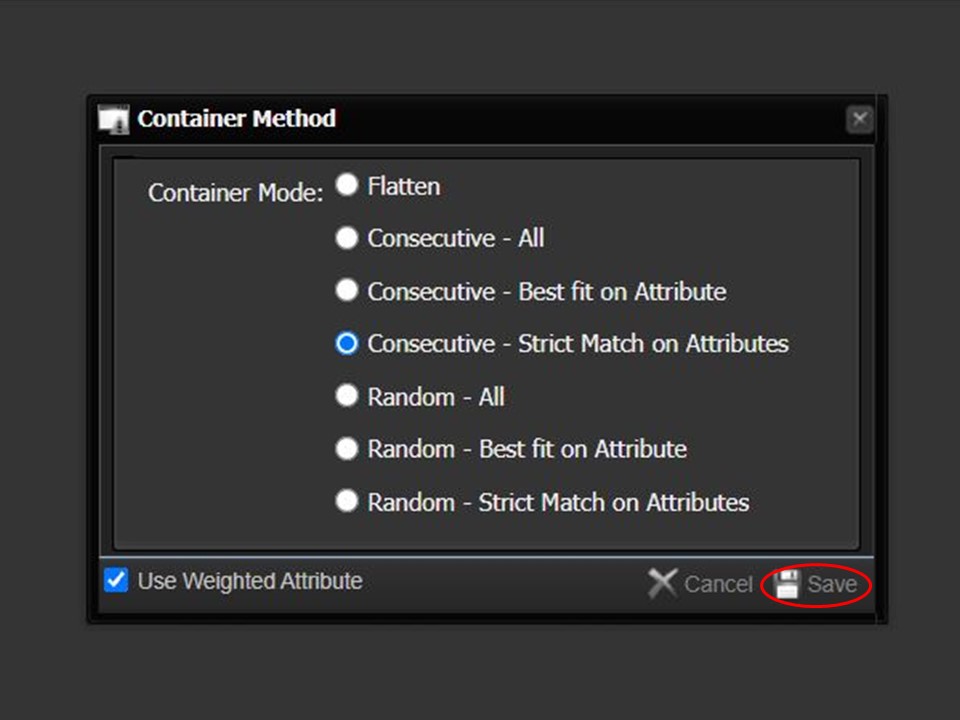
3. Click on the dot next to the container mode that you want to use. Remember to save your selection by clicking on the Save button in the bottom right corner of the window.
Please note that when you drag a container/saved query into a content list, the system automatically assigns the Flatten Container Mode.
3 crucial things to remember
1. The content must be uploaded & logged using the library object created by an admin user, intended for this purpose, so that the relevant metadata fields are available to complete when logging.
The metadata fields, relevant to the execution of a specific scheduling instruction, have to be completed correctly for the required outcome
to be achieved.
2. The content must be scheduled in a container or saved query, which must then be dragged & dropped into the relevant playlist(s) & published.
3. The container or saved query must be set to a strict container mode for the content to play as intended.
