Interactive Channel/Screen Set-up & Scheduling
BackHow to create a new screen/player channel
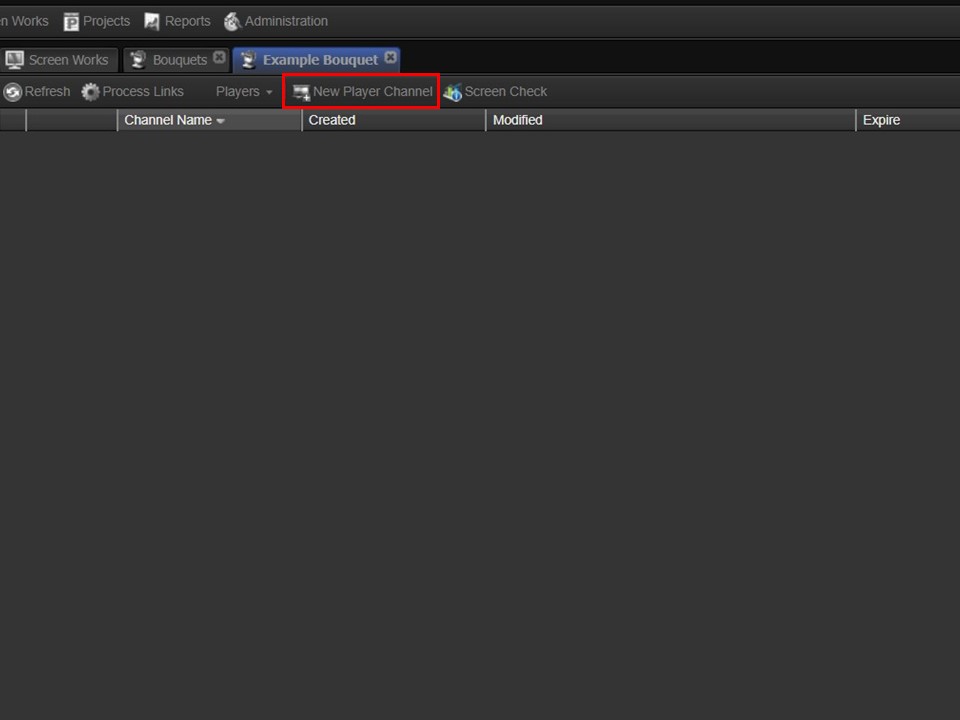
1. Navigate to the bouquet (Screen Works module) that you want to add the screen to & open it. Click on the New Player Channel button to add a new screen.
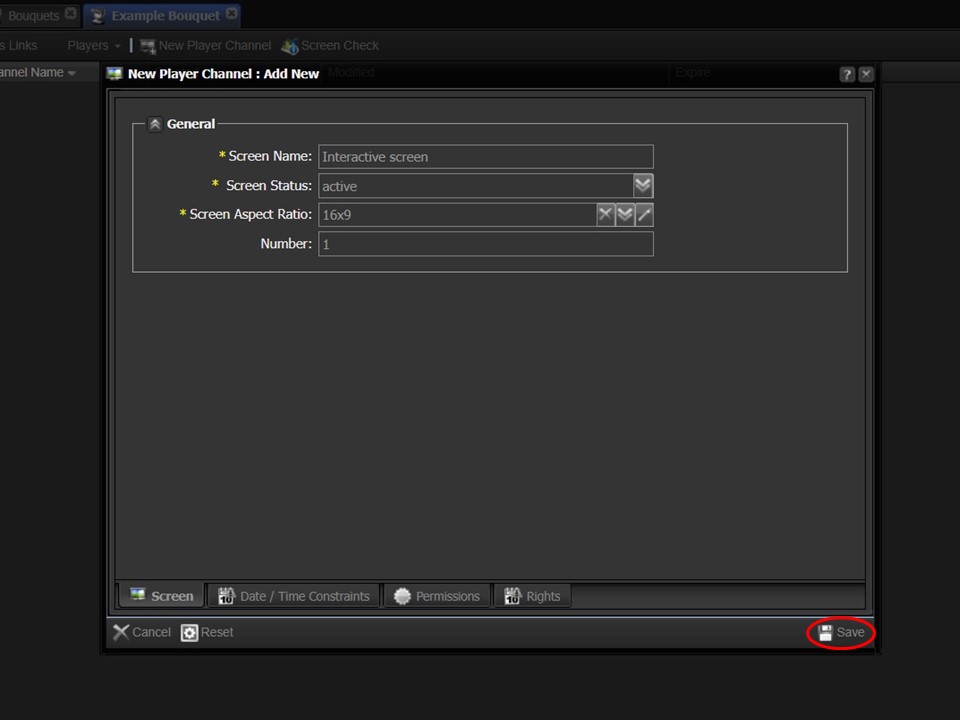
2. Name your screen, select active as the screen status & the relevant aspect ratio from the drop-down. Click on the Save button in the bottom right corner of the window.
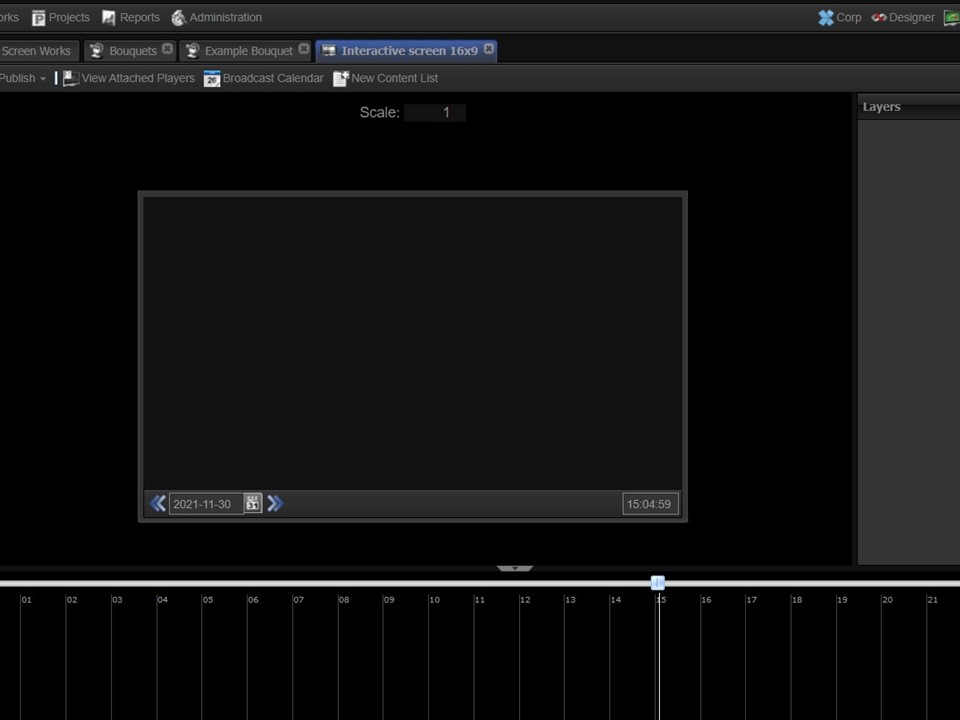
3. The screen will open in the middle panel.
How to assign a fullscreen layout to the screen
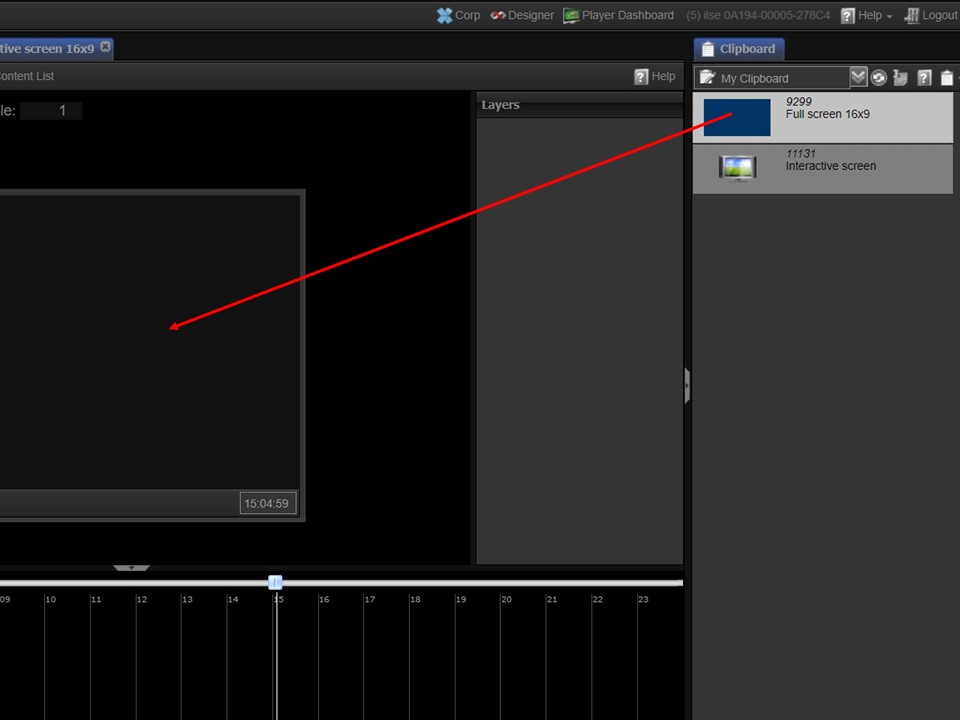
1. Drag a fullscreen layout onto the screen. A window will appear.
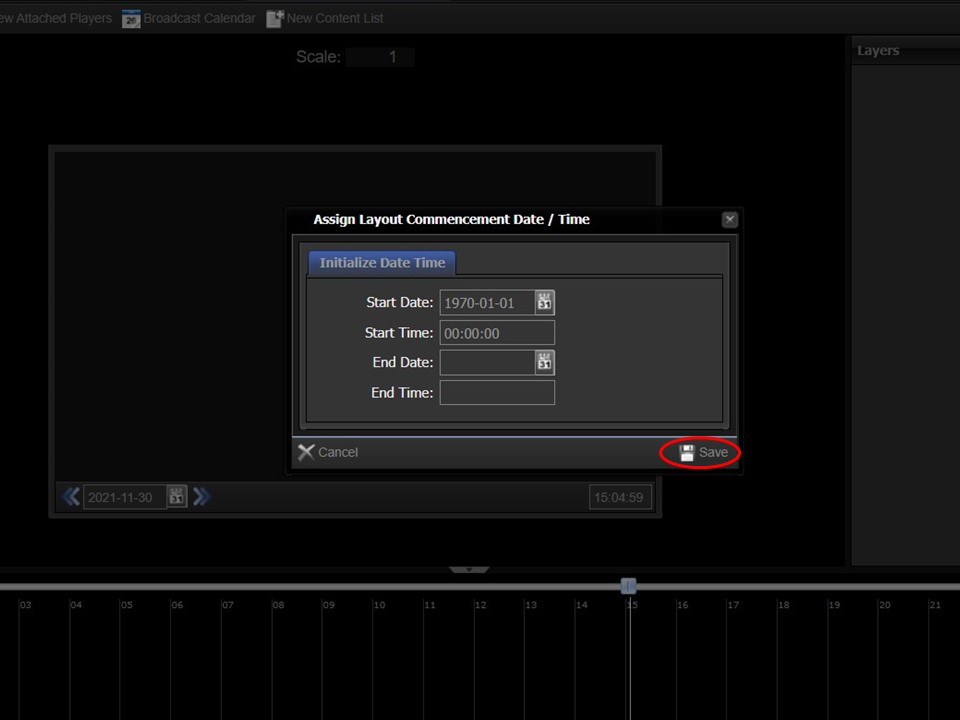
2. Click on Save in the bottom right corner of the window.
How to rename the layer to interactive_child
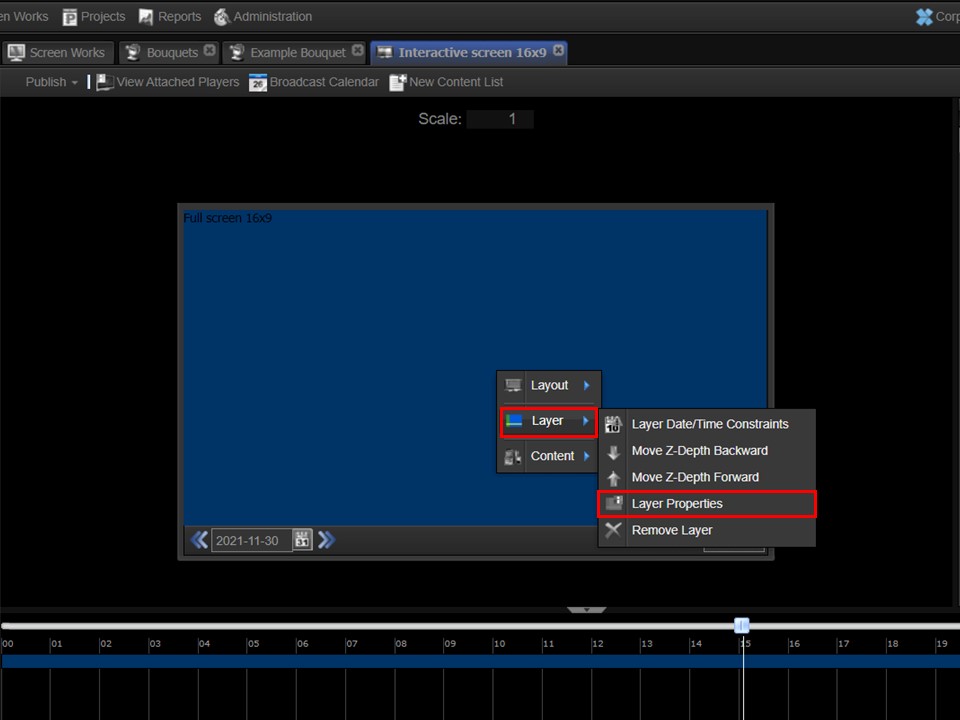
1. Right-click on the full screen layout, a menu will appear. Hover over Layer, move across to the right & click on Layer Properties.
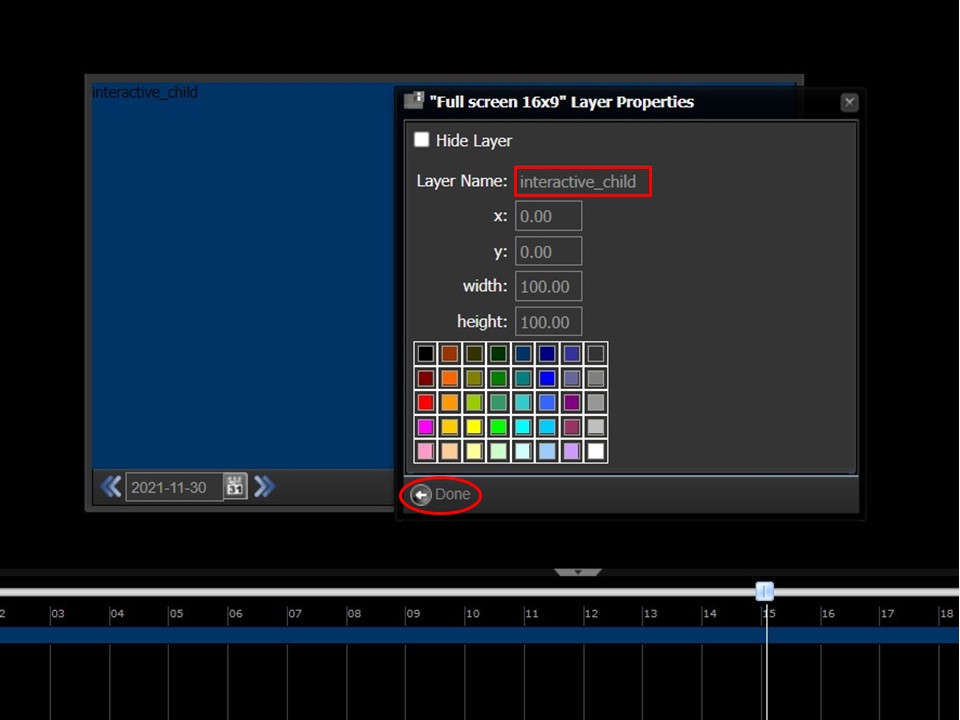
2. Rename the layer to interactive_child and click on Done in the bottom left corner of the window.
How to create a content list for the looping content
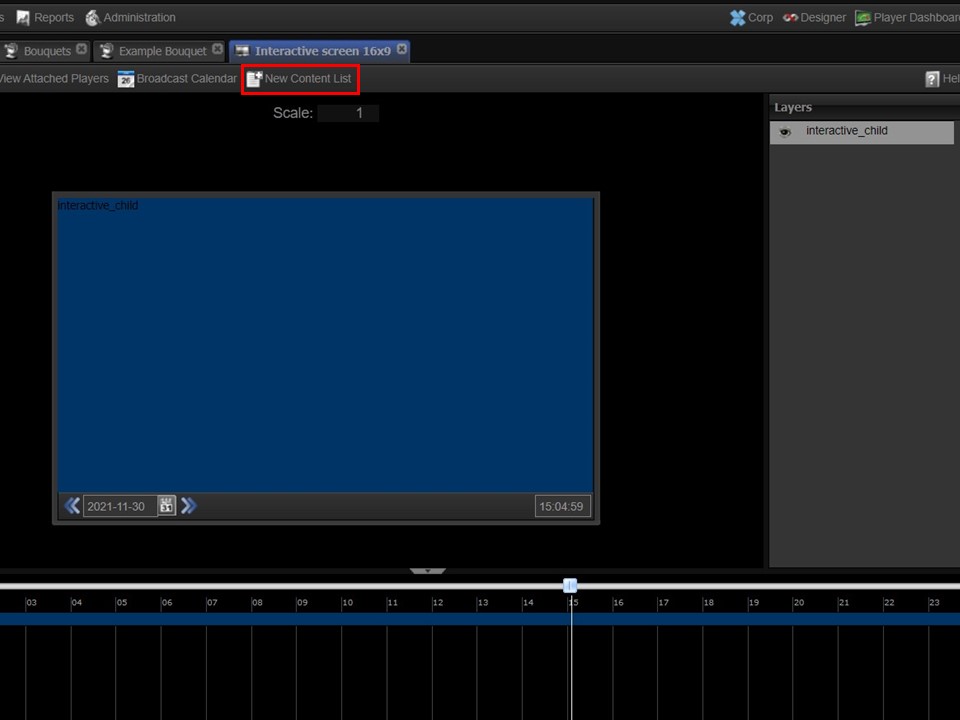
1. Click on the +New Content List button to create the content list that will contain the looping content & that will be attached to the interactive_child layer. A window will open.
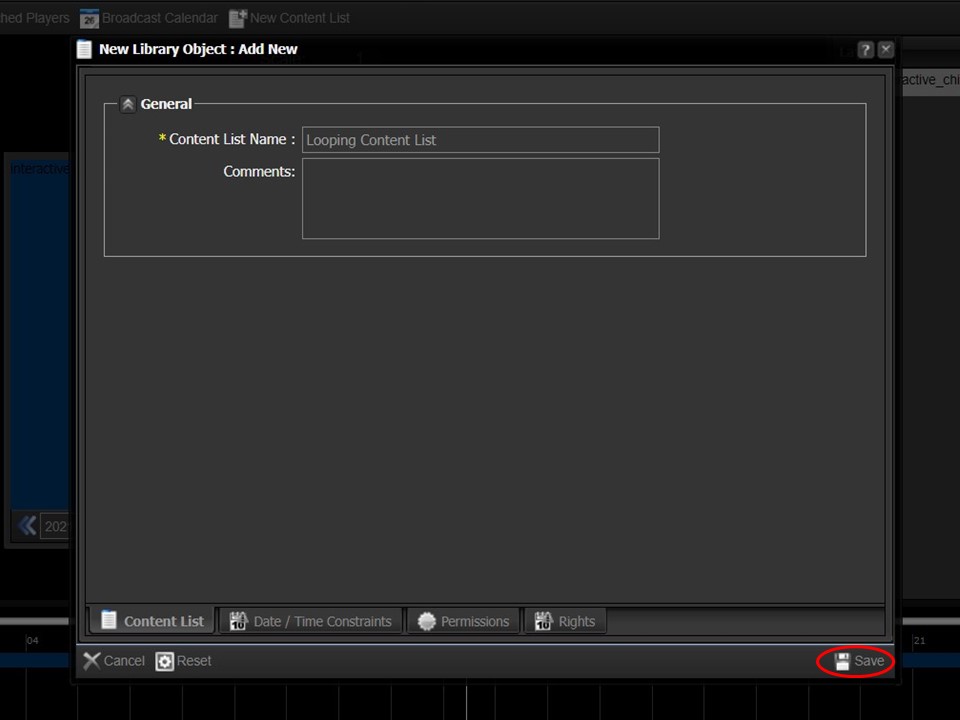
2. Name the content list & click on Save in the bottom right corner of the window. The content list will open in the middle panel & appear in your clipboard.
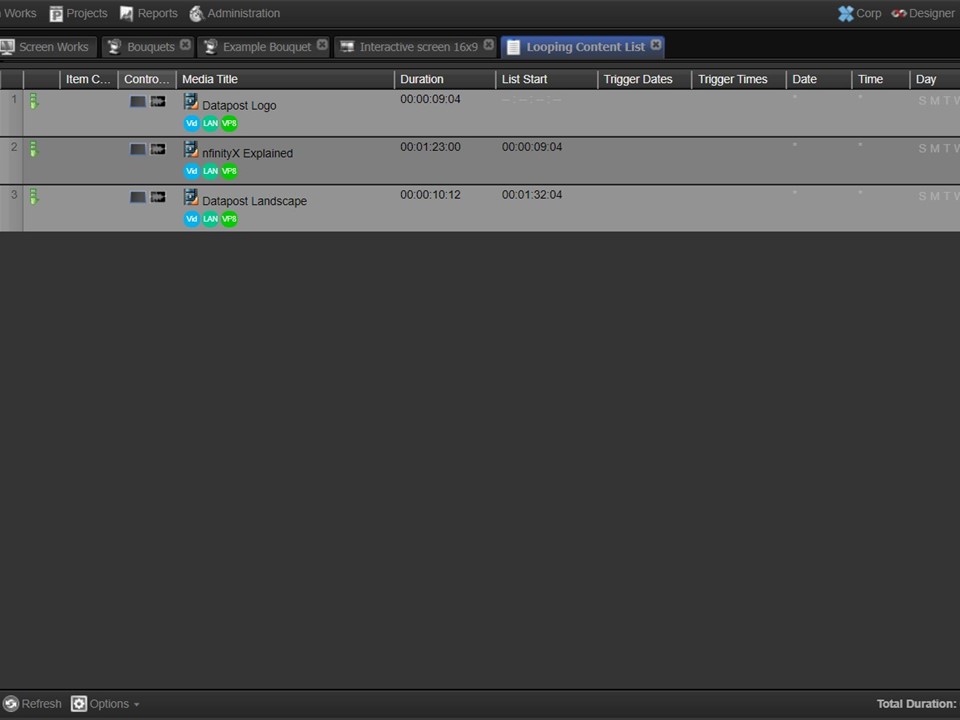
3. Drag & drop the content from your clipboard into the content list, in the sequence that you want it to play.
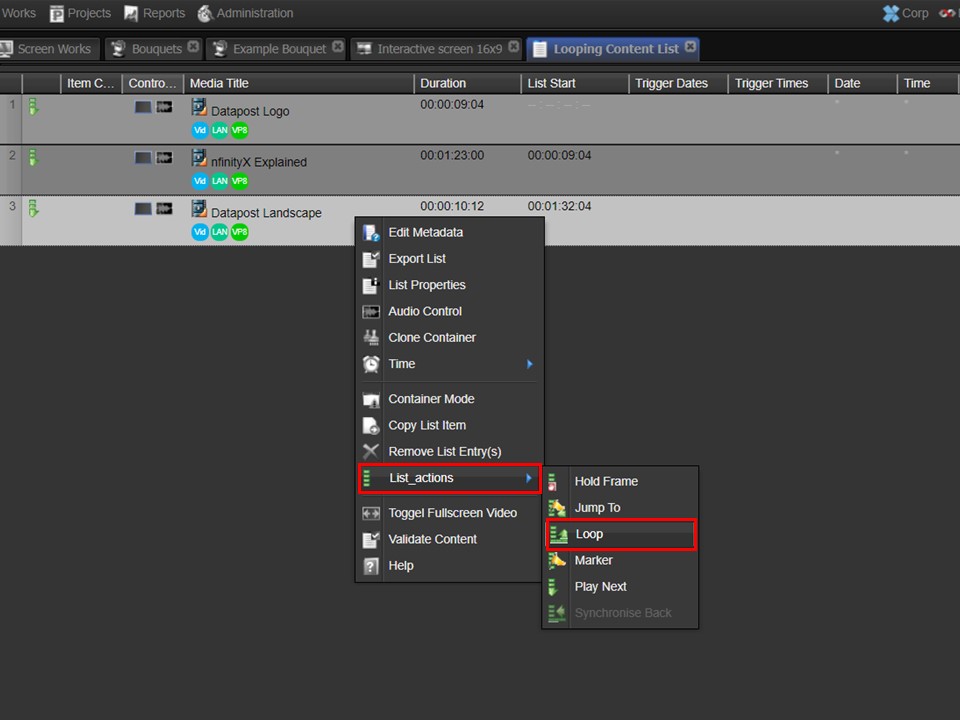
4. Add a loop list action to the last item in the content list by right-clicking on it, hovering over List_actions, moving to the right & clicking on Loop.
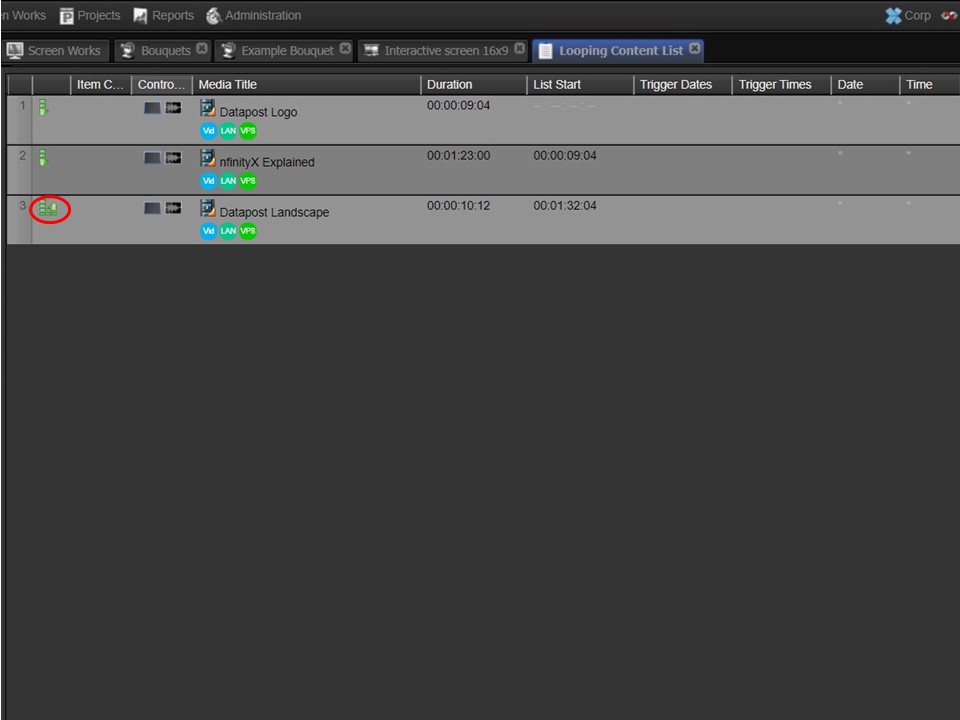
5. The icon will update in the content list.
How to assign the content list to the interactive_child layer
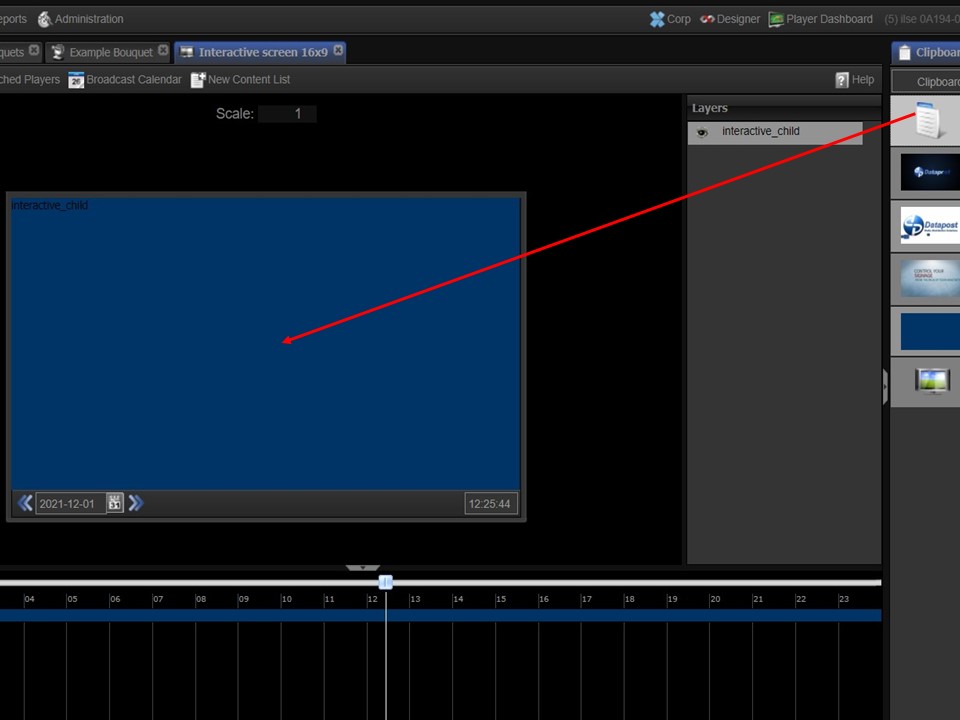
1. Close the content list in the middle panel by clicking on the cross in the right corner of the tab. Drag the content list from your clipboard onto the interactive_child layer.
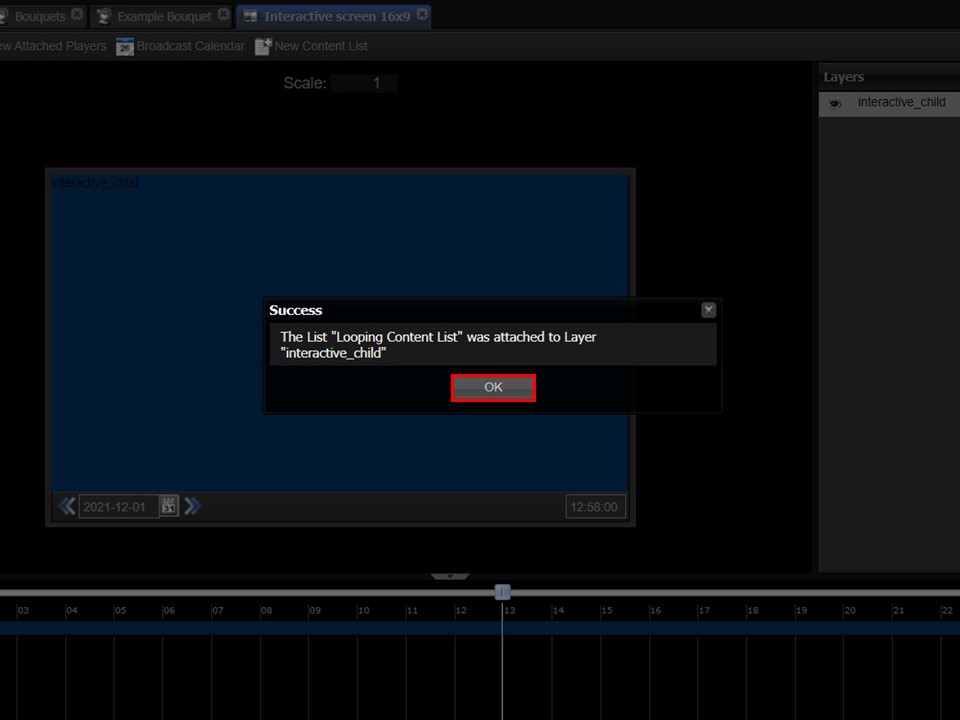
2. A message box will appear, confirming the success of the content list being attached to the layer. Click on OK.
How to create the interactive layer
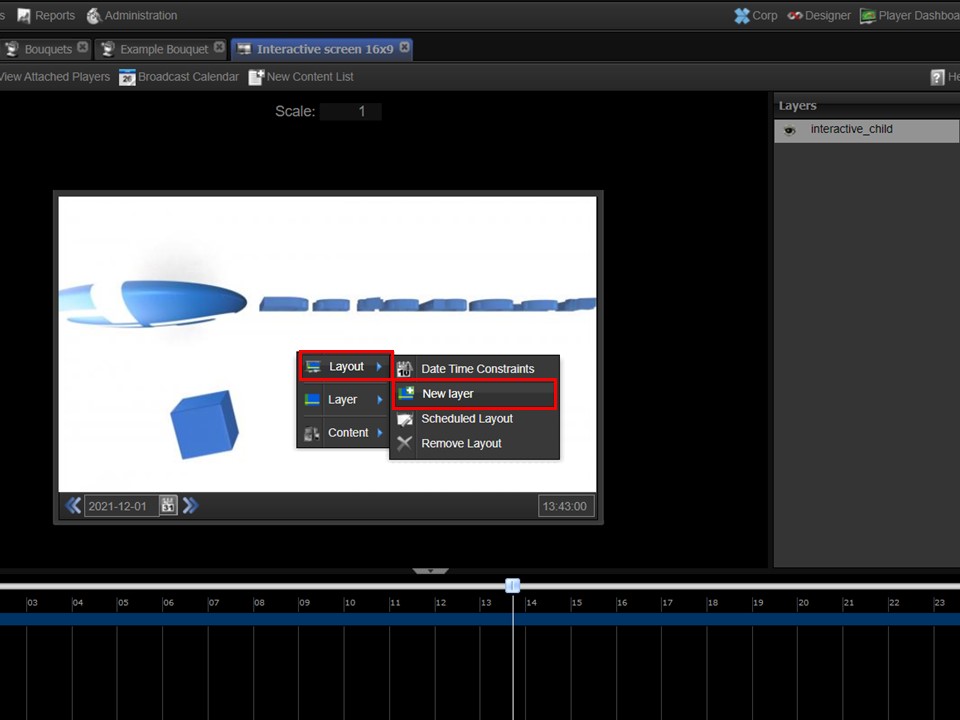
1. Right-click on the screen, a menu will appear. Hover over Layout, move across to the right & click on New Layer. A grey block, called New Layer, will appear on the screen.
Note: you will only see a frame of the content on the screen if you drag the toggle on the timeline to the right.
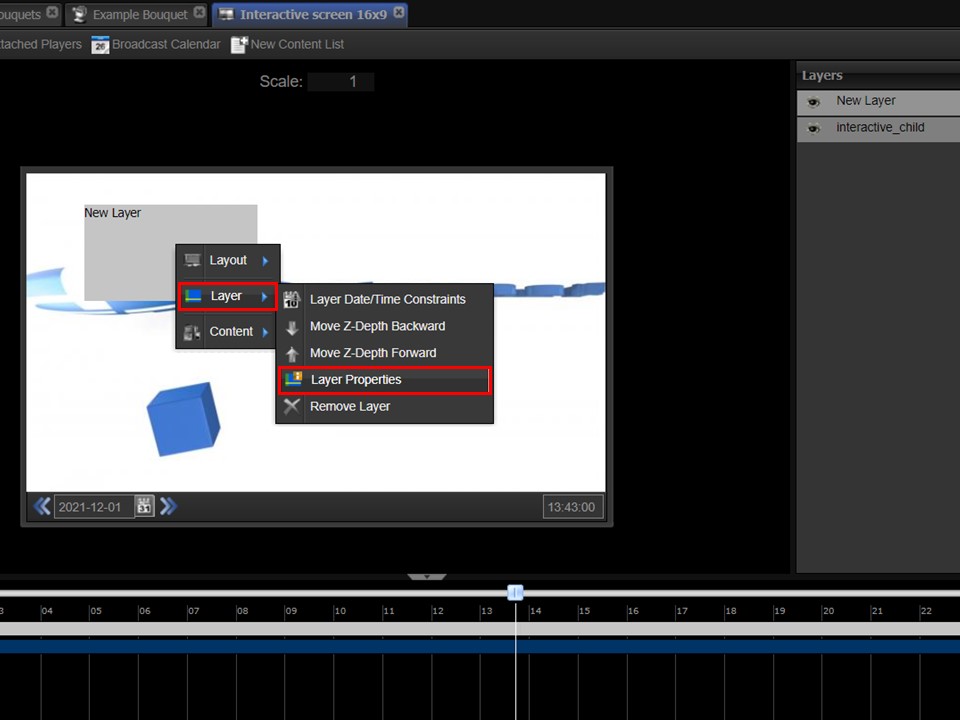
2. Right-click on the grey block, a menu will appear. Hover over Layer, move to the right & click on Layer Properties. A window will open.
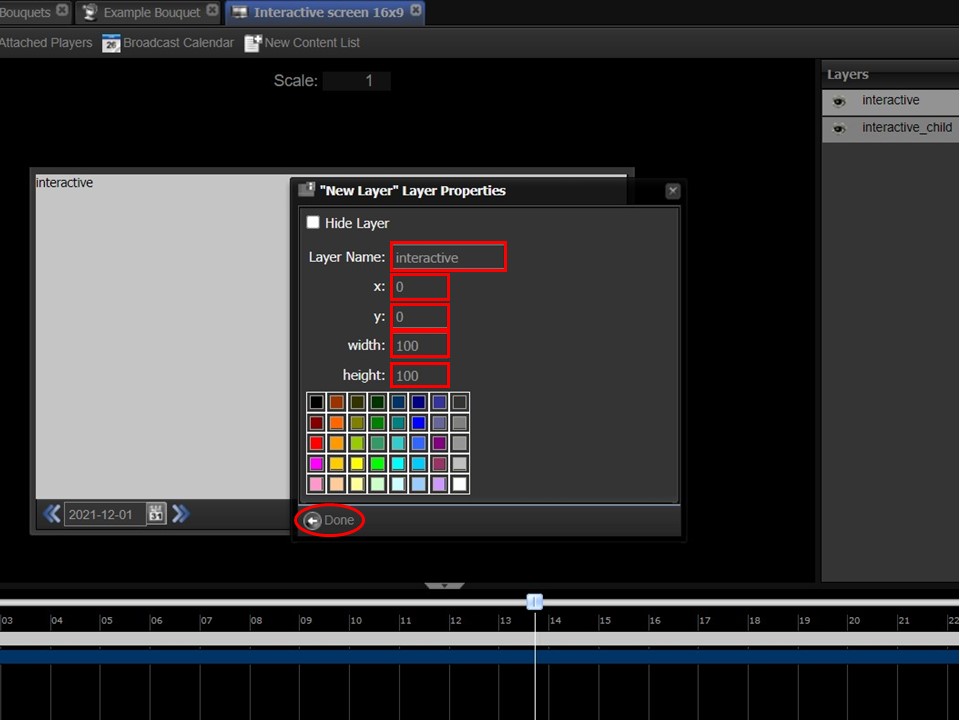
3. Rename the layer to interactive (it is crucial that it is all in lowercase). Change the x & y values to 0 and the width & height to 100. This will ensure that the XID interactive project displays full screen. Click on Done.
How to create a content list for the interactive layer
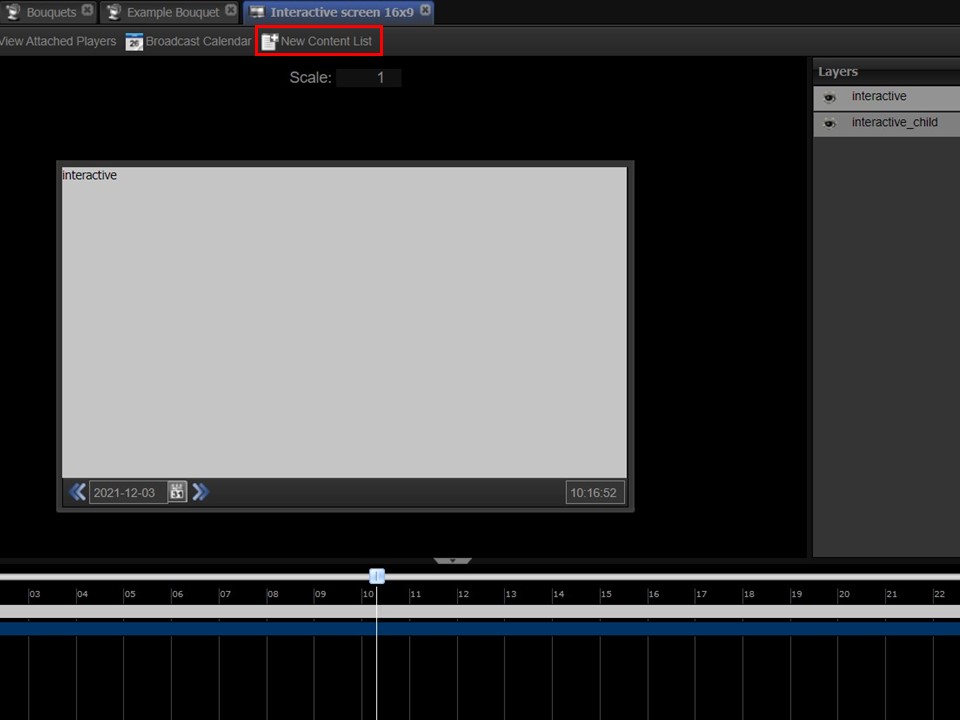
1. Click on the +New Content List. A window will open.
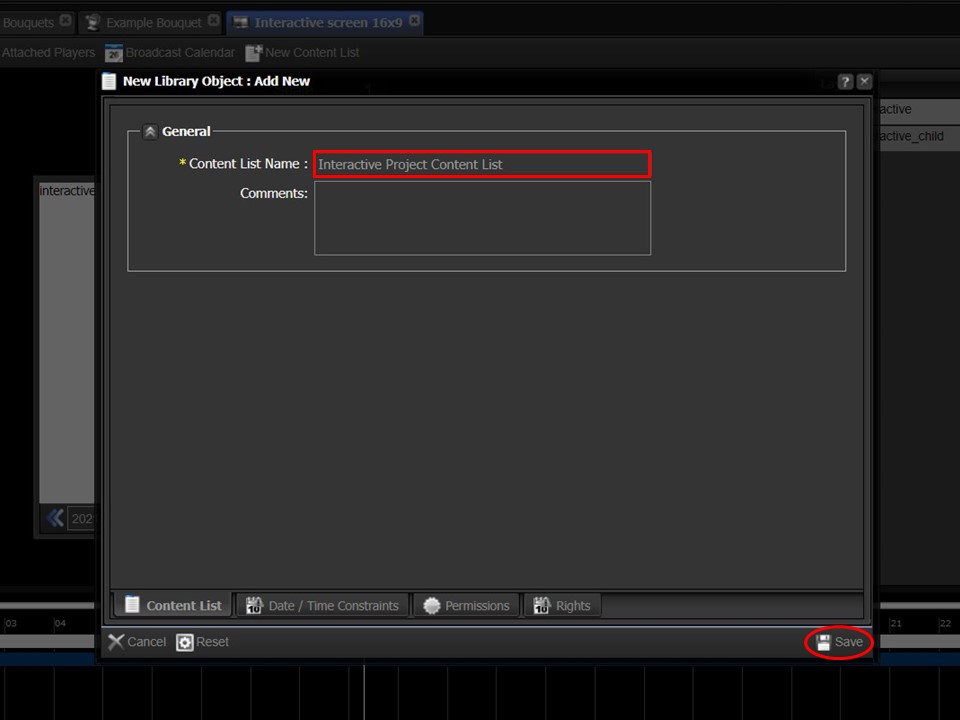
2. Name the content list that will contain the XID interactive project & will be attached to the interactive layer.
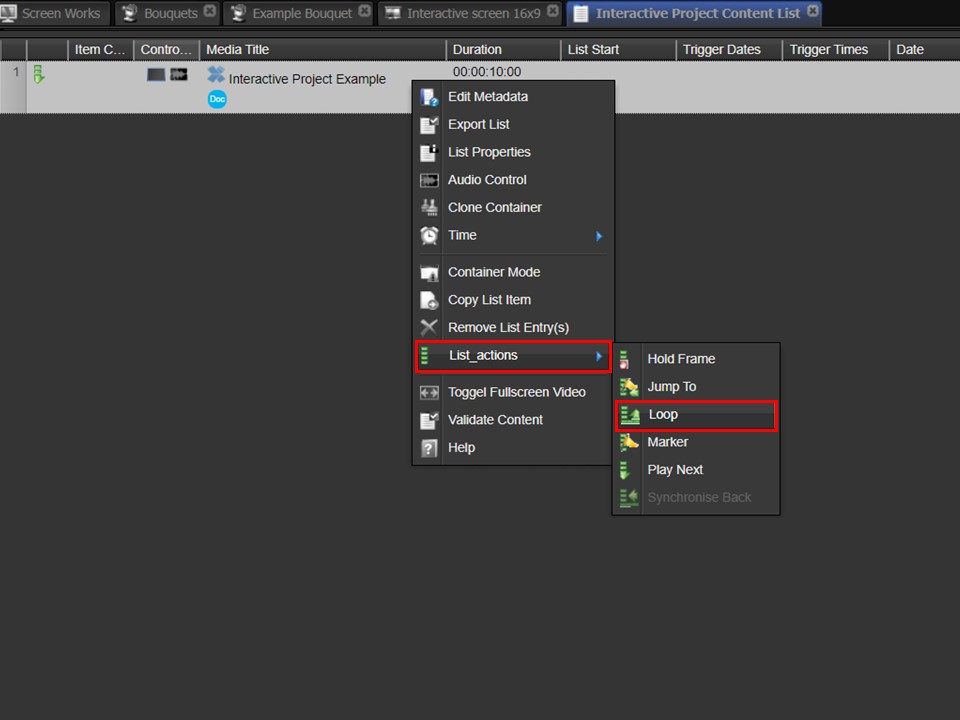
3. Drag & drop the XID interactive project from your clipboard into the content list. Right-click on the project, a menu will appear. Hover over List_actions, move to the right & select the Loop list action.
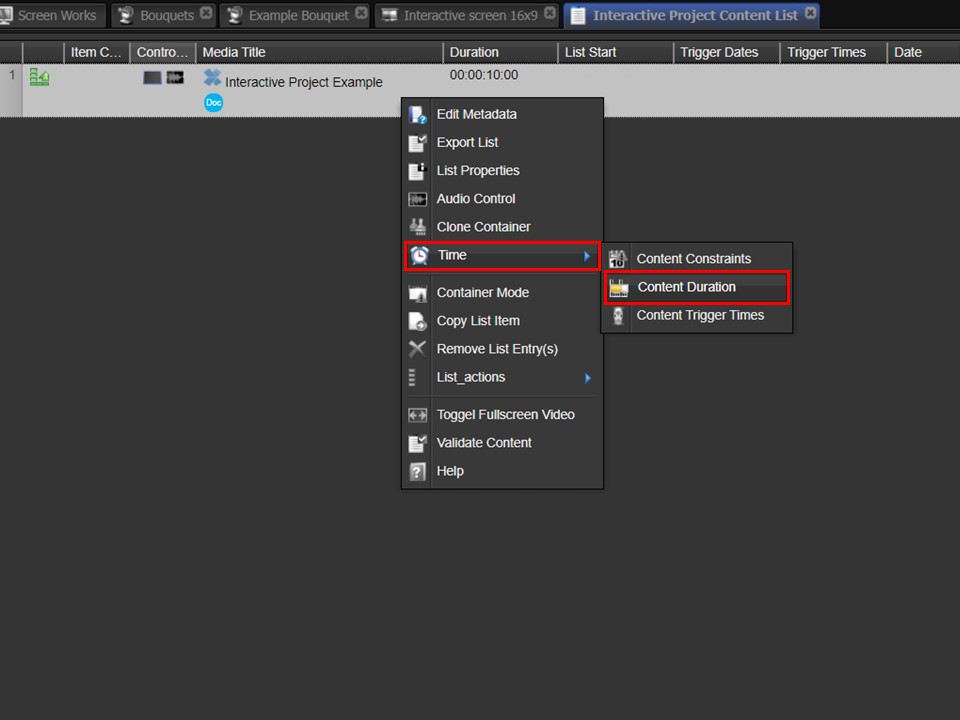
4. Right-click on the XID interactive project again, a menu will appear. Hover over Time, move to the right & click on Content Duration.
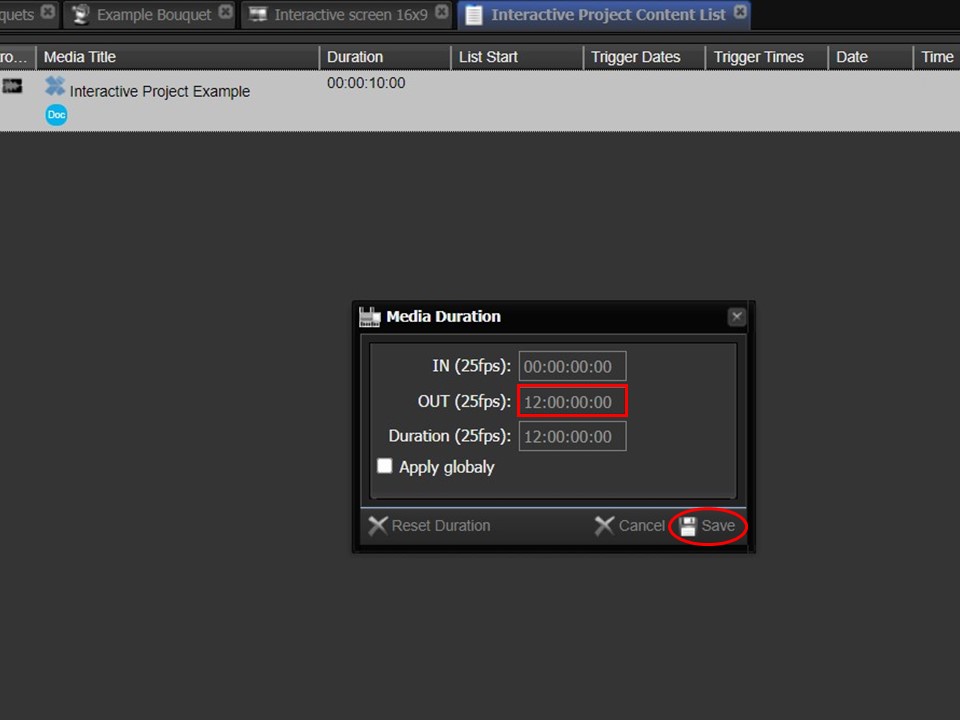
5. Change the duration from 10secs to 12hrs in the OUT box. Click on Save in the bottom right corner of the window. The XID interactive project will now refresh every 12hrs.
How to publish your interactive screen
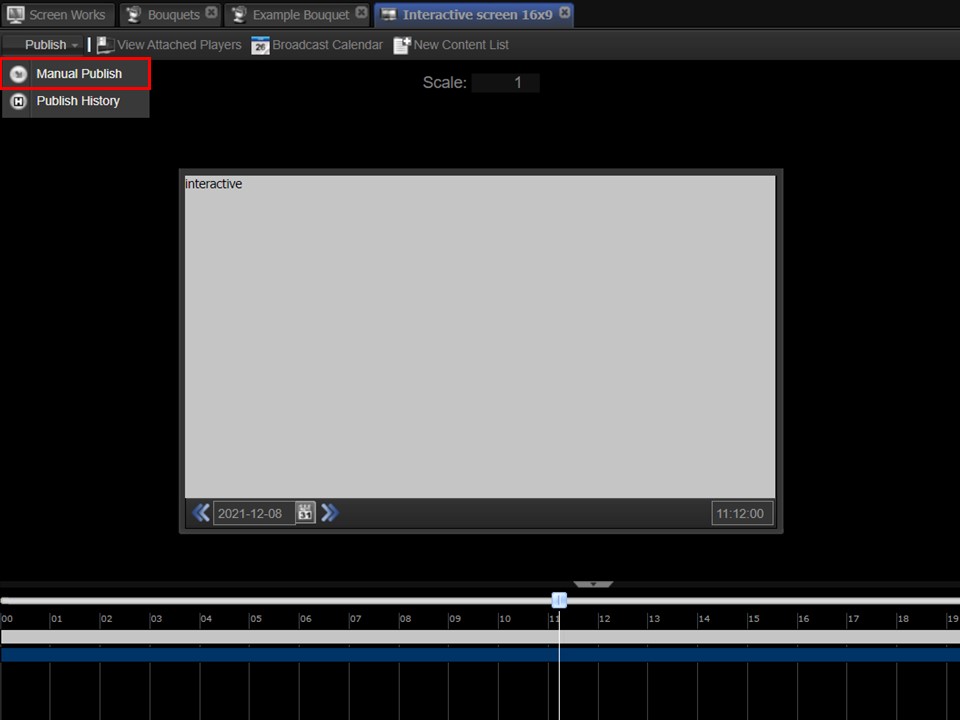
1. Click on the Publish drop-down followed by Manual Publish.
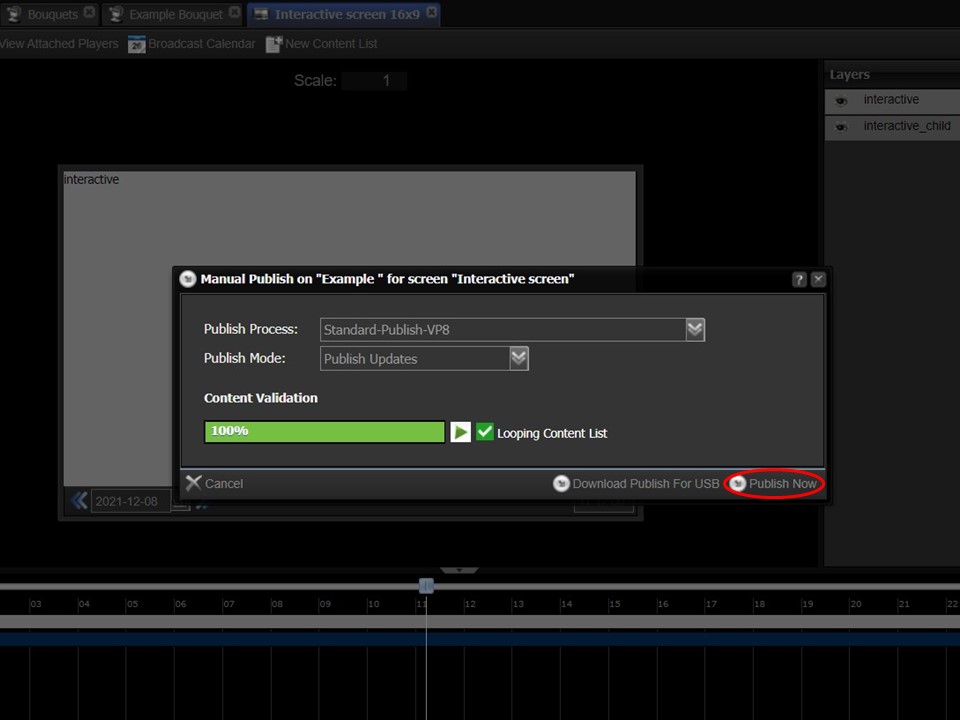
2. Select the publish process & publish mode from the respective drop-downs. Click on the content validation arrow, followed by the Publish Now button, once the content validation process has run.
Ensure that the publish process is Standard-Publish-VP8.
Important Things to Remember
1. The layer that the list with the looping content is attached to, must be named interactive_child.
2. The content list with the looping content, must have a loop on the last item in the list.
3. The layer that the list with the XID interactive project is attached to, must be named interactive.
4. The content list containing the XID interactive project must have a loop on it and the XID interactive project must have a duration of 12:00:00:00 in the content list.
5. The publish process being used has to be Standard-Publish-VP8.
