System Groups
Clicking on the System Groups icon will take you to a view of the group ID’s, group names & group types. This is where you will go to create new groups.
Step-by-step guide on how to create a permissions group
Permission groups are created to give the users that are in the group access to all the bouquets, screens & content lists created and content uploaded by the members of the group.
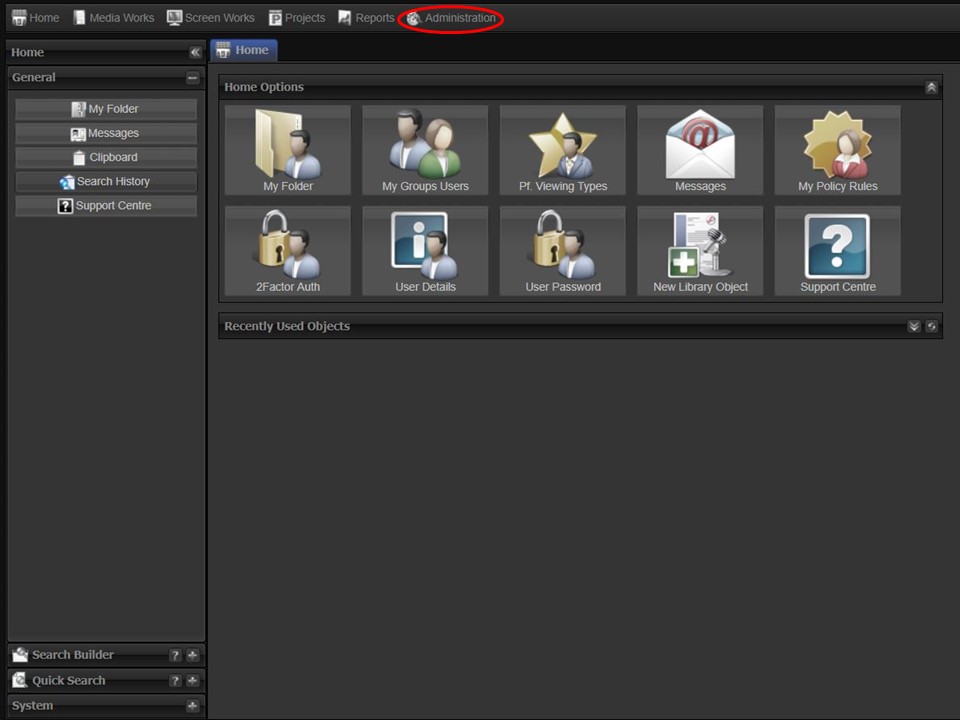
1. Click on the Administration tab in the top left corner of the screen.
2. Click on the System Groups icon. A view of the group ID’s, group names & group types will open.
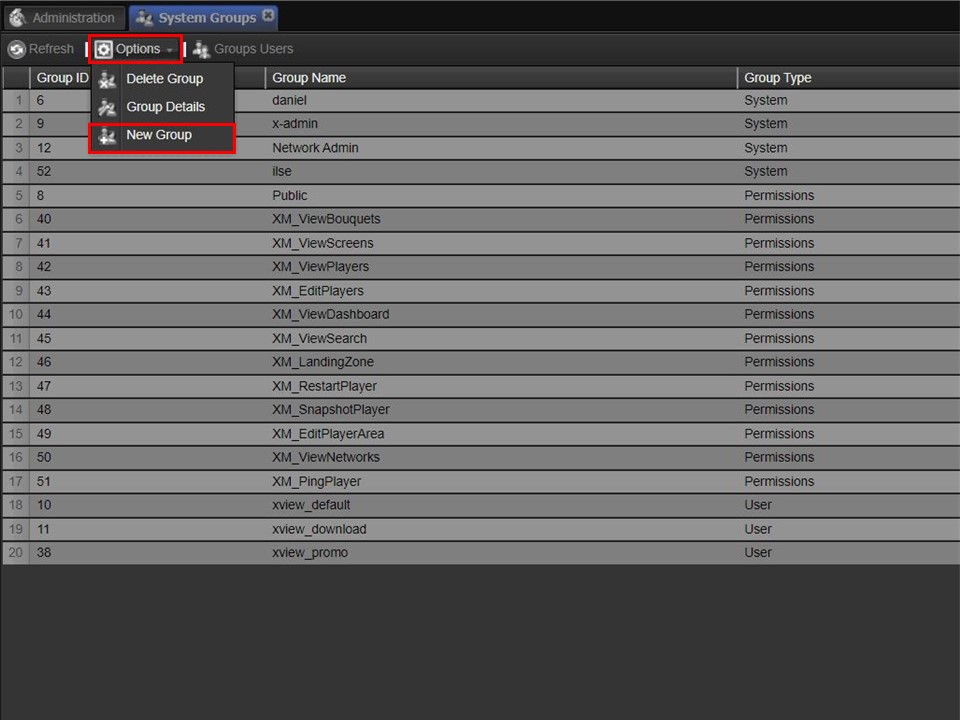
3. Click on the Options dropdown arrow, followed by New Group. A New Group tab will open.
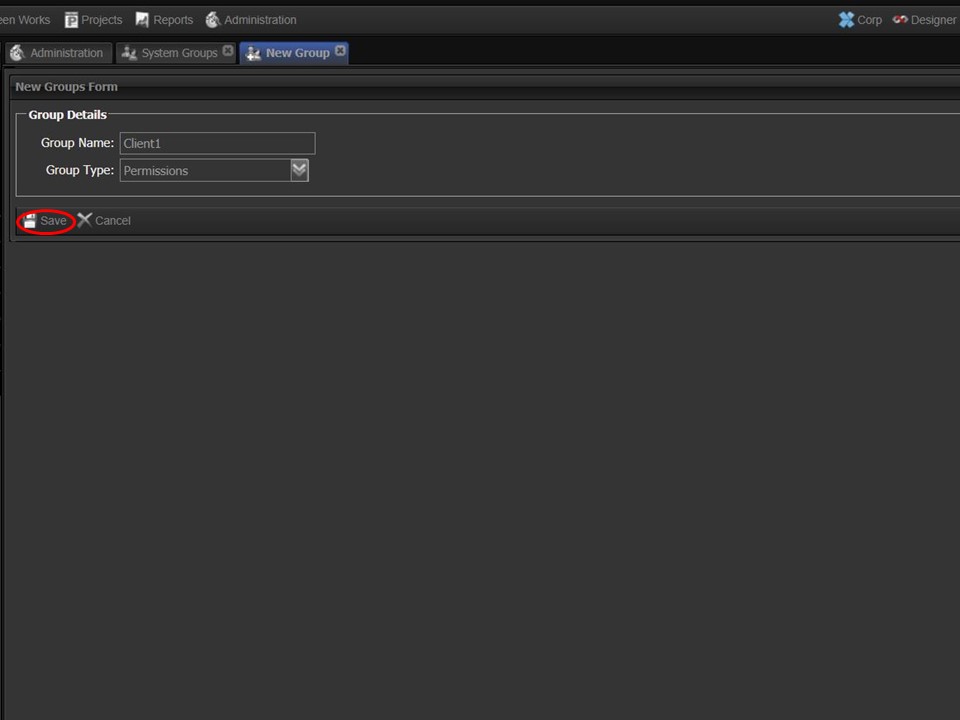
4. Type the name of your new group in the Group Name field. Select the Permissions group type from the drop-down & click on the Save button.
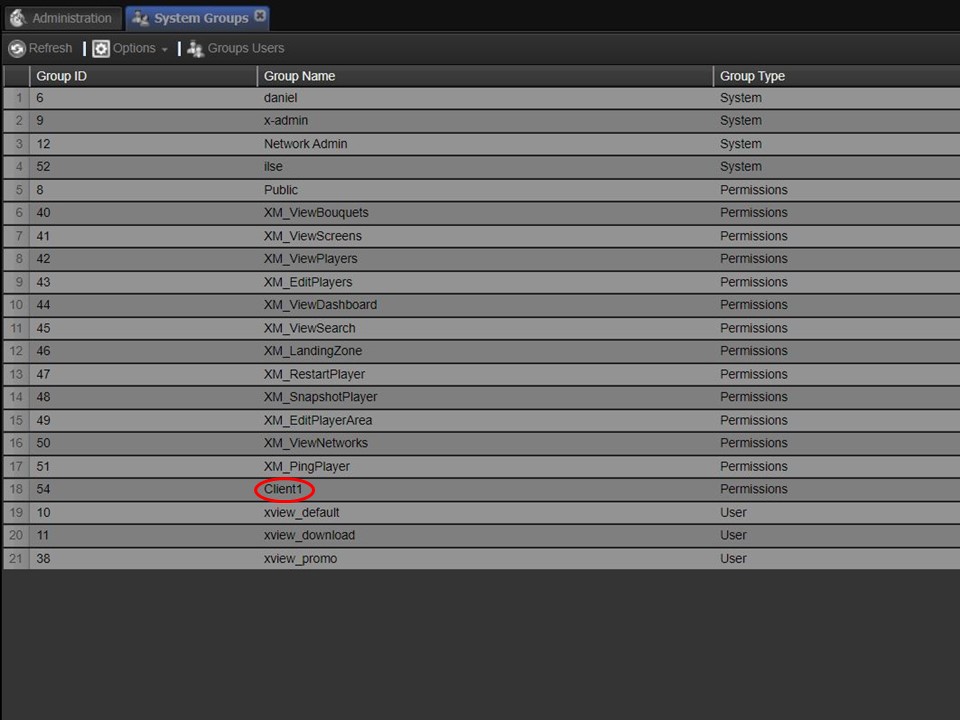
5. Click on the refresh button in the top left corner to see the permissions group that you have just created.
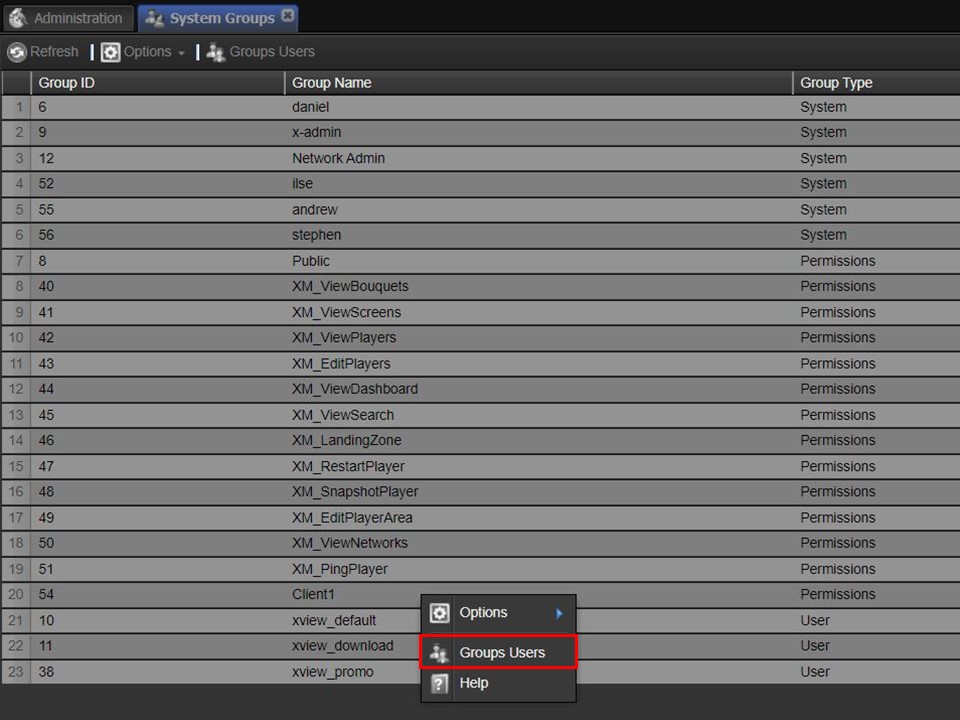
6. Right-click on the permissions group, a menu will appear. Click on Groups Users.
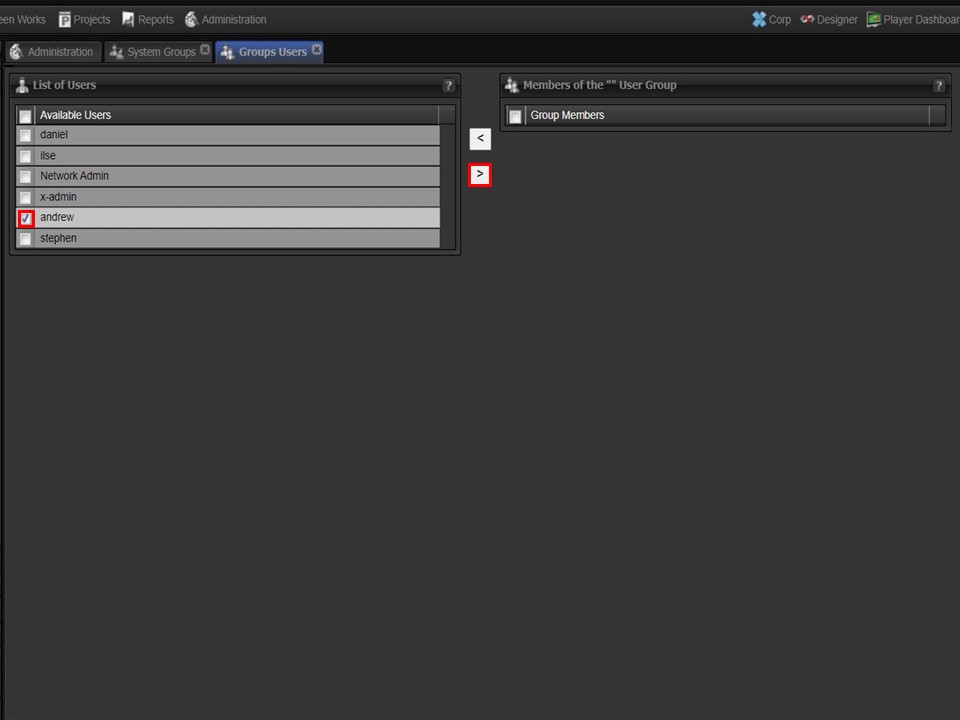
7. Add users to the permissions group by ticking the box next to the user’s name on the left and moving the user to the list on the right using the arrow in the middle.
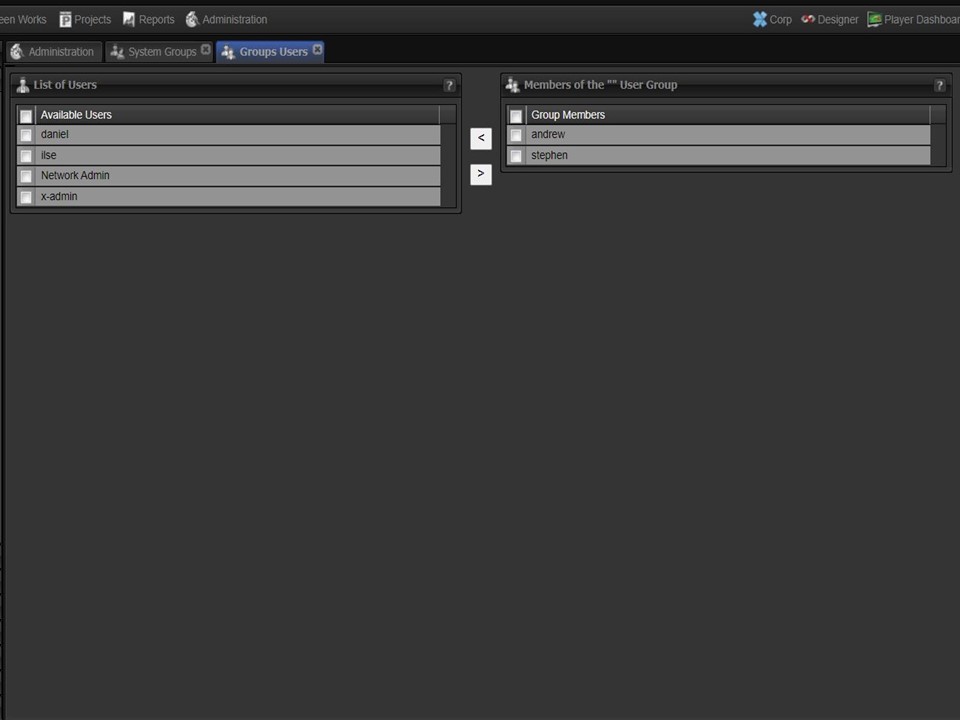
8. Move all the relevant users following the same process.
