How to upload & log media
Uploading & logging media can be done through the Home, Media Works & Projects modules.
Media specifications
File formats
The most commonly used file formats are WebM, MP4, MOV, WMV, AVI, PNG, JPEG, GIF & BMP.
PowerPoint presentations can only be used when exported as wmv’s or individual slides as jpegs.
Pdf documents can unfortunately not be used.
File sizes
File sizes must be kept as small as possible without affecting the quality, to best manage the space on target devices.
Media dimension limitations on SoC
Image and video dimensions must not exceed full HD (1920×1080). This limitation doesn’t apply for Linux.
Step-by-step guide on how to upload & log media

1a. Click on the Home tab in the top left corner of the screen. Alternatively, click on the Media Works tab or Projects tab (see below).

1b. Clicking on the Media Works tab or Projects tab.
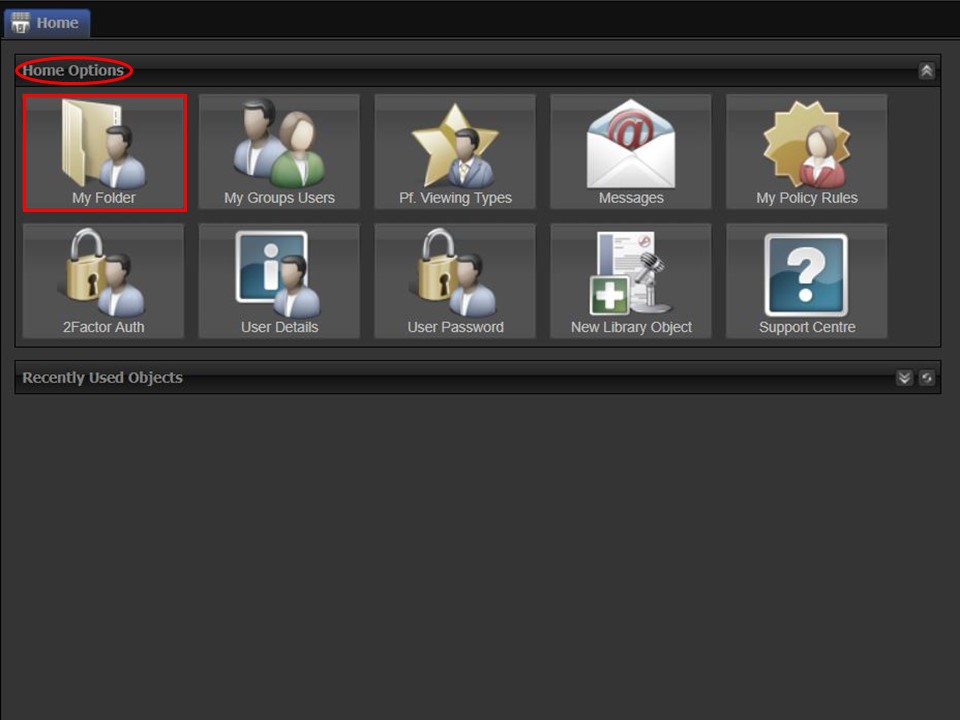
2a. Click on the My Folder icon under Home Options. The Users Folder window will open.
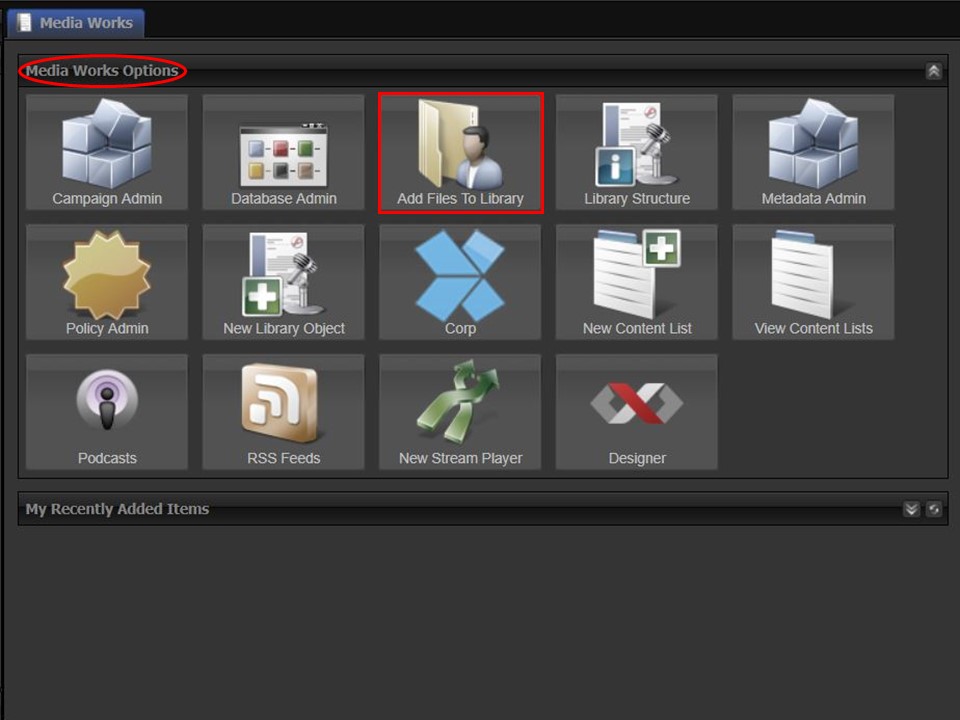
2b. If you have clicked on the Media Works tab, you will find the Add Files To Library icon under Media Works Options. Click on it. The Users Folder window will open.
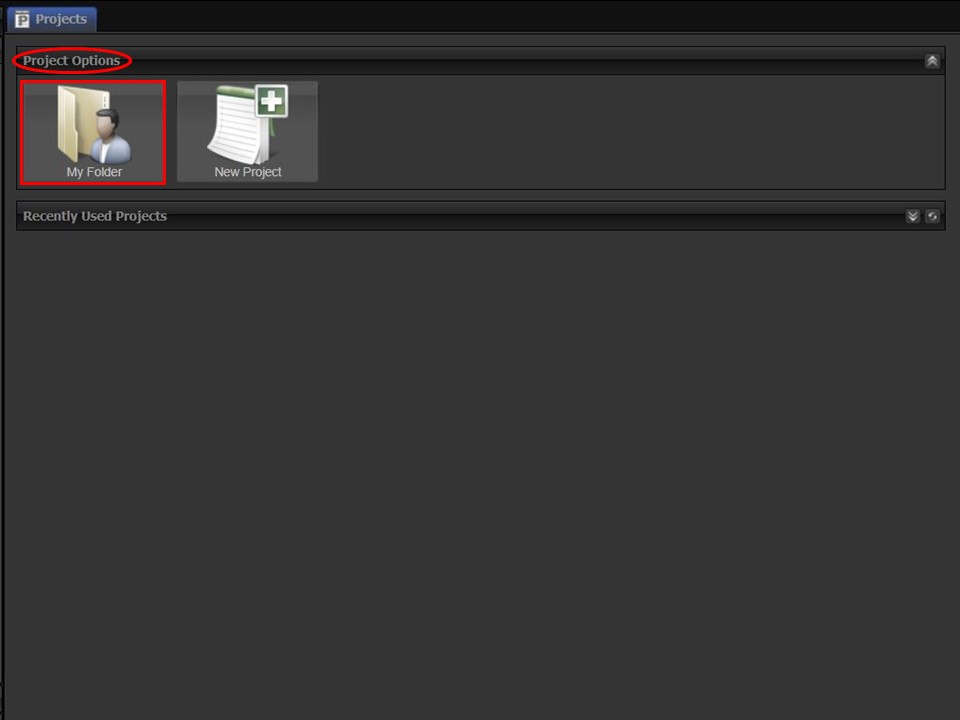
2c. If you have clicked on the Projects tab, you will find the My Folder icon under Project Options. The Users Folder window will open.
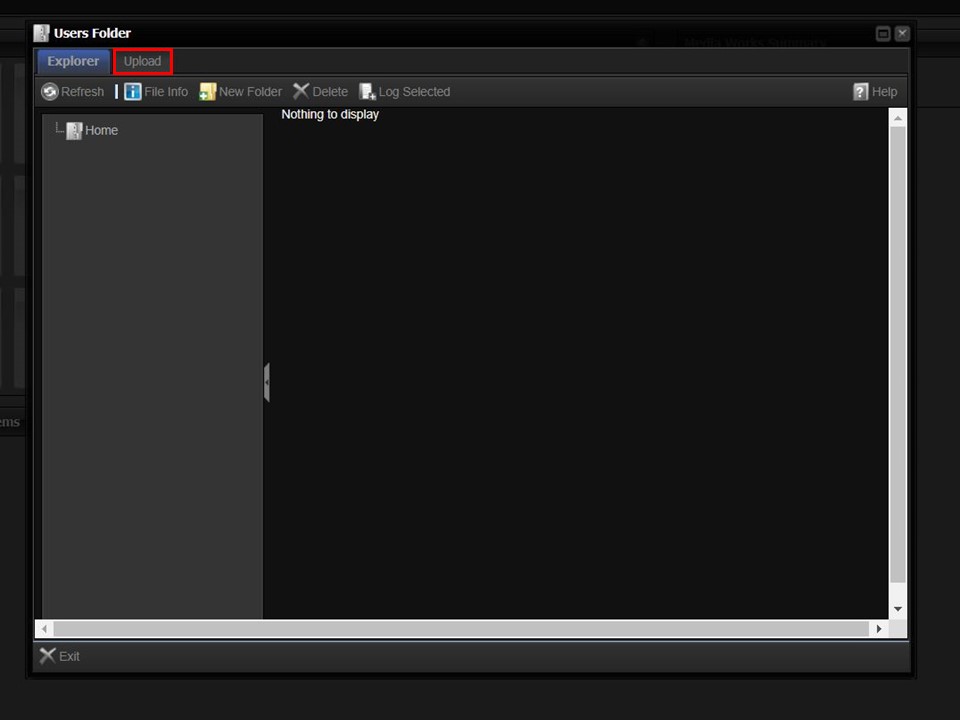
3. Click on the Upload button in the top left corner of the window. The upload bar will appear.
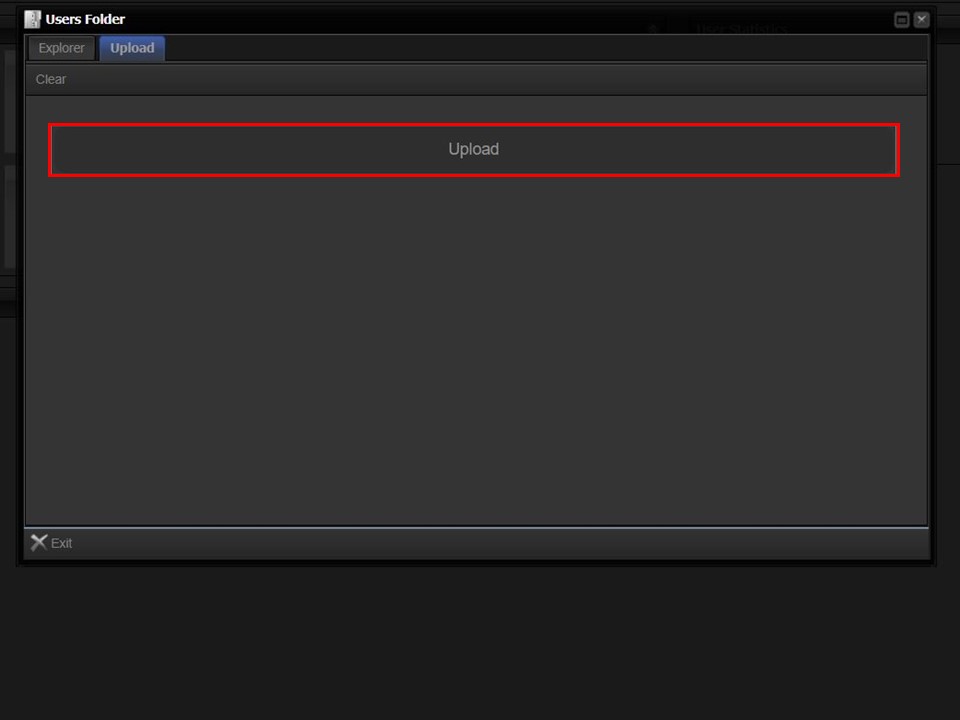
4. Click on the Upload bar to browse for the media that you want to upload.

5. Double-click on the media. A loading progress bar will appear and show the progress of your upload by turning green
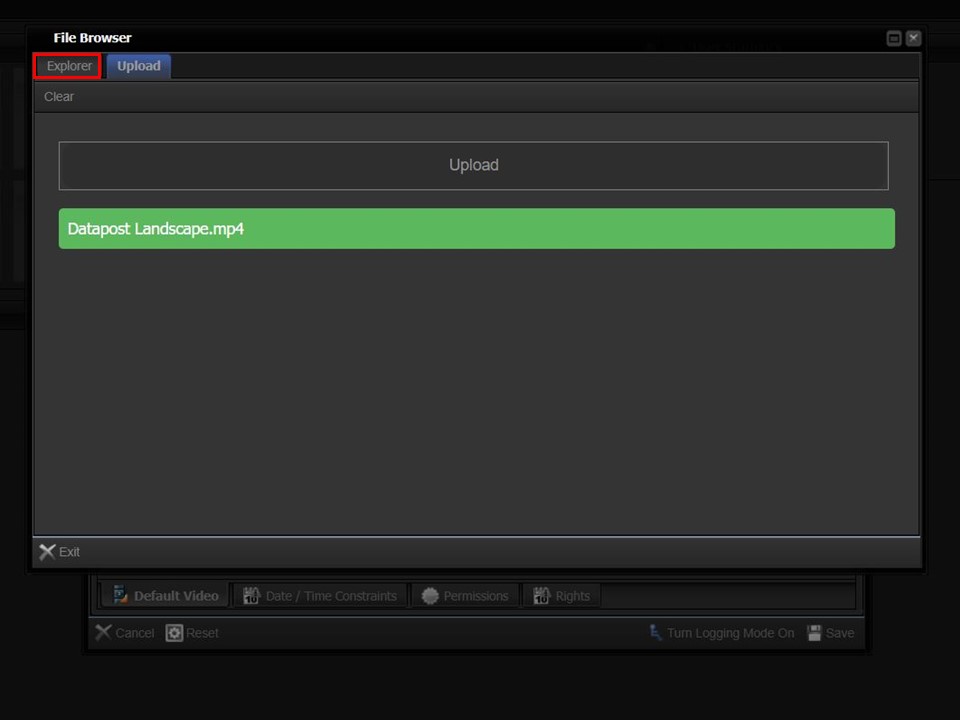
6. Click on the Explorer tab, once the progress bar is completely green. The new content that you uploaded will appear in your folder.
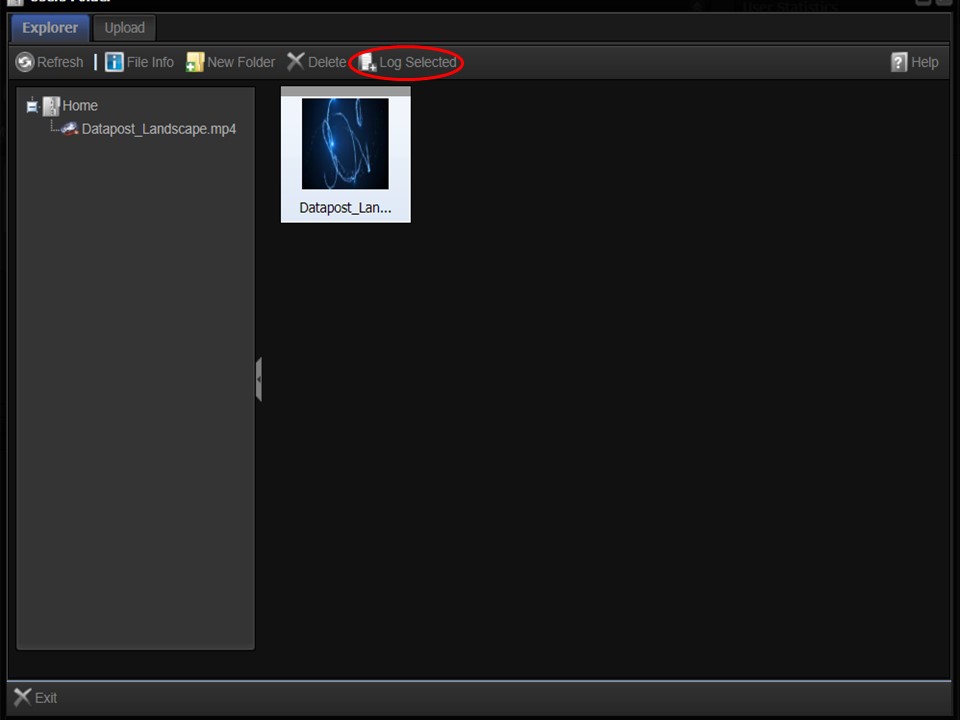
7. Highlight the media that you have uploaded by clicking on it once. Click on the Log Selected button. A new window with object types will appear.

8. Click on the object type that you want to log your media as. The relevant metadata form will open.
Which object type to use when logging media
Videos
Default Video
Default Video is used as a basic, standard video object type.
Video Generic
Content is logged as Video Generic when using a network structure and strict matching media characteristics to player attributes.
XFeature Advert
An advert is logged as an XFeature Advert when working in Xplore.
XFeature Episode
An episode is logged as an XFeature Episode when working in Xplore.
XFeature Trailer
A trailer is logged as an XFeature Trailer when working in Xplore.
Images
Default Image
Default Image is used as a basic, standard image object type.
Frame Grab
Frame grabs are simply logged as the Frame Grab object type.
People
The People object type is used when logging images of people such as directors, actors etc. in Xplore.
Picon
Portrait images are logged as picons when using them as picture icons for media items in Xplore (width 186 pixels, height 280 pixels).
XFeature Graphic
Landscape images are logged as XFeature Graphics when using them on the detail page of the series media item in Xplore (width 720 pixels, height 320 pixels).
XID Image
Images are logged as XID images when using them in XID, the interactive designer.
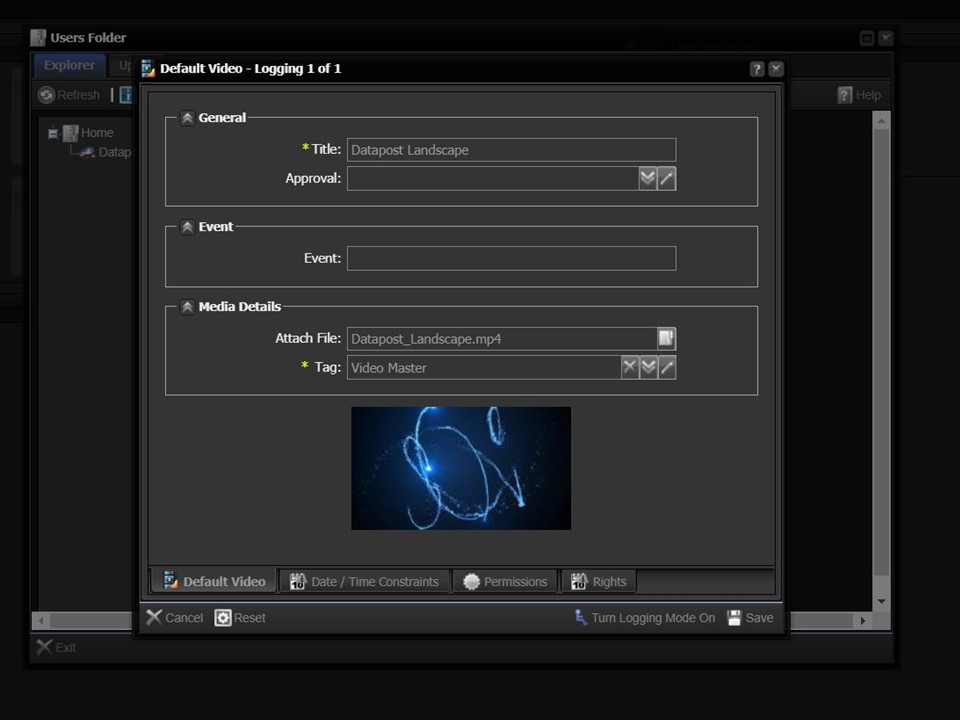
9. Complete all the relevant fields. The next step is to add Date/Time Constraints to your media.
It is important to note that a field with an asterisk to the left of it, is called a required field. This means that the field must be completed before the form will allow you to save.
Date/Time Constraints
Adding constraints to your media, allows you to schedule in advance, and ensures that content plays when it should.
Types of Date/Time Constraints
Start Date
The date the media will start playing.
End Date
The date the media will stop playing.
Start Time
The time, on the start date, the media will start playing.
End Time
The time, on the end date, the media will stop playing.
Step-by-step guide on how to add date/time constraints
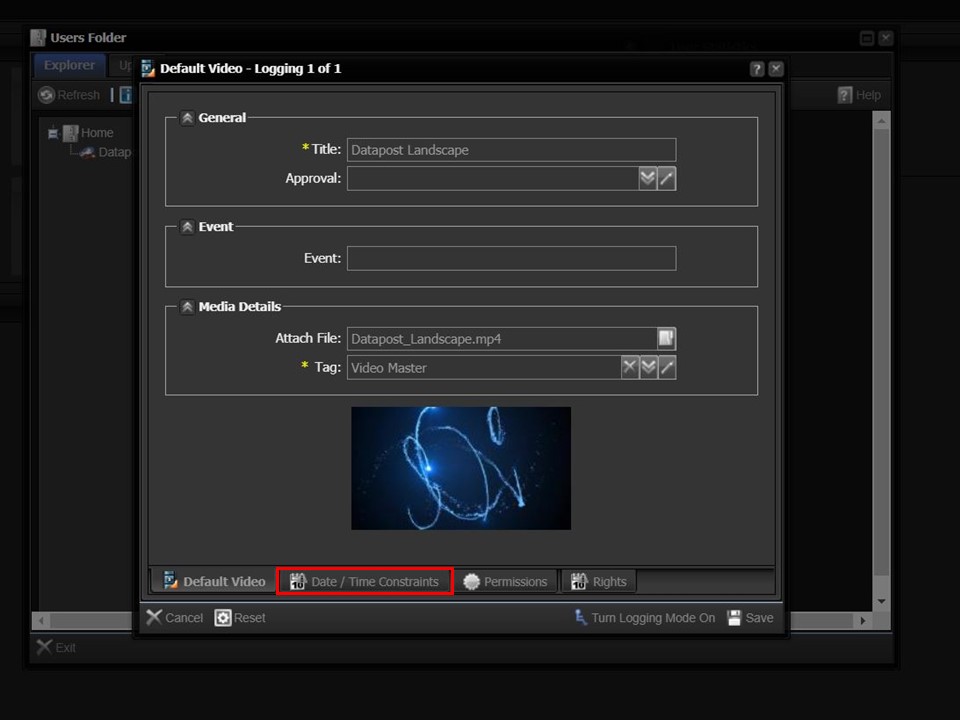
10. Click on the Date/Time Constraints tab at the bottom of the window.
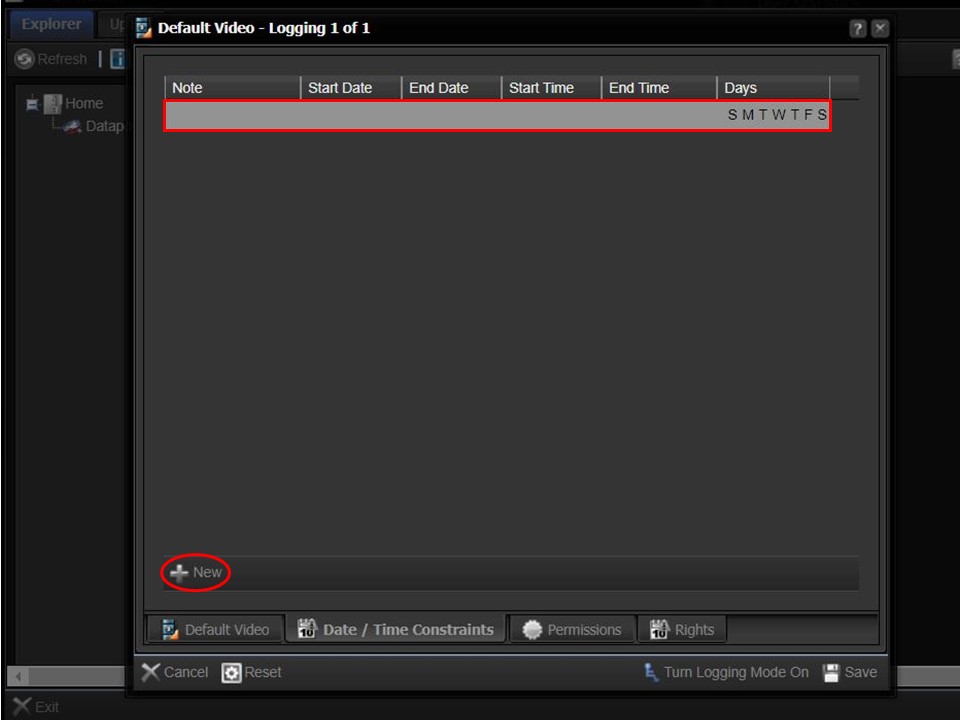
11. Click on the +New button. A grey bar will appear.
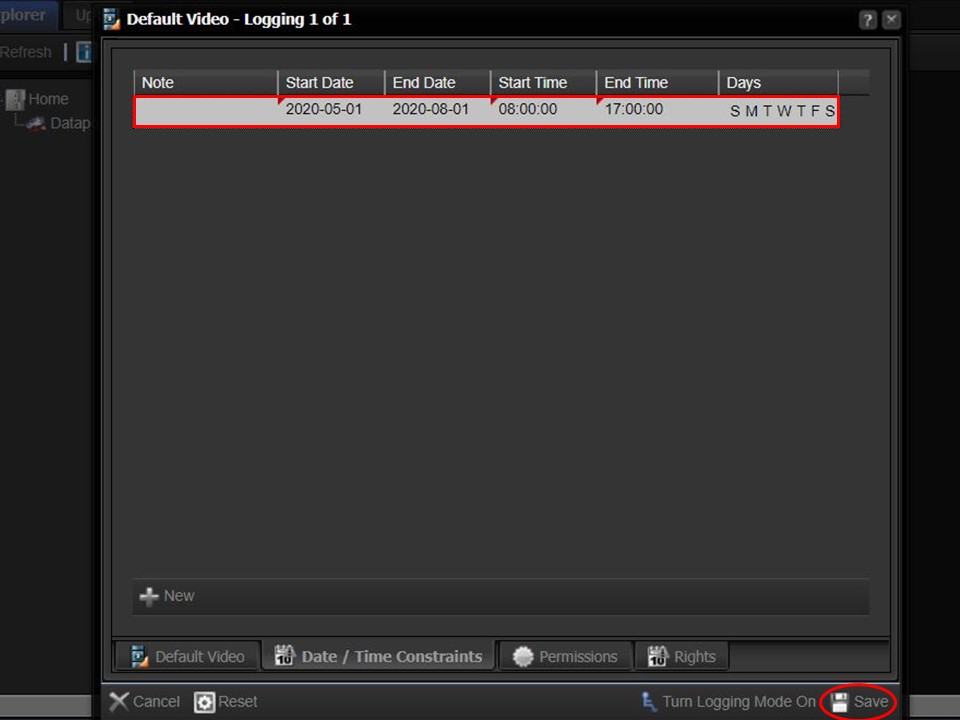
12. Complete the Start Date, End Date, Start Time and End Time. Remember to click on the Save button in the bottom right corner of the window to save.
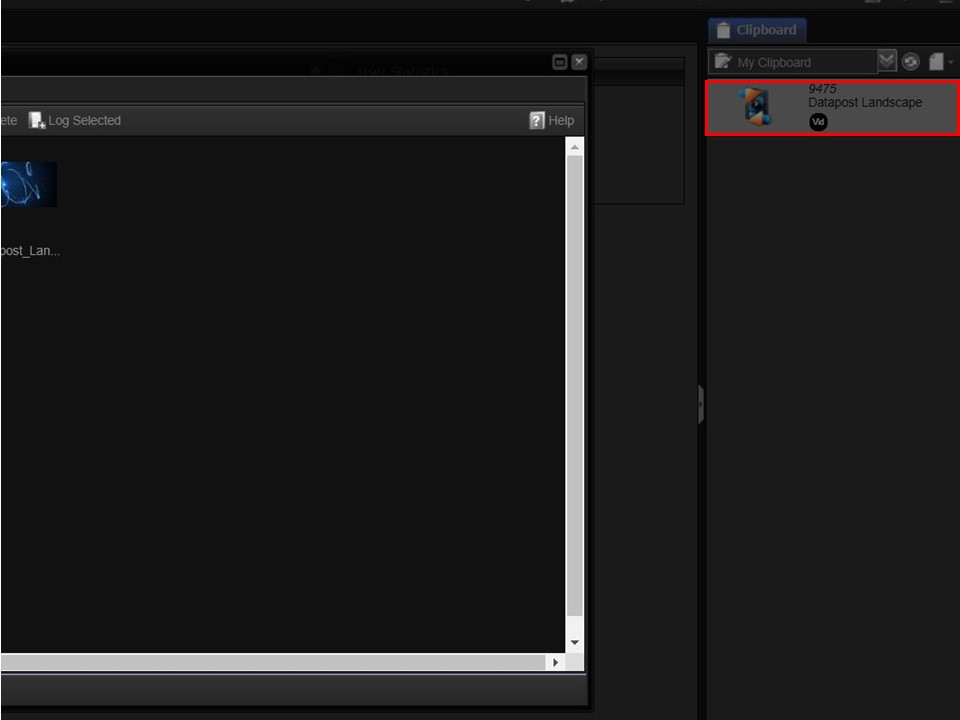
13. The media will automatically appear in your clipboard on the right of the screen for easy access.
