How does Screen Check work?
Screen Check is a scheduling tool used to plan & execute content strategies.
Where to start
Firstly you will have to decide which categories to use in classifying your content. Add the categories to the Category drop-down, on the Default Video & Default Image metadata forms, by using the pencil. You will then upload your content as default videos and/or default images. Ensure that you complete the Category field by selecting the relevant item from the drop-down.

Important Note
The Tech category is used when there is content in your list that you want to exclude from the calculations.
Step-by-step guide on how to navigate to Screen Check

1. Click on the Screen Works tab in the top left corner of the screen.
2. Click on the Bouquets icon.

3. Double-click on the relevant bouquet.

4. Click on the relevant screen once to highlight it, followed by the Screen Check button. The Screen Check dashboard will open.
What’s next?
Next you will decide on the loop duration & the durations to be allocated to each category to make up the loop duration. I.e. set the Planned Flighting Time.
If you are working with a screen that has multiple layers, i.e. different content lists, you will have to select the relevant layer from the drop-down to the left of Global Duration. If not, you can leave it as is.
Step-by-step guide on how to set the Planned Flighting Time

1. Double-click on the first category in the Content Categories section. A window will pop up.

2. Set the Planned Flighting Time for that specific category and click on Save. Do the same for the rest of the categories.

3. Click on the Refresh button to see the changes that you have made.
In this example the loop duration is 10 minutes of which 5 minutes will be advertising content, 1 minute will be brand content & 4 minutes will be product content.
The Used Time for each category refers to the duration of content that is already in the content list.
The Available Time refers to the time for each category that has not been used.

4. Schedule the content as per your planning.
See the Content Categories example below. In this example the Used Time is equal to the Planned Time. I.e. all Available Time has been used.
Screen Check dashboard explained
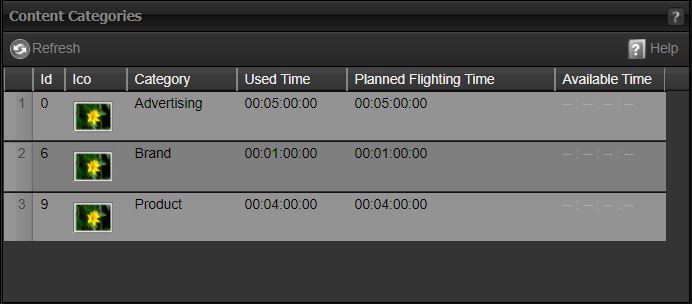
Content Categories
This is a summary of all the available categories, Used Time per category, Planned Flighting Time per category & Available Time per category.
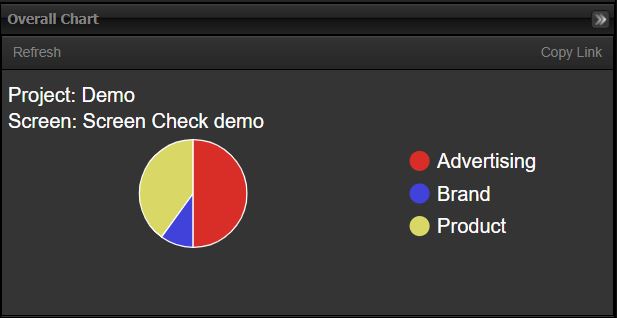
Overall Chart
This graph is a breakdown of the used time per content category. If you hover over the wedges you will see the relevant percentage & duration in seconds.
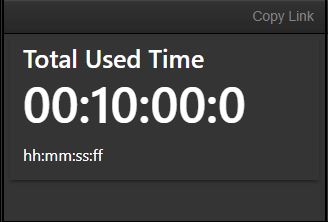
Widgets - Total Used Time
This widget shows the sum of used time for all categories.
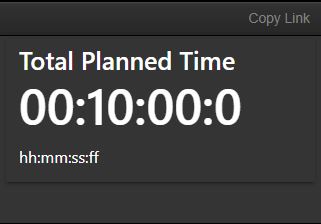
Widgets - Total Planned Time
This widget shows the sum of planned time for all categories.
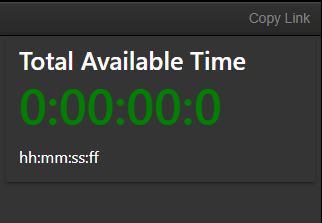
Widgets - Total Available Time
Available Time = Planned Time – Used Time
This widget shows the Total Available Time for all the categories as a whole.
If it is 0:00:00:0 (green), then the Total Used Time is equal to the Total Planned Time.
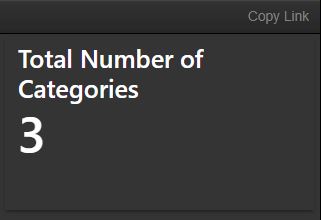
Widgets - Total Number of Categories
This widget displays the total number of categories. It will also show categories that are available, but not in use.
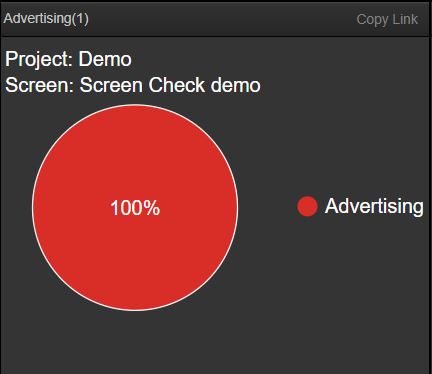
Used Planned Time - Advertising
This graph represents the percentage of Planned Time used for this category (Example: Advertising).

Used Planned Time - Brand
This graph represents the percentage of Planned Time used for this category (Example: Brand).
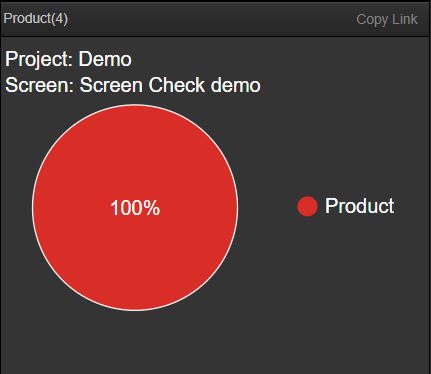
Used Planned Time - Product
This graph represents the percentage of Planned Time used for this category (Example: Product).
Important Note
Setting the Global Duration will override the Planned Flighting Time. I.e. the categories will not be taken into account, only the total loop duration, also referred to as the Global Duration. Always remember to click on Save after setting the Global Duration. It can also be activated & de-activated by ticking & unticking the Active box.
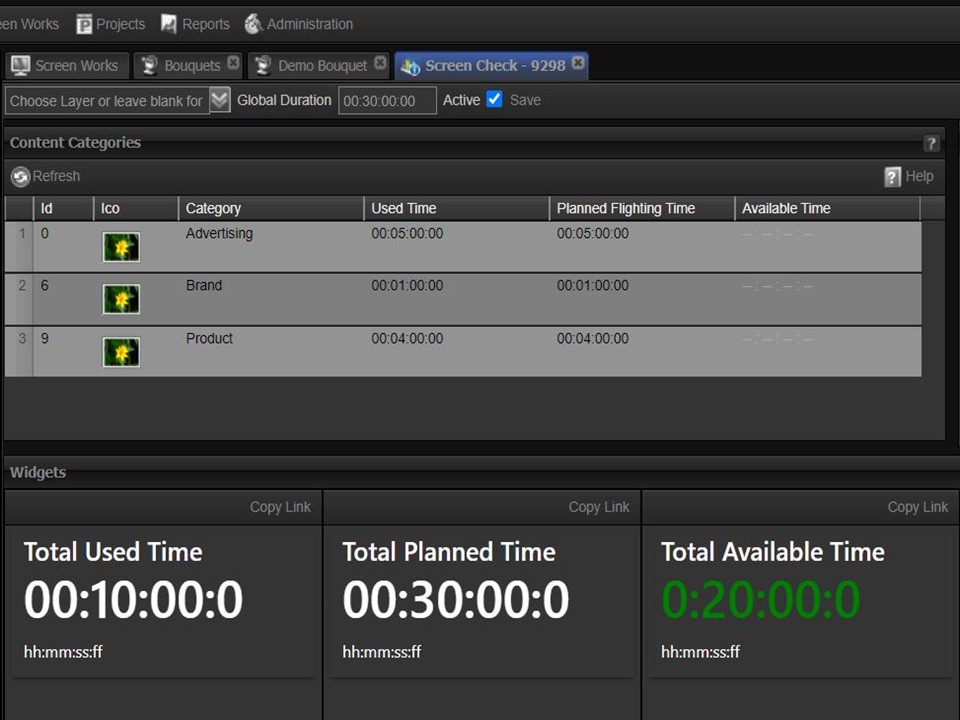
Dashboard with Global Duration set to 00:30:00:00
The Total Used Time is still 10 minutes as per the previous example. The Planned Time is now the Global Duration of 30 Minutes, which means there are 20 minutes available, regardless of the content category.