Menu Items
BackThis guide provides step-by-step instructions on how to create menu items using SST (Self-Service Terminal). It covers all the necessary details, such as item identifier, name, font color, sort code, price, item flow, suggestive menu, notes, extras, choice groups, out of stock status, and sizes. Following this guide will ensure that menu items are properly configured and displayed on the SST kiosk.
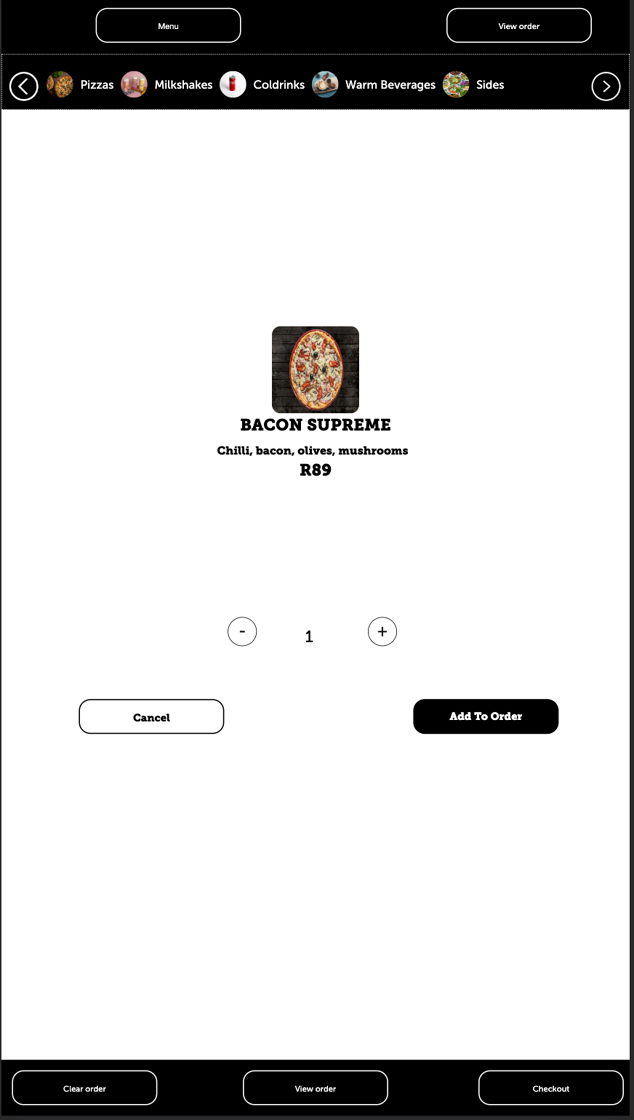
Tip: Below is an example of menu items. This page is created with the "Store Items" template.

CREATE A MENU ITEM
1. Navigate to "Items" located under "Menu configurations" in the sidebar

2. Click "+ Add item"

3. Fill out all relevant fields in the form (See below tips for more info on each option)
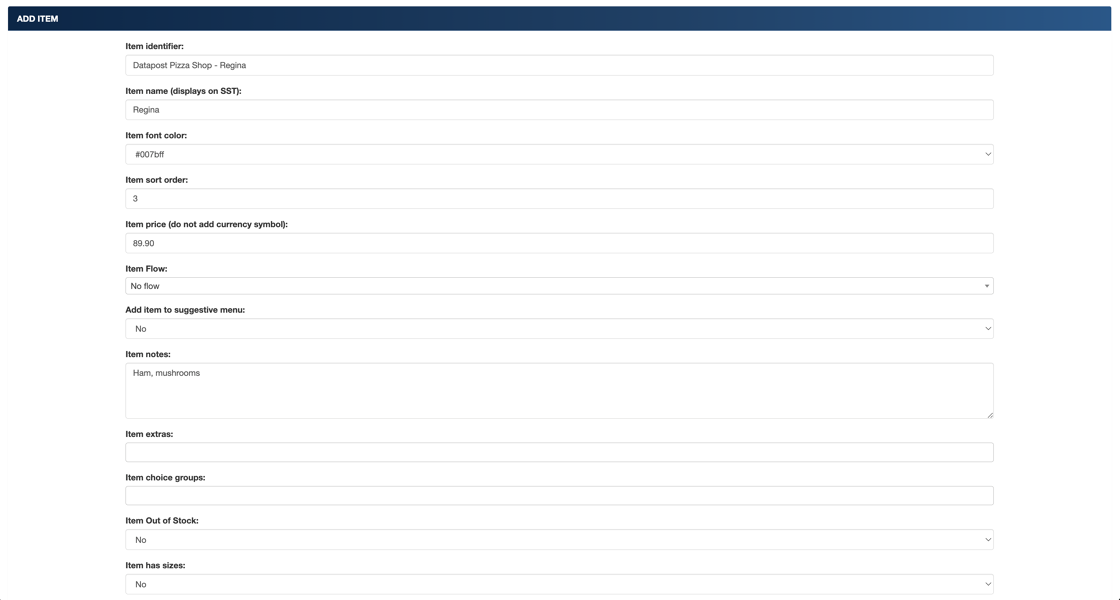
Tip: - "Item identifier": When adding items to a menu, the "Item identifier" entered here will be displayed in the dropdown to select the items to be added to the menu. Use unique names that will not be confusing to identify amongst hundreds of items shared across stores/locations that you manage.
- "Item name": This is the name that will be displayed on the SST kiosk.
- "Item sort order": This value defines the order in which the item will be displayed on the menu. The smaller the value, the closer the item will be to the beginning menu. The bigger the value, the further the item moves to the end of the menu.
- "Item price": The price of the item. Do not include the currency symbol here. Currencies can be added under the "Currency" configuration option in the sidebar.
- "Item flow": Flows created under "Order flows" configuration option will be selectable here. An item/order flow allows you to guide a customer to other items based on items they have added to their cart.
- "Add item to suggestive menu": The suggestive menu gets displayed just before checkout. Items added to this menu will get displayed their to allow a customer to add suggestions before checkout.
- "Item notes": this gets displayed on the "Store Single Item" layout design. The store single item is displayed when adding the selecting the item before adding it to the cart and when editing the cart.
- "Item extras": Extras can be created under the "Extras" configuration page. Extras allow a customer to add or remove items from an item.
- "Item choice groups": Item choice groups can be created under the "Choice Grouping" configuration page. Choice groups refer to options that belong to a menu item such as options for sides, drinks, etc. This will add the item to the choice group to be used in another item.
- "Out of Stock": selecting "yes" will remove this item from displaying on the SST without having to edit the menu and remove the item.
- "Item has sizes": sizes created under the "Sizes" configuration page can be used here.
- "Item image": select an image to be displayed for this item. Images can be uploaded under the "Media" configuration page.
4. Click here

ADD ITEM TO MENU
5. Navigate to "Menus" under the "Menu configurations" in the sidebar

6. Click " Edit" on the desired menu

7. Add the desired items to the "Menu has items" options

8. Click "Save"

Tip: Below is an example of a single item. This page is created with the "Store Single Item" template.
STORE SINGLE ITEM TEMPLATE
9. Navigate to "Store Single Item" under "Store Templates" in the sidebar

10. Click "+ Add template"

11. Enter a template name and click "Save"

12. Click "Edit Layout Design"

13. Click on the layout icon to get elements related to this template

14. Click and drag one of the layouts from under "Single Layouts" onto the blank canvas.

15. Click "Save"

ADD SINGLE ITEM TEMPLATE TO STORE CONFIGURATION
16. Navigate to "Stores" under "Menu configurations"

17. Click edit (the button with the pencil) on the desired store

18. Select the template under "Store has item single template"
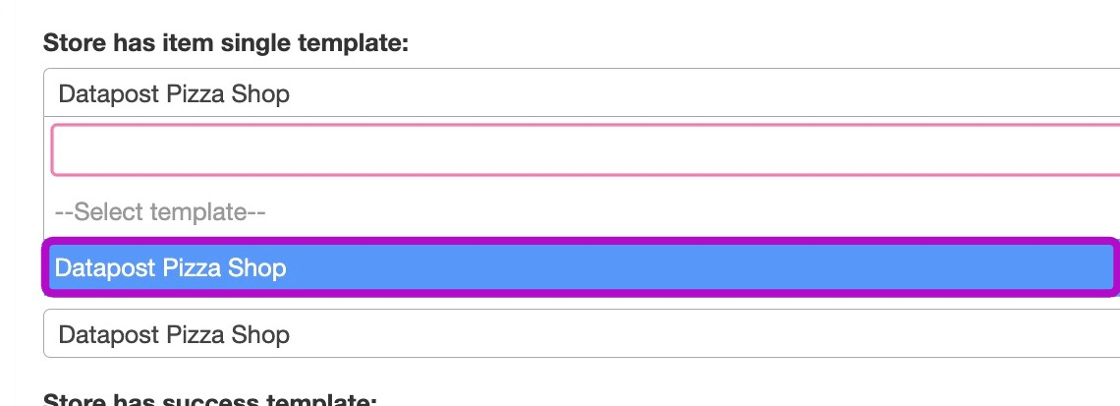
19. Click "Save"

STORE ITEMS TEMPLATE
20. Navigate to "Store Items" under "Store Templates" in the sidebar

21. Click "+ Add template"

22. Enter a template name and click "Save"

23. Click "Edit Layout Design"

24. Click on the layout icon to get elements related to this template

25. Click and drag an item layout from "Item Area" onto the canvas.

26. Once you are done customising your design, click "Save"
ADD STORE ITEM TEMPLATE TO STORE CONFIGURATION
27. Navigate to "Stores" under "Menu configurations" in the sidebar

28. Click "Edit" on the desired store

29. Select the template under "Store has item template"

30. Click "Save"
