Thermo Content
Back3 types of thermo content
Temperature
Content is triggered based on the GPS location of the player and the temperature at the location.
Cloud Coverage
Content is triggered based on cloud coverage.
Weather Conditions
Content is triggered based on a variety of weather conditions.
Thermo Content triggering based on temperature
Step-by-step guide on how to set the location (GPS coordinates) of a player

1. Click on the Screen Works tab in the top left corner of the screen.
2. Click on the GPS Dashboard icon to open the dashboard.

3. Select the relevant player by ticketing the box.

4. Zoom out, by clicking on the minus in the bottom right corner.

5. Drop the pin by clicking on the map. Start zooming in using the plus in the bottom right corner. Ensure that the pin stays in frame as you zoom in.

6. Click on the Save button once you are happy with the location.

7. The latitude and longitude will update.
Step-by-step guide on how to set up the XID project

1. Create a new XID project by clicking on the New Project button, a canvas will open.

2. Click on the Save As button.

3. Name the project and click on Save.

4. Click on the Dynamic Smart Object button in the vertical menu bar on the left. A window, with dynamic smart object options, will open.

5. Click on Thermo Content.

6. Click on Temperature.

7. Set the temperature parameters for the first event by moving the slider on the left to the desired minimum temperature and the slider on the right for the desired maximum temperature.

8. Complete the event name and click on Create Event.

9. The event will update on the canvas. The same process must be followed to add the other events.

10. All the events will update in the canvas.

11. Tick the Localize Weather Data box and save the project.
Step-by-step guide on how to set up the screen/channel

1. Navigate to the bouquet you want to add the screen/channel to. Click on the New Player Channel button. A window will open.

2. Name the screen, set the screen status as active and select the relevant aspect ratio. Click on Save in the bottom right corner of window. The screen will open in the middle panel.

3. Drag a layout from your clipboard onto the screen/channel. A window will appear. Click on Save.

4. Right-click on the screen, a menu will appear. Hover over Layer, move to the right & click on Layer Properties.

5. Rename the layer & click on the Done button in the bottom left corner of the window.
Important Note
The layer name must contain the word event, all lowercase.
Step-by-step guide on how to create and set up the content list

1. Double-click on the timeline, a window will open. Click on the New Content List button. A window will open.

2. Name the content list and click on Save in the bottom right corner of the window. The content list will open in the middle panel.

3. Drag content from your clipboard into the content list in the sequence you want it to play.
Right-click on the last item in the list, a menu will appear. Hover over List_actions, move to the right and click on Loop. By adding a loop, you are telling the playlist to return to the top, from where it will play from top to bottom again.

4. Click on the Media Works tab in the top left corner of the screen. The module will open.

5. Click on the New Content List button, a form will open.

6. Name the container & click on Save in the bottom right corner of the window. The container will open in the middle panel.
The container is created to house the content that will be triggered based on temperature.

7. Drag the content that you want to trigger based on temperature into the container from your clipboard.
Important Note
The Event field, in the metadata form, has to be completed when logging the content, being triggered based on temperature.
The event name must be identical to what has been set up in the XID project, which has been explained in the first section.

Event name: Hot
This content will trigger when the temperature is hot, as defined in the XID project.
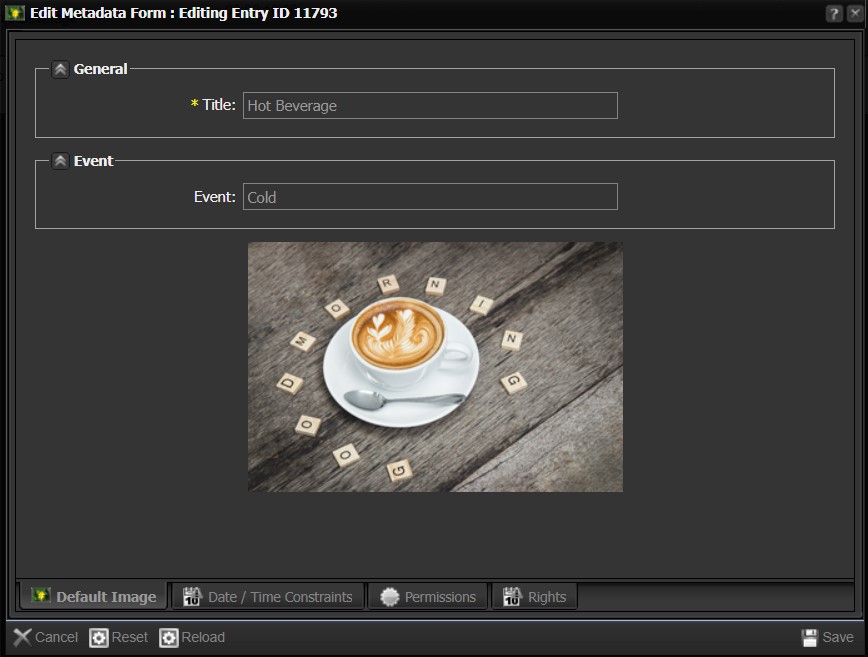
Event name: Cold
This content will trigger when the temperature is cold, as defined in the XID project.

8. Open the orginal content list that you created by clicking on the tab. Drag the container into the content list below the loop.
Right-click on the container, a menu will appear. Click on Container Mode.

9. Select the Consecutive – Strict Match on Attributes container mode & click on Save in the bottom right corner of the window.

10. Search for the XID project that you created for Thermo Content triggering by using the Quick Search function in the menu on the left.
Drag the project from your clipboard into the content list. The XID project has to be above the loop.
Important Note
Standard-Publish-VP8 has to be used as publish format, when publishing the screen.